
Growing corn on concrete? Sounds impossible, right? I thought so too, until I stumbled upon a game-changing DIY trick that completely redefined my understanding of urban gardening! Forget sprawling fields; we’re talking about bringing the taste of summer to even the most unlikely of spaces.
Corn, a staple in diets across the globe, holds a rich history, deeply intertwined with indigenous cultures of the Americas. For centuries, it has been a symbol of sustenance and community. But what if you live in a city, surrounded by concrete jungles, and yearn for that fresh, homegrown corn flavor? That’s where this DIY magic comes in!
Let’s face it, traditional gardening isn’t always accessible. Limited space, poor soil, and lack of resources can be major roadblocks. But with this innovative approach to growing corn on concrete, you can bypass these challenges and enjoy the satisfaction of harvesting your own sweet corn, no matter where you live. I’m excited to share this simple yet effective method that will transform your concrete patch into a mini cornfield. Get ready to unlock the secrets to urban farming and impress your friends with your green thumb – even on concrete!
Growing Corn on Concrete: A DIY Guide to Urban Farming
Hey there, fellow gardening enthusiasts! Ever dreamed of growing your own sweet corn but thought you were limited by a lack of arable land? Well, I’m here to tell you that you can absolutely grow corn, even on concrete! It’s all about creating the right environment and providing the necessary nutrients. This guide will walk you through the process, step-by-step, so you can enjoy fresh, homegrown corn, no matter where you live.
What You’ll Need
Before we dive in, let’s gather our supplies. This is crucial for a smooth and successful corn-growing adventure.
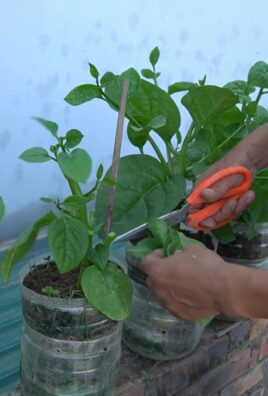
* Large Containers: Think big! Corn plants need plenty of space for their roots to grow. I recommend containers that are at least 24 inches in diameter and 24 inches deep. Half whiskey barrels, large plastic tubs, or even repurposed trash cans (cleaned thoroughly, of course!) work great. The bigger, the better, honestly.
* High-Quality Potting Mix: Don’t skimp on this! You need a well-draining potting mix that’s rich in organic matter. Avoid using garden soil directly, as it can compact in containers and hinder drainage. I like to use a mix of compost, peat moss (or coco coir as a sustainable alternative), and perlite or vermiculite.
* Corn Seeds: Choose a variety of sweet corn that’s suitable for container growing. Look for varieties that are shorter and more compact. “Golden Bantam” and “Early Sunglow” are popular choices.
* Slow-Release Fertilizer: Corn is a heavy feeder, so a slow-release fertilizer will provide a steady supply of nutrients throughout the growing season. Look for a fertilizer with a balanced NPK ratio (nitrogen, phosphorus, and potassium).
* Watering Can or Hose: Essential for keeping your corn plants hydrated.
* Trowel or Shovel: For filling your containers with potting mix and planting the seeds.
* Mulch: Straw, wood chips, or even shredded leaves can help retain moisture and suppress weeds.
* Optional:
* Support Stakes: If you live in a windy area, you might need to stake your corn plants to prevent them from toppling over.
* Bird Netting: Birds love corn seeds and young seedlings, so netting can protect your crop.
* Companion Plants: Consider planting companion plants like beans or squash around your corn to improve soil health and deter pests.
Preparing Your Containers
This is a crucial step to ensure proper drainage and root development.
1. Drill Drainage Holes: If your containers don’t already have them, drill several drainage holes in the bottom. This is essential to prevent waterlogging, which can lead to root rot.
2. Add a Layer of Gravel (Optional): Some people like to add a layer of gravel or pebbles to the bottom of the container to improve drainage. I personally don’t find it necessary if you’re using a well-draining potting mix, but it’s an option.
3. Fill with Potting Mix: Fill your containers with the high-quality potting mix, leaving a few inches of space at the top. Gently pat down the soil to remove any air pockets.
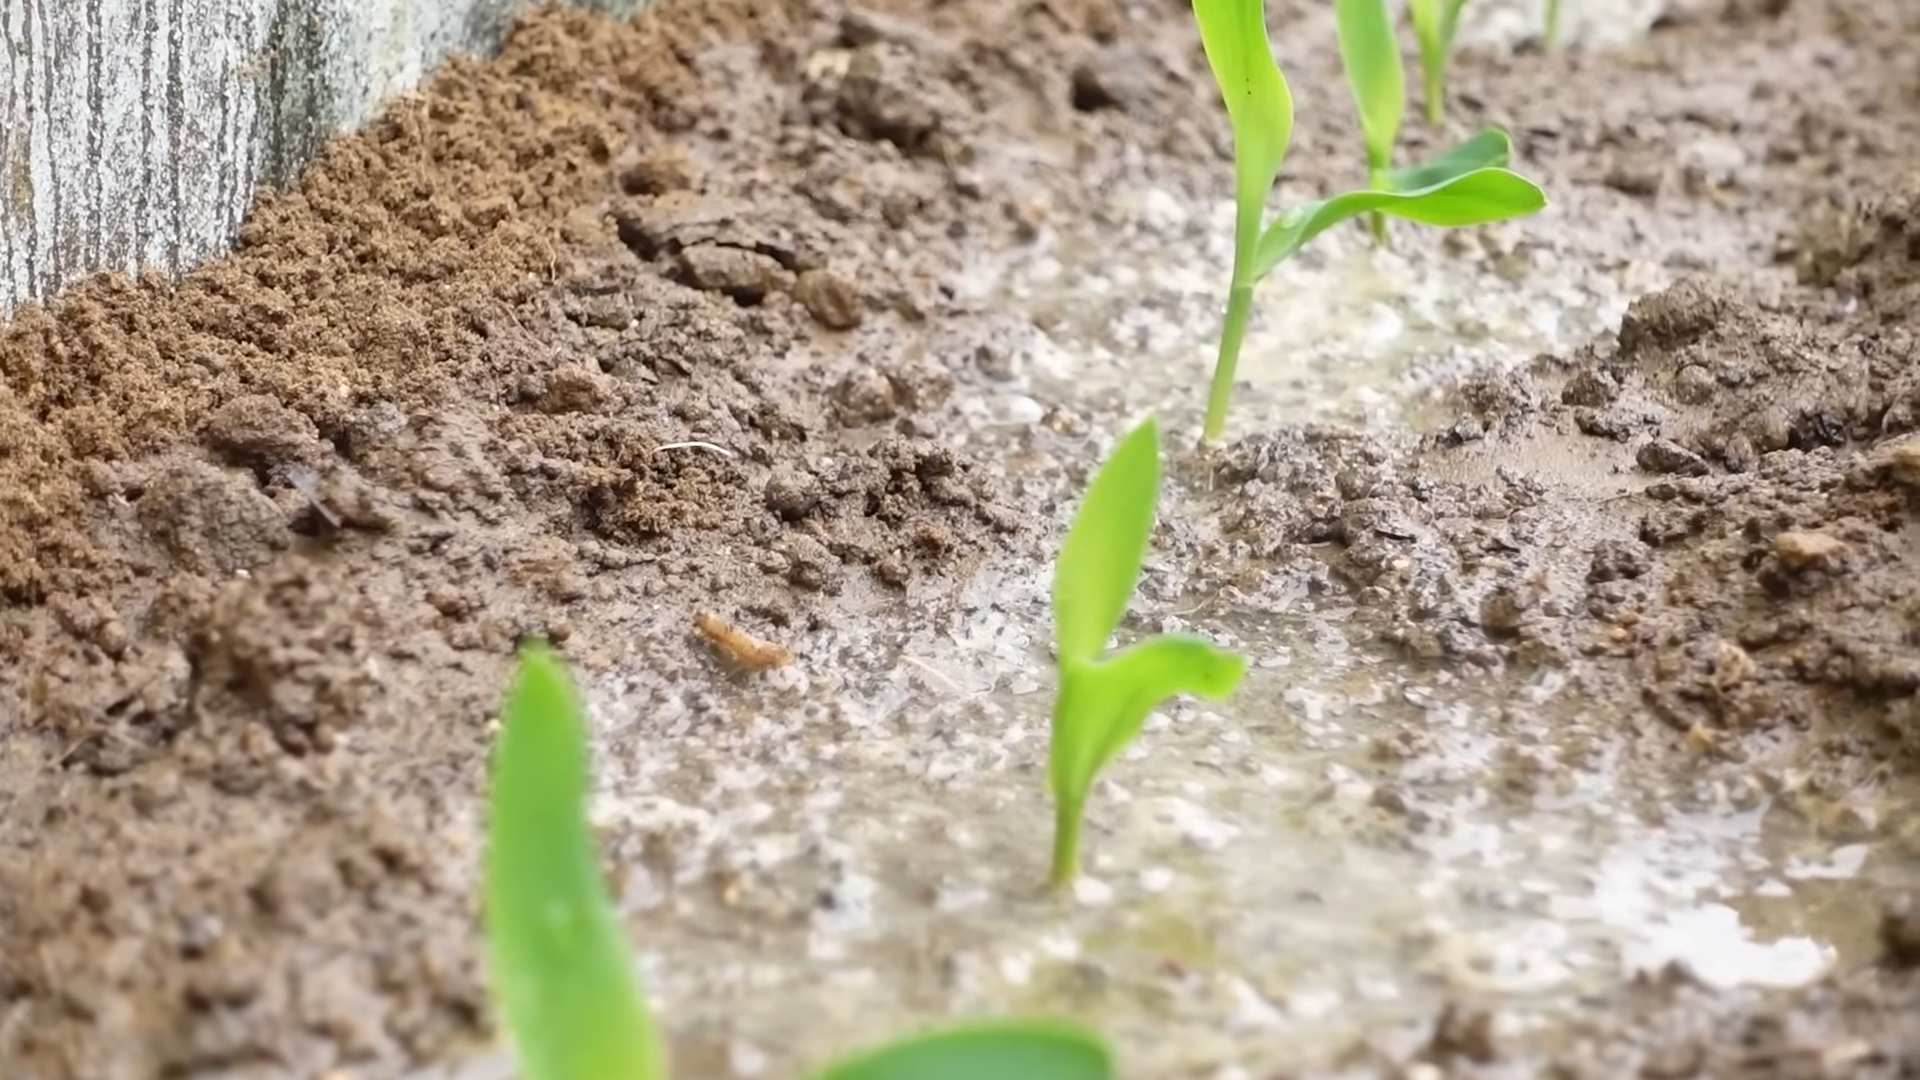
Planting Your Corn Seeds
Now for the fun part! Let’s get those seeds in the ground (or, in this case, the container).
1. Sow the Seeds: Plant the corn seeds about 1-2 inches deep and 4-6 inches apart. I usually plant 4-5 seeds per container to ensure good pollination. Remember, corn is wind-pollinated, so you need multiple plants growing close together.
2. Water Gently: After planting, water the soil gently to moisten it. Avoid overwatering, which can cause the seeds to rot.
3. Provide Sunlight: Place your containers in a location that receives at least 6-8 hours of direct sunlight per day. Corn needs plenty of sun to thrive.
4. Wait for Germination: Be patient! It can take 7-10 days for the seeds to germinate, depending on the temperature and moisture levels. Keep the soil consistently moist but not soggy.
Caring for Your Corn Plants
Once your corn seedlings emerge, it’s time to provide them with the care they need to grow strong and healthy.
1. Thin the Seedlings: Once the seedlings are a few inches tall, thin them to the strongest 2-3 plants per container. This will give them enough space to grow and prevent overcrowding.
2. Water Regularly: Corn plants need consistent watering, especially during hot weather. Water deeply whenever the top inch of soil feels dry to the touch. Avoid watering the foliage, as this can promote fungal diseases.
3. Fertilize Regularly: Corn is a heavy feeder, so you’ll need to fertilize it regularly throughout the growing season. Apply a balanced slow-release fertilizer according to the package directions. You can also supplement with liquid fertilizer every few weeks.
4. Control Pests and Diseases: Keep an eye out for common corn pests like corn earworms and aphids. You can control them with insecticidal soap or neem oil. Also, watch out for fungal diseases like rust and blight. Improve air circulation and avoid overwatering to prevent these diseases.
5. Provide Support (If Needed): If your corn plants are getting tall and top-heavy, or if you live in a windy area, you might need to provide them with support. You can use stakes or trellises to keep them from toppling over.
Pollinating Your Corn
Corn is wind-pollinated, which means that the pollen from the tassels (the male flowers at the top of the plant) needs to reach the silks (the female flowers that emerge from the developing ears of corn). In a small container garden, you might need to hand-pollinate your corn to ensure good pollination.
1. Identify the Tassels and Silks: The tassels are the male flowers that appear at the top of the corn plant. They produce pollen. The silks are the female flowers that emerge from the developing ears of corn. Each silk is connected to a kernel of corn.
2. Collect Pollen: When the tassels are shedding pollen (usually in the morning), gently shake them over a container to collect the pollen.
3. Apply Pollen to Silks: Use a small brush or your fingers to apply the pollen to the silks. Make sure to cover all of the silks.
4. Repeat Daily: Repeat this process daily for several days to ensure that all of the silks are pollinated.
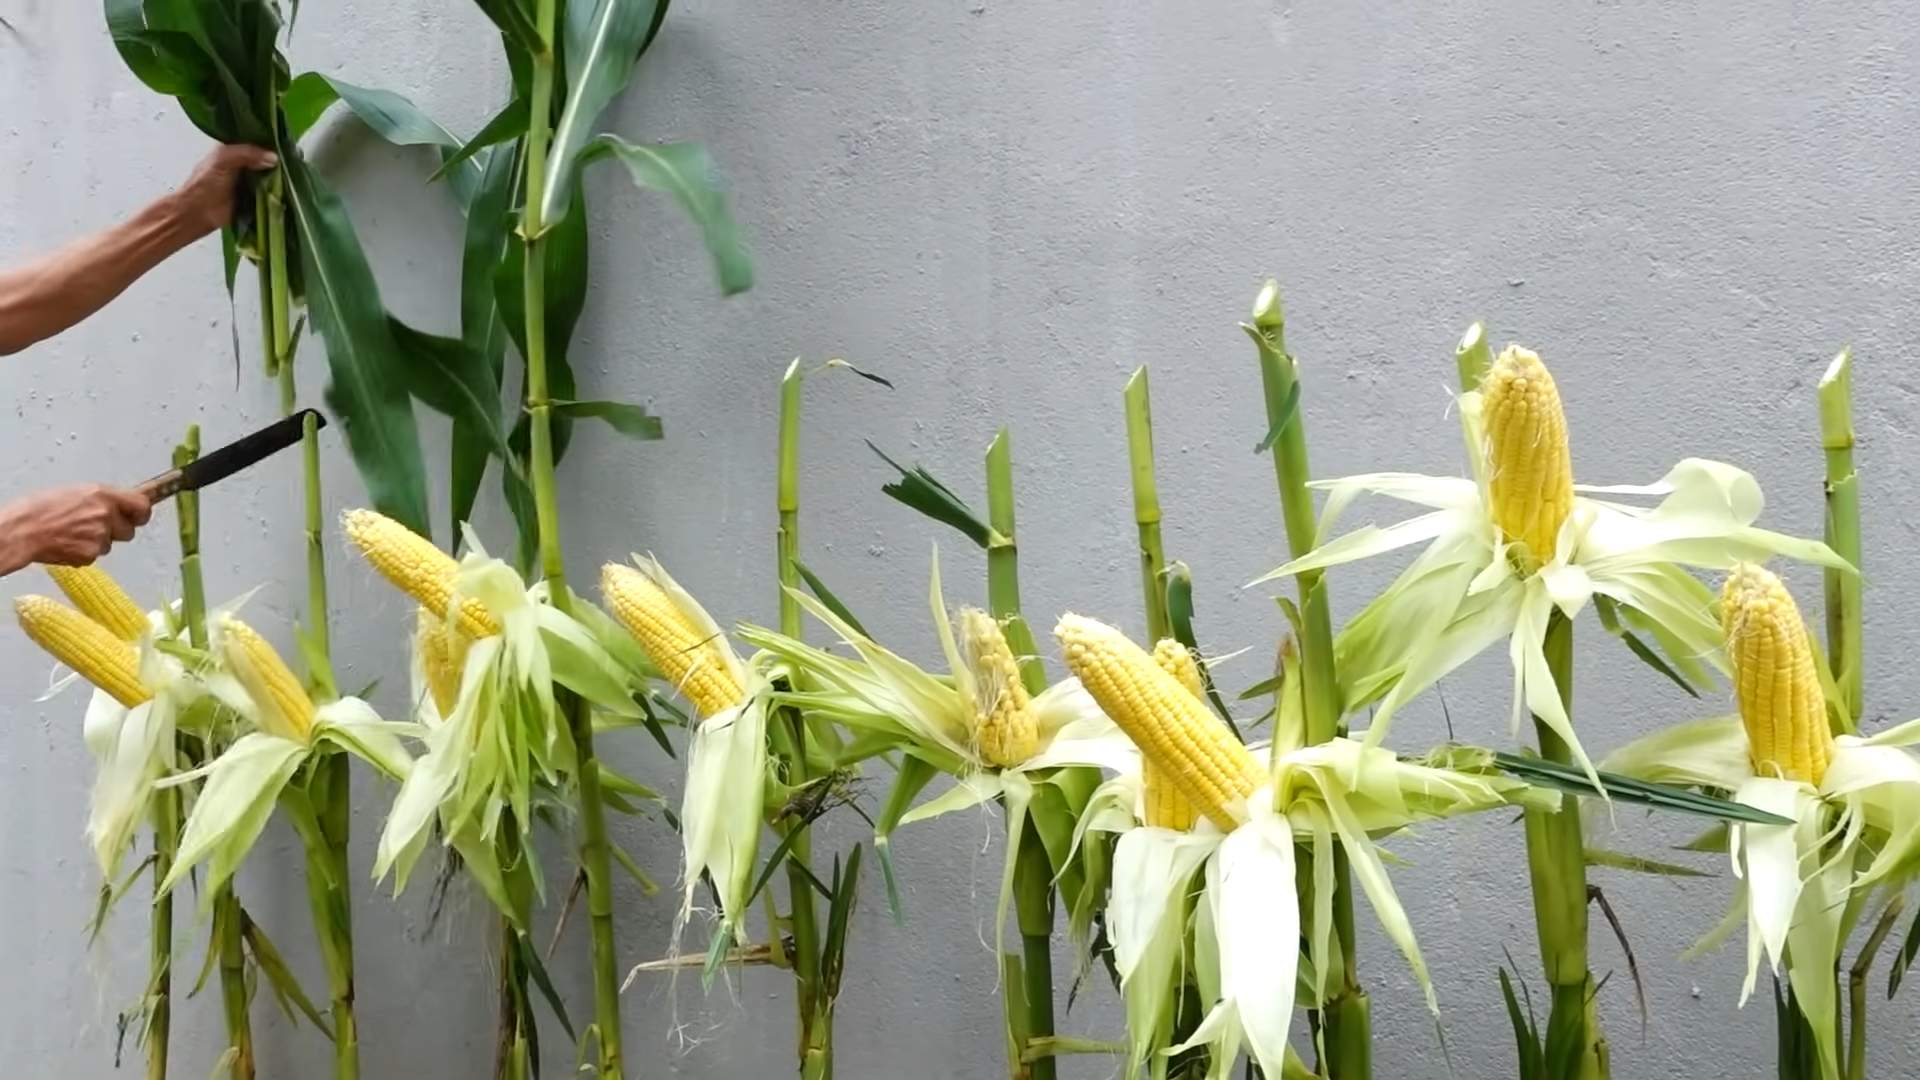
Harvesting Your Corn
The moment we’ve all been waiting for! Harvesting your homegrown corn is incredibly rewarding.
1. Check for Ripeness: Corn is usually ready to harvest about 2-3 weeks after the silks emerge. The silks will turn brown and dry, and the ears will feel plump and full.
2. Test for Doneness: To test for doneness, peel back a small portion of the husk and puncture a kernel with your fingernail. If the liquid that comes out is milky, the corn is ready to harvest. If the liquid is clear, it’s not quite ready.
3. Harvest the Ears: To harvest the ears, grasp them firmly and twist them downward. They should snap off easily.
4. Enjoy Your Harvest: Enjoy your fresh, homegrown corn! You can eat it right off the cob, grill it, or use it in your favorite recipes.
Troubleshooting
Even with the best planning, you might encounter some challenges along the way. Here are a few common problems and how to address them:
* Poor Germination: If your corn seeds aren’t germinating, make sure the soil is consistently moist but not soggy. Also, check the expiration date on your seed packet. Old seeds may have a lower germination rate.
* Yellowing Leaves: Yellowing leaves can be a sign of nutrient deficiency. Make sure you’re fertilizing your corn plants regularly with a balanced fertilizer.
* Stunted Growth: Stunted growth can be caused by a variety of factors, including poor soil, lack of sunlight, and pests or diseases. Make sure your corn plants are getting enough sunlight, water, and nutrients. Also, inspect them regularly for pests and diseases.
* Poor Pollination: If your corn ears are not filling out properly, it could be due to poor pollination. Try hand-pollinating your corn plants to improve pollination.
* Pests and Diseases: Keep an eye out for common corn pests and diseases. Control them with appropriate methods, such as insecticidal soap, neem oil, or fungicides.
Choosing the Right Corn Variety
Selecting the right corn variety is crucial for success in container gardening. Look for varieties that are specifically bred for smaller spaces and shorter growing seasons. Here are a few recommendations:
* Golden Bantam: A classic heirloom variety that’s known for its sweet flavor and early maturity. It’s a
Conclusion
So, there you have it! Growing corn on concrete might sound like an impossible feat, a horticultural oxymoron, but with this simple DIY trick, you can absolutely cultivate your own sweet, juicy corn, even without a traditional garden. This method isn’t just about defying expectations; it’s about embracing resourcefulness, maximizing space, and enjoying the unparalleled satisfaction of harvesting food you’ve grown yourself, regardless of your environment.
This DIY approach to growing corn on concrete is a game-changer for urban dwellers, apartment residents with balconies, or anyone facing limited soil availability. It opens up a world of possibilities, allowing you to experience the joy of gardening and the taste of fresh, homegrown produce, even in the most unlikely of places. The self-watering container system we’ve outlined ensures consistent moisture, a critical factor for successful corn cultivation, while the carefully selected soil mix provides the necessary nutrients for robust growth.
But don’t stop there! Feel free to experiment with different corn varieties. While sweet corn is a popular choice, consider trying popcorn corn for a fun and rewarding project, or even ornamental corn for a splash of color and visual interest. You can also adjust the size of your containers to accommodate different amounts of corn plants, keeping in mind that each plant needs adequate space to thrive. Consider companion planting by adding herbs like basil or dill around the base of your corn stalks to deter pests and attract beneficial insects.
This DIY corn growing method is more than just a gardening hack; it’s a testament to the power of innovation and the adaptability of nature. It’s a chance to connect with the earth, learn about the growing process, and enjoy the fruits (or rather, the kernels) of your labor.
We strongly encourage you to give this DIY trick a try. It’s a relatively simple and inexpensive project that yields impressive results. Imagine the satisfaction of biting into a cob of sweet corn that you nurtured from seed to harvest, all on your concrete patio!
Once you’ve tried it, we’d love to hear about your experience. Share your photos, tips, and any variations you’ve discovered in the comments below. Let’s build a community of concrete corn growers and inspire others to embrace the possibilities of urban gardening. Your success story could be the inspiration someone else needs to start their own concrete corn adventure! Remember, the key to successful growing corn on concrete lies in consistent care, proper watering, and a little bit of patience. Happy growing!
Frequently Asked Questions (FAQ)
1. What type of corn is best for growing in containers on concrete?
The best types of corn for container gardening, especially on concrete, are shorter, more compact varieties. Sweet corn varieties like ‘Golden Bantam’ or ‘Early Sunglow’ are excellent choices because they mature relatively quickly and don’t grow as tall as some other types. Popcorn corn varieties like ‘Strawberry Popcorn’ or ‘Tom Thumb Popcorn’ are also good options, offering a fun and unique harvest. Avoid very tall or late-maturing varieties, as they may become unstable in containers and require more space and a longer growing season. Consider the size of your container when selecting a variety; smaller containers are better suited for dwarf or compact corn types.
2. How much sunlight does corn need when grown on concrete?
Corn requires a significant amount of sunlight to thrive, ideally at least 6-8 hours of direct sunlight per day. When growing corn on concrete, ensure your containers are placed in the sunniest spot available. Concrete can reflect sunlight, which can be beneficial, but it can also heat up significantly. Monitor the temperature of your containers, especially during hot summer months, and consider providing some shade during the hottest part of the day to prevent the soil from overheating. If you don’t have access to enough natural sunlight, you might consider supplementing with grow lights, especially during the early stages of growth.
3. What kind of soil should I use for growing corn in containers on concrete?
The ideal soil for growing corn in containers on concrete is a well-draining, nutrient-rich potting mix. Avoid using garden soil, as it can become compacted in containers and doesn’t provide adequate drainage. A good mix would consist of equal parts of high-quality potting soil, compost, and perlite or vermiculite. The compost provides essential nutrients, while the perlite or vermiculite improves drainage and aeration. You can also add a slow-release fertilizer to the mix to provide a steady supply of nutrients throughout the growing season. Ensure the potting mix is slightly acidic to neutral (pH 6.0-7.0) for optimal corn growth.
4. How often should I water corn grown in containers on concrete?
Watering frequency is crucial for successful corn cultivation in containers, especially on concrete, which can heat up and dry out the soil quickly. Water deeply and regularly, ensuring the soil is consistently moist but not waterlogged. Check the soil moisture level daily by sticking your finger about an inch into the soil. If it feels dry, it’s time to water. During hot, sunny weather, you may need to water daily, or even twice a day. Consider using a self-watering container or adding a layer of mulch to the surface of the soil to help retain moisture. Avoid overhead watering, as it can increase the risk of fungal diseases.
5. How do I pollinate corn grown in containers on concrete?
Corn is wind-pollinated, meaning the pollen from the tassels (male flowers at the top of the plant) needs to reach the silks (female flowers emerging from the developing ears). When growing corn in containers, especially if you only have a few plants, you may need to assist with pollination. You can do this by gently shaking the tassels to release pollen or by collecting pollen from the tassels with a small brush and applying it to the silks. Repeat this process every day for about a week, or until the silks start to turn brown. Planting corn in blocks rather than rows can also improve pollination rates.
6. What are some common pests and diseases that affect corn grown in containers on concrete, and how can I prevent them?
Common pests that can affect corn include aphids, corn earworms, and spider mites. Diseases include fungal infections like rust and smut. To prevent these problems, start with healthy seeds or seedlings and use a well-draining potting mix. Regularly inspect your plants for signs of pests or diseases. If you find pests, you can try spraying them with insecticidal soap or neem oil. For fungal diseases, ensure good air circulation around the plants and avoid overhead watering. You can also use a fungicide if necessary. Companion planting with herbs like basil or dill can help deter pests naturally.
7. How do I know when my corn is ready to harvest when growing it on concrete?
The time to harvest corn depends on the variety, but generally, sweet corn is ready to harvest about 20-25 days after the silks appear. The silks will turn brown and dry, and the ear will feel plump and full. You can also peel back a small portion of the husk and pierce a kernel with your fingernail. If the liquid that comes out is milky, the corn is ready to harvest. If it’s clear, it needs more time. If it’s doughy, it’s overripe. Harvest in the morning for the best flavor.
8. Can I grow corn on concrete year-round?
Whether you can grow corn on concrete year-round depends on your climate. Corn is a warm-season crop and requires a long growing season with warm temperatures. In areas with mild winters, you may be able to grow corn year-round, but in colder climates, you’ll need to start seeds indoors and transplant them outdoors after the last frost. You can also use season extension techniques like row covers or greenhouses to extend the growing season. Consider the specific climate requirements of the corn variety you choose.
9. How many corn plants can I grow in one container on concrete?
The number of corn plants you can grow in one container depends on the size of the container and the variety of corn. Generally, you should allow at least 12 inches of space between plants. A large container (at least 20 gallons) can accommodate 3-4 corn plants. Smaller containers (10-15 gallons) are better suited for 1-2 plants. Overcrowding can lead to reduced yields and increased susceptibility to pests and diseases. Ensure each plant has adequate space to access sunlight, water, and nutrients.
10. What kind of fertilizer should I use for growing corn on concrete?
Corn is a heavy feeder and requires a balanced fertilizer to thrive. Use a fertilizer with a higher nitrogen content during the early stages of growth to promote leafy growth. Once the plants start to tassel and form ears, switch to a fertilizer with a higher phosphorus and potassium content to support ear development. You can use a slow-release granular fertilizer or a liquid fertilizer applied every 2-3 weeks. Follow the instructions on the fertilizer label carefully to avoid over-fertilizing, which can damage the plants. Organic options like compost tea or fish emulsion are also excellent choices.
Leave a Comment