
Growing ginger in container might seem like a challenge, but trust me, it’s easier than you think! Imagine harvesting your own fresh, spicy ginger right from your patio – perfect for adding a zing to your stir-fries, teas, or even a soothing homemade ginger ale. For centuries, ginger has been treasured not only for its culinary prowess but also for its medicinal properties, deeply rooted in Asian cultures where it’s been used to treat everything from nausea to inflammation.
But why should you bother with growing ginger yourself? Well, store-bought ginger can sometimes lack that vibrant, fresh flavor. Plus, let’s be honest, who doesn’t love the satisfaction of growing their own food? This DIY guide will walk you through every step, from selecting the perfect ginger rhizome to ensuring a bountiful harvest. We’ll cover everything you need to know about growing ginger in container, even if you have limited space or a less-than-green thumb. Get ready to unlock the secrets to a thriving ginger plant and enjoy the freshest, most flavorful ginger you’ve ever tasted!
Ingwer im Topf selbst anbauen: So geht’s!
Hallo ihr Lieben! Habt ihr euch jemals gefragt, wie man diesen würzigen, gesunden Ingwer, den wir so gerne in unseren Tees und Currys verwenden, selbst anbauen kann? Ich habe es ausprobiert und es ist einfacher als ihr denkt! Hier zeige ich euch, wie ihr Ingwer ganz einfach in einem Topf zu Hause ziehen könnt. Es ist ein tolles Projekt, das nicht nur Spaß macht, sondern euch auch mit frischem Ingwer versorgt.
Was ihr für den Ingweranbau im Topf benötigt
Bevor wir loslegen, hier eine Liste der Dinge, die ihr braucht:
* Ein Ingwer-Rhizom: Achtet darauf, dass es fest, prall und am besten mit kleinen “Augen” (Wachstumsknoten) versehen ist. Bio-Ingwer ist oft eine bessere Wahl, da er weniger wahrscheinlich mit Wachstumsinhibitoren behandelt wurde.
* Ein ausreichend großer Topf: Ingwer braucht Platz, um sich auszubreiten. Ein Topf mit mindestens 30 cm Durchmesser und Tiefe ist ideal.
* Hochwertige Blumenerde: Eine gut durchlässige, nährstoffreiche Erde ist wichtig. Ich verwende gerne eine Mischung aus Blumenerde, Kompost und etwas Perlit oder Vermiculit für eine bessere Drainage.
* Wasser: Regelmäßiges Gießen ist entscheidend, aber vermeidet Staunässe.
* Ein warmer, heller Standort: Ingwer liebt Wärme und indirektes Sonnenlicht. Ein Platz am Fensterbrett oder im Gewächshaus ist perfekt.
* Optional: Organischer Dünger, Sprühflasche.
Die Vorbereitung des Ingwer-Rhizoms
Dieser Schritt ist wichtig, um sicherzustellen, dass euer Ingwer gut anwächst.
1. Ingwer auswählen: Sucht im Supermarkt nach einem Ingwer-Rhizom, das gesund aussieht. Es sollte prall sein und keine schrumpeligen Stellen haben. Achtet auf die “Augen” – kleine Knospen, aus denen die Triebe wachsen werden.
2. Einweichen (optional): Wenn euer Ingwer etwas trocken aussieht, könnt ihr ihn vor dem Pflanzen über Nacht in lauwarmes Wasser legen. Das hilft, ihn zu rehydrieren und das Wachstum anzuregen.
3. Schneiden (optional): Wenn euer Ingwer-Rhizom sehr groß ist, könnt ihr es in mehrere Stücke schneiden. Achtet darauf, dass jedes Stück mindestens ein oder zwei “Augen” hat. Lasst die Schnittflächen vor dem Pflanzen ein paar Tage trocknen, um Fäulnis zu vermeiden.
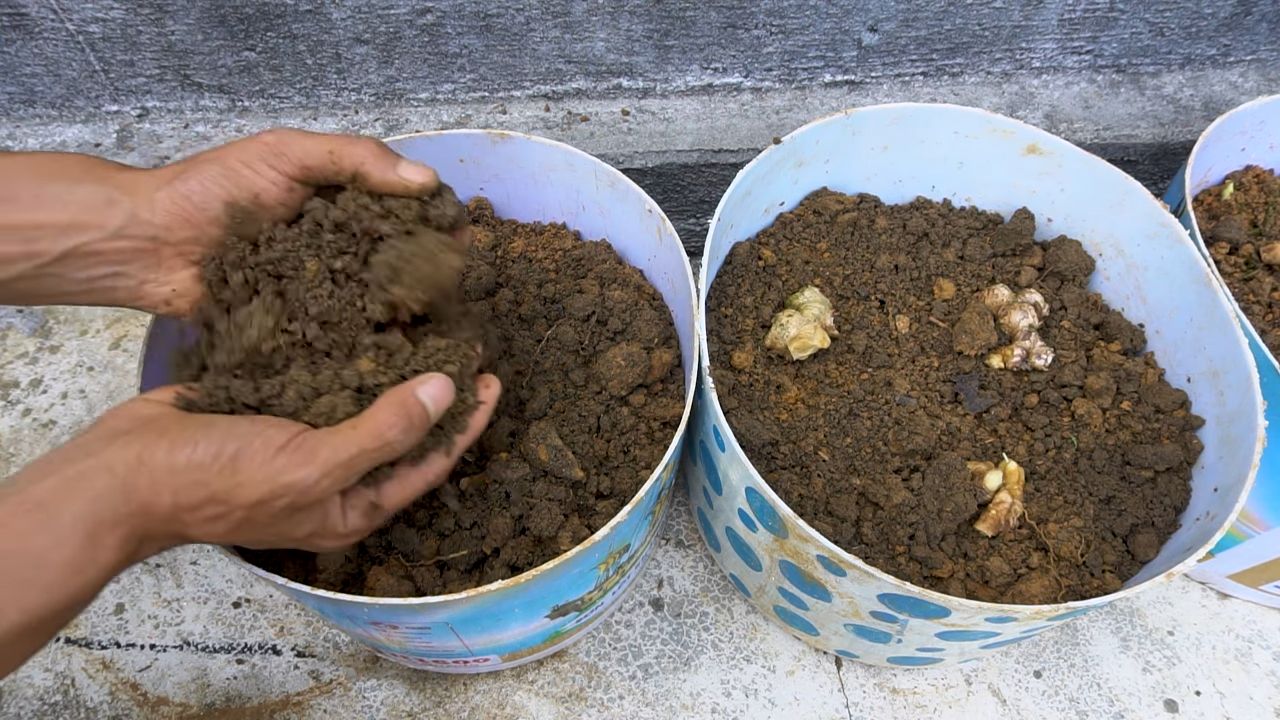
Ingwer pflanzen: Schritt-für-Schritt-Anleitung
Jetzt geht es ans Eingemachte! Hier ist, wie ihr den Ingwer richtig in den Topf pflanzt:
1. Topf vorbereiten: Füllt den Topf mit eurer Blumenerde-Mischung. Lasst etwa 5 cm Platz bis zum Rand.
2. Ingwer platzieren: Legt das Ingwer-Rhizom horizontal auf die Erde, mit den “Augen” nach oben.
3. Mit Erde bedecken: Bedeckt den Ingwer mit etwa 2-5 cm Erde. Drückt die Erde leicht an.
4. Gießen: Gießt den Topf gründlich, bis das Wasser aus den Abzugslöchern läuft.
5. Standort wählen: Stellt den Topf an einen warmen, hellen Ort, aber vermeidet direkte Sonneneinstrahlung. Ein Fensterbrett mit Ost- oder Westausrichtung ist ideal.
Die Pflege eures Ingwers
Die richtige Pflege ist entscheidend für eine erfolgreiche Ingwerernte.
1. Gießen: Haltet die Erde feucht, aber nicht nass. Gießt, wenn sich die oberste Erdschicht trocken anfühlt. Vermeidet Staunässe, da dies zu Fäulnis führen kann.
2. Düngen: Düngt den Ingwer alle paar Wochen mit einem organischen Dünger. Ich verwende gerne verdünnten Komposttee oder einen Flüssigdünger für Gemüse.
3. Temperatur: Ingwer liebt Wärme. Die ideale Temperatur liegt zwischen 20 und 30 Grad Celsius. Schützt den Ingwer vor Frost.
4. Luftfeuchtigkeit: Ingwer mag eine hohe Luftfeuchtigkeit. Ihr könnt die Luftfeuchtigkeit erhöhen, indem ihr den Ingwer regelmäßig mit Wasser besprüht oder den Topf auf eine mit Wasser gefüllte Schale mit Kieselsteinen stellt.
5. Umpflanzen (optional): Wenn der Ingwer zu groß für den Topf wird, könnt ihr ihn in einen größeren Topf umpflanzen.
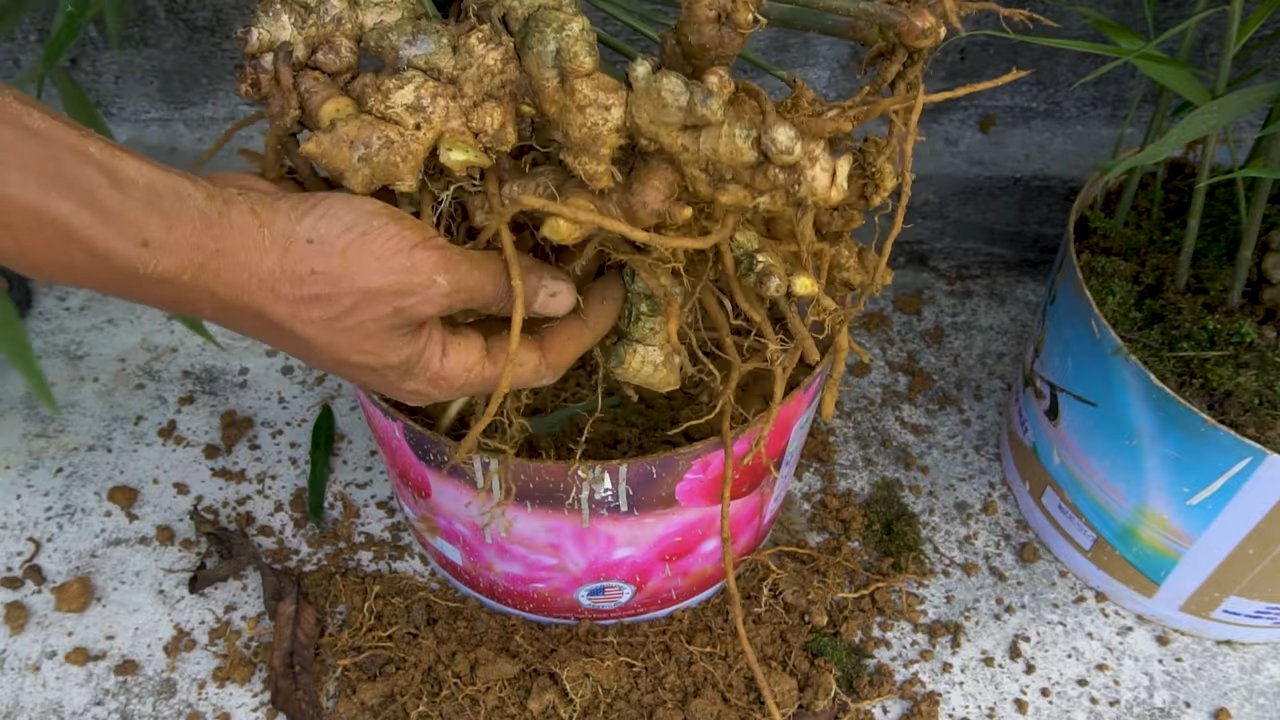
Die Ernte: Wann ist der Ingwer reif?
Die Ernte ist der aufregendste Teil!
1. Wartezeit: Ingwer braucht etwa 8-10 Monate, um zu reifen.
2. Anzeichen der Reife: Die Blätter beginnen gelb zu werden und abzusterben.
3. Ernten: Ihr könnt entweder den gesamten Ingwer ernten oder nur einen Teil davon. Um einen Teil zu ernten, grabt vorsichtig um die Pflanze herum und schneidet ein Stück des Rhizoms ab. Bedeckt die restliche Pflanze wieder mit Erde. Um den gesamten Ingwer zu ernten, kippt den Topf aus und trennt die Rhizome voneinander.
4. Lagerung: Frischer Ingwer kann im Kühlschrank in einem Plastikbeutel oder Behälter aufbewahrt werden. Ihr könnt ihn auch einfrieren oder trocknen.
Häufige Probleme und Lösungen
Auch beim Ingweranbau können Probleme auftreten. Hier sind einige häufige Probleme und wie ihr sie lösen könnt:
* Gelbe Blätter: Können durch Überwässerung, Unterdüngung oder zu wenig Licht verursacht werden. Passt eure Gießgewohnheiten an, düngt regelmäßig und stellt den Ingwer an einen helleren Ort.
* Fäulnis: Wird durch Staunässe verursacht. Achtet auf eine gute Drainage und gießt nicht zu viel.
* Schädlinge: Ingwer ist relativ resistent gegen Schädlinge, aber gelegentlich können Blattläuse oder Spinnmilben auftreten. Bekämpft sie mit einem natürlichen Insektizid oder einer Seifenlösung.
Zusätzliche Tipps für den Ingweranbau
Hier sind noch ein paar zusätzliche Tipps, die euch helfen können, erfolgreich Ingwer anzubauen:
* Verwendet Bio-Ingwer: Bio-Ingwer ist weniger wahrscheinlich mit Wachstumsinhibitoren behandelt worden.
* Achtet auf die Drainage: Eine gute Drainage ist entscheidend, um Fäulnis zu vermeiden.
* Seid geduldig: Ingwer braucht Zeit, um zu wachsen. Seid geduldig und gebt ihm die richtige Pflege.
* Experimentiert: Probiert verschiedene Sorten von Ingwer aus, um herauszufinden, welche euch am besten schmeckt.
Warum Ingwer selbst anbauen?
Es gibt viele Gründe, warum es sich lohnt, Ingwer selbst anzubauen:
* Frischer Ingwer: Ihr habt immer frischen Ingwer zur Hand, wenn ihr ihn braucht.
* Gesundheitliche Vorteile: Ingwer ist reich an Antioxidantien und hat entzündungshemmende Eigenschaften.
* Nachhaltigkeit: Ihr reduziert euren ökologischen Fußabdruck, indem ihr Ingwer selbst anbaut.
* Spaß: Es macht Spaß, Ingwer anzubauen und zu sehen, wie er wächst.
Ich hoffe, diese Anleitung hat euch geholfen, den Ingweranbau im Topf zu verstehen. Mit ein wenig Geduld und Sorgfalt könnt ihr bald euren eigenen frischen Ingwer ernten. Viel Spaß beim Gärtnern!
Conclusion
So, there you have it! Growing ginger in containers isn’t just a fun gardening project; it’s a gateway to fresh, flavorful ginger right at your fingertips. Forget those sad, shriveled ginger roots languishing in the produce aisle. With a little patience and the right setup, you can cultivate your own supply of this culinary powerhouse, bursting with vibrant flavor and potent health benefits.
Why is this DIY trick a must-try? Because it empowers you to control the quality and freshness of your ginger. You know exactly where it came from, how it was grown, and that it hasn’t been sitting on a shelf for weeks. Plus, the satisfaction of harvesting your own homegrown ginger is simply unparalleled. It’s a rewarding experience that connects you to the food you eat and adds a touch of green to your living space.
But the benefits don’t stop there. Growing ginger in containers is also incredibly versatile. You can experiment with different varieties of ginger, from the common culinary ginger to more exotic types like galangal or turmeric (which thrives in similar conditions). You can also tailor the growing conditions to your specific climate and space. Live in a colder region? No problem! Simply bring your container indoors during the winter months and continue enjoying fresh ginger year-round.
Ready to take your ginger game to the next level? Consider these variations:
* Ginger Tea Garden: Plant several ginger rhizomes in a larger container and harvest the leaves regularly for a refreshing and aromatic ginger tea.
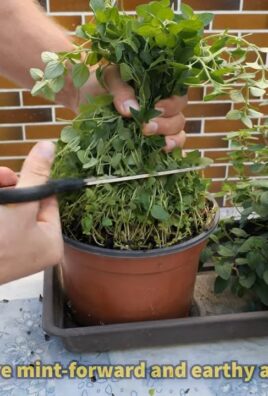
* Companion Planting: Plant ginger alongside other shade-loving herbs like mint or parsley for a mutually beneficial relationship.
* Ginger Bonsai: With careful pruning and training, you can even create a unique and eye-catching ginger bonsai.
Don’t be intimidated by the process. Growing ginger in containers is surprisingly easy, even for beginner gardeners. The key is to provide the right conditions: well-draining soil, consistent moisture, and plenty of indirect sunlight. With a little attention and care, you’ll be rewarded with a bountiful harvest of fresh, flavorful ginger.
We wholeheartedly encourage you to give this DIY trick a try. It’s a simple, rewarding, and sustainable way to enjoy the many benefits of fresh ginger. And most importantly, don’t forget to share your experience with us! We’d love to hear about your successes, challenges, and any creative variations you come up with. Post photos of your ginger plants, share your favorite ginger recipes, and let us know what you’ve learned along the way. Together, we can create a community of ginger-growing enthusiasts and spread the joy of homegrown goodness. So, grab a container, some ginger rhizomes, and get ready to embark on a flavorful adventure! You will be amazed at how easy it is to start growing ginger in container.
Frequently Asked Questions (FAQ)
What kind of container should I use for growing ginger?
The ideal container for growing ginger should be at least 12 inches deep and wide to allow ample space for the rhizomes to spread and develop. Choose a container made of plastic, terracotta, or any other durable material. Ensure the container has adequate drainage holes to prevent waterlogging, which can lead to root rot. A wider container is generally better than a deeper one, as ginger rhizomes tend to grow horizontally. Consider using a fabric pot, as these promote air pruning of the roots, leading to healthier and more vigorous growth.
What type of soil is best for growing ginger in containers?
Ginger thrives in well-draining, nutrient-rich soil. A good potting mix for ginger should consist of equal parts of:
* Compost: Provides essential nutrients and improves soil structure.
* Peat moss or coco coir: Retains moisture while allowing for good drainage.
* Perlite or vermiculite: Enhances drainage and aeration.
Avoid using heavy clay soil, as it can become waterlogged and suffocate the roots. You can also amend your potting mix with a slow-release fertilizer to provide a steady supply of nutrients throughout the growing season. The ideal pH for growing ginger is between 6.0 and 6.5, which is slightly acidic.
How much sunlight does ginger need when grown in containers?
Ginger prefers partial shade to filtered sunlight. Avoid placing your container in direct sunlight, especially during the hottest part of the day, as this can scorch the leaves. A location that receives morning sun and afternoon shade is ideal. If you’re growing ginger indoors, place it near a bright window that receives indirect sunlight. You can also supplement with artificial grow lights if needed, especially during the winter months. Monitor the leaves for signs of sunburn (browning or yellowing) and adjust the location accordingly.
How often should I water ginger grown in containers?
Ginger needs consistent moisture to thrive, but it’s crucial to avoid overwatering. Water thoroughly when the top inch of soil feels dry to the touch. Ensure the excess water drains freely from the drainage holes. During hot and dry weather, you may need to water more frequently. Reduce watering during the winter months when the plant is dormant. Mulching around the base of the plant can help retain moisture and suppress weeds. Check the soil moisture regularly and adjust your watering schedule accordingly.
How long does it take to harvest ginger grown in containers?
It typically takes 8-10 months from planting to harvest mature ginger rhizomes. However, you can start harvesting small pieces of ginger after about 4 months, as needed for cooking. To harvest, gently dig around the edges of the container and lift the rhizomes from the soil. You can harvest the entire plant at once or selectively harvest pieces as needed, leaving the rest to continue growing. The leaves will start to turn yellow and die back when the plant is ready for harvest.
Can I grow ginger indoors in a container?
Yes, ginger can be successfully grown indoors in a container, provided you provide the right conditions. Ensure the plant receives adequate indirect sunlight or supplemental grow lights. Maintain a consistent temperature between 65-75°F (18-24°C). Water regularly, allowing the soil to dry slightly between waterings. Increase humidity by misting the plant regularly or placing the container on a pebble tray filled with water. Choose a well-draining potting mix and a container with drainage holes. Monitor for pests and diseases and take appropriate action if needed.
What are some common problems when growing ginger in containers and how can I prevent them?
Some common problems include:
* Root rot: Caused by overwatering and poor drainage. Prevent by using well-draining soil and avoiding overwatering.
* Pests: Aphids, spider mites, and scale can infest ginger plants. Control with insecticidal soap or neem oil.
* Leaf spot: A fungal disease that causes spots on the leaves. Prevent by providing good air circulation and avoiding overhead watering.
* Lack of growth: Can be caused by insufficient sunlight, nutrients, or water. Ensure the plant receives adequate sunlight, fertilize regularly, and water consistently.
Regularly inspect your plants for signs of pests or diseases and take prompt action to prevent them from spreading.
How do I store harvested ginger?
Freshly harvested ginger can be stored in several ways:
* Refrigerator: Wrap the ginger in a paper towel and place it in a plastic bag in the refrigerator. It will last for several weeks.
* Freezer: Peel and chop the ginger into small pieces or grate it. Freeze it in a single layer on a baking sheet, then transfer it to a freezer bag. It will last for several months.
* Pickling: Pickle the ginger in vinegar or brine for a longer shelf life.
* Drying: Slice the ginger thinly and dry it in a dehydrator or oven. Store the dried ginger in an airtight container.
Choose the storage method that best suits your needs and preferences.
Leave a Comment