
Growing carrots backyard can feel like a daunting task, right? I get it! You envision those perfectly orange, crunchy carrots from the grocery store, and wonder if you can *really* achieve that in your own little patch of earth. Well, let me tell you, you absolutely can! This isn’t just about planting seeds and hoping for the best; it’s about unlocking the secrets to a thriving carrot harvest right outside your back door.
For centuries, carrots have been a staple in gardens worldwide, evolving from their humble, often purple or white, wild ancestors. The vibrant orange variety we know and love today is a relatively modern development, but the joy of pulling a fresh carrot from the soil is a timeless experience. But, let’s be honest, sometimes those backyard carrots end up stunted, forked, or just plain disappointing. That’s where these DIY tricks come in!
Why do you need these hacks? Because growing carrots backyard successfully means understanding their specific needs. We’ll dive into soil preparation, seed spacing, watering techniques, and even pest control strategies that will transform your carrot-growing game. Imagine the satisfaction of serving up a salad made entirely from your own backyard bounty, or the pride of sharing your homegrown carrots with friends and family. Let’s ditch the gardening guesswork and get ready to harvest some seriously delicious carrots!
Growing French Beans at Home: A Beginner’s Guide
Okay, so you want to grow French beans at home? Awesome! It’s easier than you think, and there’s nothing quite like the taste of freshly picked beans from your own garden (or balcony!). I’m going to walk you through everything you need to know, from choosing the right variety to harvesting your delicious crop. Let’s get started!
Choosing Your French Bean Variety
First things first, you need to decide what kind of French bean you want to grow. There are two main types: bush beans and climbing beans (also known as pole beans).
* Bush Beans: These are compact and don’t need any support. They’re perfect if you have limited space. They produce a lot of beans in a relatively short period, usually all at once.
* Climbing Beans: These need a trellis or other support to climb on. They take up more vertical space but produce beans over a longer period. They’re also super fun to watch grow!
Within these two types, there are tons of different varieties. Some popular choices include:
* ‘Provider’ (Bush): A reliable and early-maturing variety.
* ‘Blue Lake’ (Bush): Known for its excellent flavor and stringless pods.
* ‘Kentucky Wonder’ (Climbing): A classic climbing bean with long, flavorful pods.
* ‘Scarlet Runner’ (Climbing): Beautiful red flowers and delicious beans – a real showstopper!
Consider your space, your taste preferences, and your local climate when choosing your variety. Seed packets usually have helpful information about growing conditions and harvest times.
Getting Started: Planting Your French Beans
Now for the fun part: planting! French beans are warm-weather crops, so you need to wait until the danger of frost has passed before planting them. The soil temperature should be at least 60°F (15°C).
What You’ll Need:
* French bean seeds
* Well-draining soil (you can use potting mix if you’re growing in containers)
* A sunny spot (at least 6 hours of sunlight per day)
* A garden bed or container (at least 6 inches deep for bush beans, deeper for climbing beans)
* A trellis or other support for climbing beans (if you’re growing them)
* Watering can or hose
* Optional: Compost or other organic matter to enrich the soil
Step-by-Step Planting Instructions:
1. Prepare the Soil: Whether you’re planting in a garden bed or a container, make sure the soil is loose and well-draining. You can amend the soil with compost or other organic matter to improve its fertility. I like to dig in a good amount of compost a week or two before planting.
2. Sow the Seeds: Plant the seeds directly into the soil, about 1 inch deep and 2-3 inches apart for bush beans, and 4-6 inches apart for climbing beans. If you’re planting in rows, space the rows about 18-24 inches apart for bush beans, and 24-36 inches apart for climbing beans.
3. Water Gently: After planting, water the soil gently but thoroughly. You want to keep the soil moist but not waterlogged.
4. Provide Support (for Climbing Beans): If you’re growing climbing beans, install a trellis or other support system at the time of planting. The seedlings will need something to climb on as they grow. I’ve used bamboo poles tied together, a store-bought trellis, and even just string tied to a fence – get creative!
5. Label Your Rows: It’s always a good idea to label your rows or containers so you know what you’ve planted. Trust me, you’ll thank yourself later!
Caring for Your French Bean Plants
Once your French bean plants are up and growing, they’ll need regular care to thrive.
Watering:
* Water your plants regularly, especially during dry spells. French beans need consistent moisture to produce well.
* Water deeply, soaking the soil around the roots. Avoid watering the foliage, as this can encourage fungal diseases.
* The best time to water is in the morning, so the foliage has time to dry before nightfall.
Fertilizing:
* French beans don’t need a lot of fertilizer, but a light feeding of a balanced fertilizer can help them grow.
* I like to use a liquid fertilizer diluted to half strength, applied every few weeks.
* Avoid over-fertilizing, as this can lead to excessive foliage growth at the expense of bean production.
Weeding:
* Keep your garden bed or container free of weeds, as they can compete with your French bean plants for nutrients and water.
* Hand-pull weeds carefully, being careful not to disturb the roots of your bean plants.
* Mulching around your plants can help suppress weed growth and retain moisture in the soil.
Pest and Disease Control:
* French beans can be susceptible to pests such as aphids, bean beetles, and slugs.
* Inspect your plants regularly for signs of pests or diseases.
* If you find pests, you can try spraying them with insecticidal soap or neem oil.
* For fungal diseases, make sure your plants have good air circulation and avoid overhead watering.
* I always try to use organic pest control methods whenever possible.
Supporting Climbing Beans:
* As your climbing beans grow, you may need to help them find their way up the trellis.
* Gently guide the vines towards the support and tie them loosely with twine if necessary.
* Make sure the trellis is strong enough to support the weight of the mature plants.
Harvesting Your French Beans
The moment you’ve been waiting for! Harvesting your French beans is the most rewarding part of the process.
When to Harvest:
* French beans are usually ready to harvest about 50-60 days after planting.
* The pods should be firm, plump, and snap easily when bent.
* Harvest them before the beans inside become too large and tough.
* Regular harvesting encourages the plants to produce more beans.
How to Harvest:
* Gently snap the pods off the plant, being careful not to damage the stems.
* Harvest in the morning, when the pods are cool and crisp.
* Check your plants every few days and harvest any beans that are ready.
Storing Your Harvest:
* Freshly harvested French beans are best eaten right away.
* You can store them in the refrigerator for a few days in a plastic bag.
* For longer storage, you can blanch and freeze them.
Troubleshooting Common Problems
Even with the best care, you might encounter some problems when growing French beans. Here are a few common issues and how to deal with them:
* Poor Germination: If your seeds don’t germinate, it could be due to cold soil, poor-quality seeds, or overwatering. Make sure the soil is warm enough and use fresh seeds. Avoid overwatering, which can cause the seeds to rot.
* Yellowing Leaves: Yellowing leaves can be a sign of nutrient deficiency, overwatering, or disease. Check the soil drainage and fertilize if necessary. If you suspect a disease, consult a gardening expert.
* Lack of Bean Production: If your plants are growing well but not producing beans, it could be due to lack of pollination, hot weather, or over-fertilizing. Make sure the plants are getting enough sunlight and water. Avoid over-fertilizing, especially with nitrogen.
* Pest Infestations: As mentioned earlier, French beans can be susceptible to pests. Inspect your plants regularly and take action promptly if you find any pests.
Enjoying Your Homegrown French Beans
Now that you’ve harvested your delicious French beans, it’s time to enjoy them! There are so many ways to cook and eat them. You can steam them, sauté them, roast them, or add them to salads, soups, and stews. I personally love them simply steamed with a little butter and salt.
Growing your own French beans is a rewarding experience that connects you to nature and provides you with fresh, healthy food. With a little bit of care and attention, you can enjoy a bountiful harvest of delicious beans from your own garden. Happy gardening!
Conclusion
So, there you have it! Growing carrots in your backyard doesn’t have to be a daunting task. With a little preparation, the right techniques, and a dash of patience, you can enjoy the unparalleled taste of homegrown carrots, bursting with sweetness and freshness that store-bought varieties simply can’t match. This DIY trick, focusing on soil preparation, proper spacing, and consistent watering, is a game-changer for anyone looking to cultivate these vibrant root vegetables.
Why is this a must-try? Because it empowers you to control the entire process, from seed to table. You know exactly what goes into your carrots – no mystery chemicals or long-distance transportation. Plus, the satisfaction of harvesting your own food is incredibly rewarding. Imagine the pride you’ll feel serving a salad featuring carrots you nurtured from tiny seeds!
But don’t stop there! Experiment with different carrot varieties. Nantes carrots are known for their cylindrical shape and sweet flavor, while Chantenay carrots are shorter and sturdier, perfect for heavier soils. Rainbow carrots add a splash of color to your garden and your plate. Consider companion planting too. Onions and garlic can deter carrot root flies, while rosemary can repel carrot rust flies. Marigolds are also great for deterring nematodes.
For a fun twist, try growing carrots in containers or raised beds if you have limited space or poor soil. This allows you to create the ideal growing environment and makes it easier to manage pests and weeds. You can even succession plant, sowing seeds every few weeks, to ensure a continuous harvest throughout the growing season.
We’re confident that this DIY trick for growing carrots in your backyard will transform your gardening experience. It’s not just about growing vegetables; it’s about connecting with nature, learning new skills, and enjoying the fruits (or rather, vegetables) of your labor.
Now it’s your turn! Grab your seeds, prepare your soil, and get ready to embark on a carrot-growing adventure. We encourage you to try this method and share your experiences with us. Let us know what worked well, what challenges you faced, and any variations you discovered. Your insights will help other gardeners succeed and contribute to a thriving community of homegrown carrot enthusiasts. Happy gardening!
Frequently Asked Questions (FAQ)
What kind of soil is best for growing carrots?
Carrots thrive in loose, well-drained soil that is free of rocks and clumps. Rocky or compacted soil can cause the roots to split or become misshapen. A sandy loam soil is ideal. Before planting, amend your soil with compost or well-rotted manure to improve drainage and fertility. Avoid using fresh manure, as it can cause forking. The ideal pH for growing carrots is between 6.0 and 6.8. If your soil is heavy clay, consider growing carrots in raised beds or containers filled with a suitable potting mix.
How much sunlight do carrots need?
Carrots need at least six hours of direct sunlight per day to grow properly. Choose a sunny location in your garden where they will receive ample sunlight. If you live in a hot climate, some afternoon shade can be beneficial to prevent the soil from drying out too quickly.
How often should I water my carrots?
Consistent watering is crucial for growing carrots. Keep the soil consistently moist, but not waterlogged. Water deeply when the top inch of soil feels dry to the touch. Avoid overhead watering, as it can promote fungal diseases. Drip irrigation or soaker hoses are excellent options for delivering water directly to the roots. During hot, dry weather, you may need to water more frequently.
When is the best time to plant carrots?
Carrots are a cool-season crop and can be planted in early spring or late summer for a fall harvest. In areas with mild winters, you can even plant carrots in the fall for a winter harvest. Check your local planting calendar for the best planting dates in your region. For a spring planting, sow seeds as soon as the soil can be worked. For a fall planting, sow seeds about 2-3 months before the first expected frost.
How do I prevent carrot root flies?
Carrot root flies are a common pest that can damage carrot roots. To prevent them, cover your carrot bed with a fine mesh netting or row cover to prevent the flies from laying their eggs near the plants. You can also plant carrots alongside onions or garlic, as their strong scent can deter the flies. Regularly inspect your plants for signs of infestation, such as wilting or yellowing leaves. If you find any infested carrots, remove them immediately to prevent the spread of the pest.
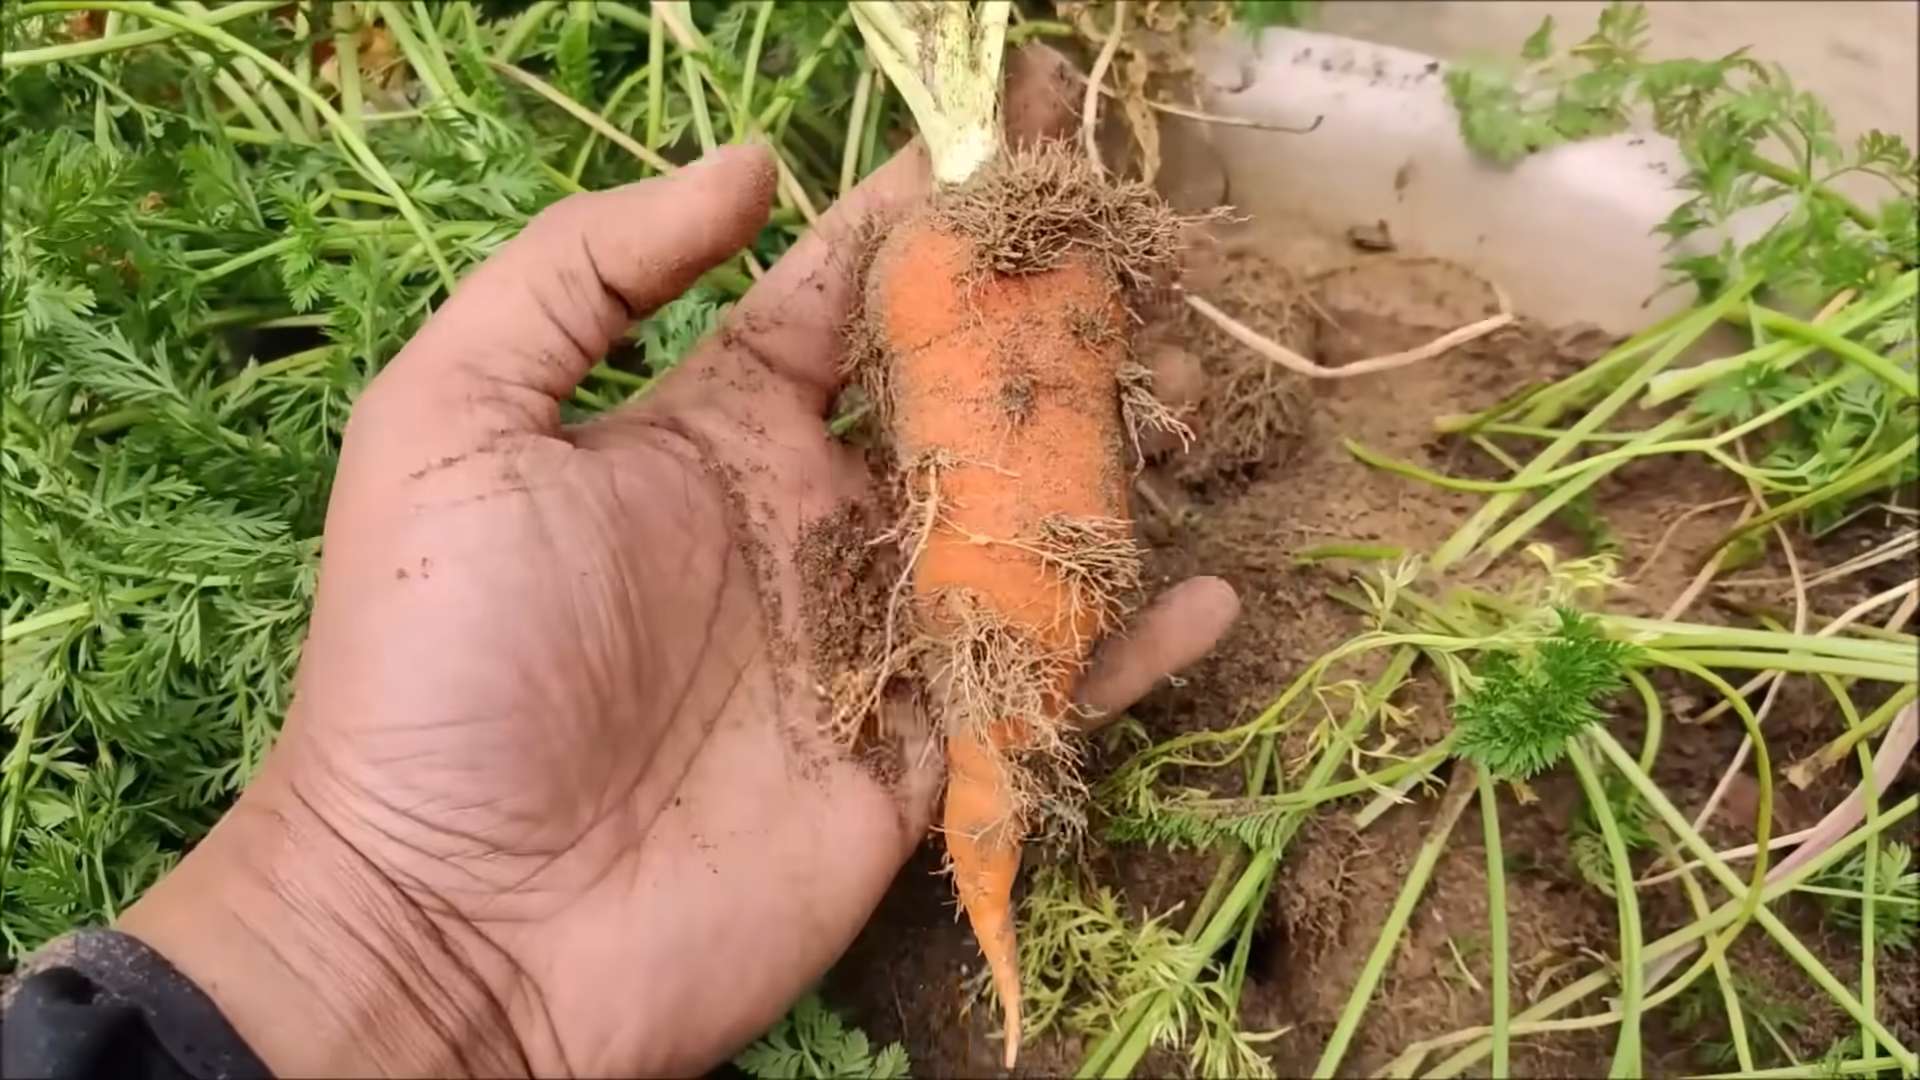
Why are my carrots forking or splitting?
Forking or splitting carrots are often caused by rocky or compacted soil. The roots encounter an obstacle and split in search of a path of least resistance. To prevent this, ensure that your soil is loose, well-drained, and free of rocks and clumps. Amend your soil with compost or well-rotted manure to improve its structure. Avoid using fresh manure, as it can also contribute to forking.
How do I thin my carrot seedlings?
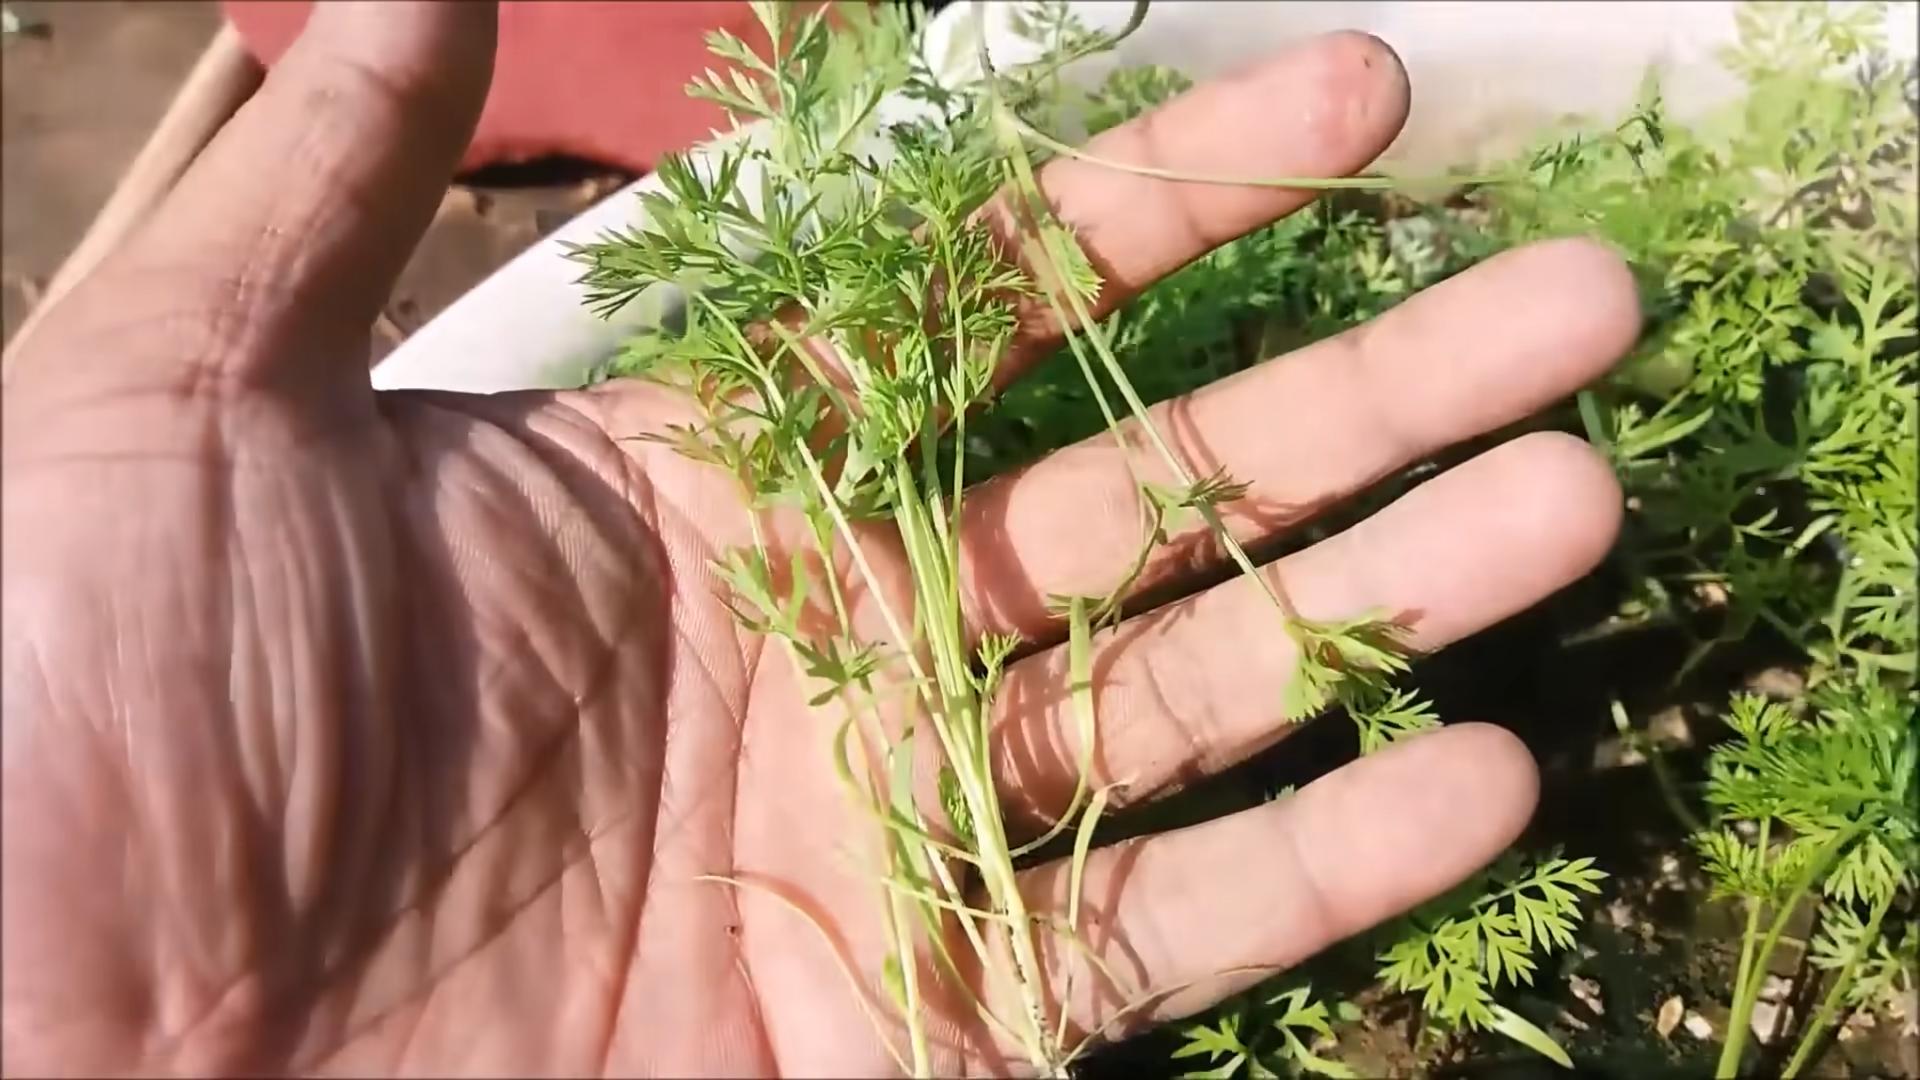
Thinning is essential for giving your carrots enough space to grow. When the seedlings are about 2 inches tall, thin them to about 1-2 inches apart. When they are about 4 inches tall, thin them again to about 3-4 inches apart. Gently pull out the unwanted seedlings, being careful not to disturb the roots of the remaining plants. You can eat the thinned seedlings as microgreens.
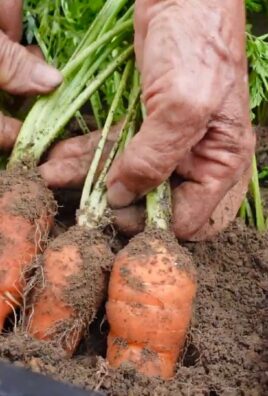
How do I know when my carrots are ready to harvest?
Carrots are typically ready to harvest when they reach the desired size and color. Check the seed packet for the expected maturity date. You can also gently dig around the base of a carrot to check its size. Harvest carrots on a dry day to prevent them from rotting. Loosen the soil around the carrots with a garden fork and gently pull them out of the ground.
Can I grow carrots in containers?
Yes, you can grow carrots in containers, especially if you have limited space or poor soil. Choose a container that is at least 12 inches deep and wide to accommodate the roots. Fill the container with a well-draining potting mix. Sow the seeds directly into the container and thin them as needed. Water regularly and fertilize with a balanced fertilizer.
What are some good companion plants for carrots?
Companion planting can help to improve the growth and health of your carrots. Some good companion plants for carrots include onions, garlic, rosemary, sage, marigolds, and lettuce. Onions and garlic can deter carrot root flies, while rosemary can repel carrot rust flies. Marigolds can help to control nematodes in the soil. Lettuce can provide shade for the carrot seedlings and help to keep the soil moist.

Leave a Comment