
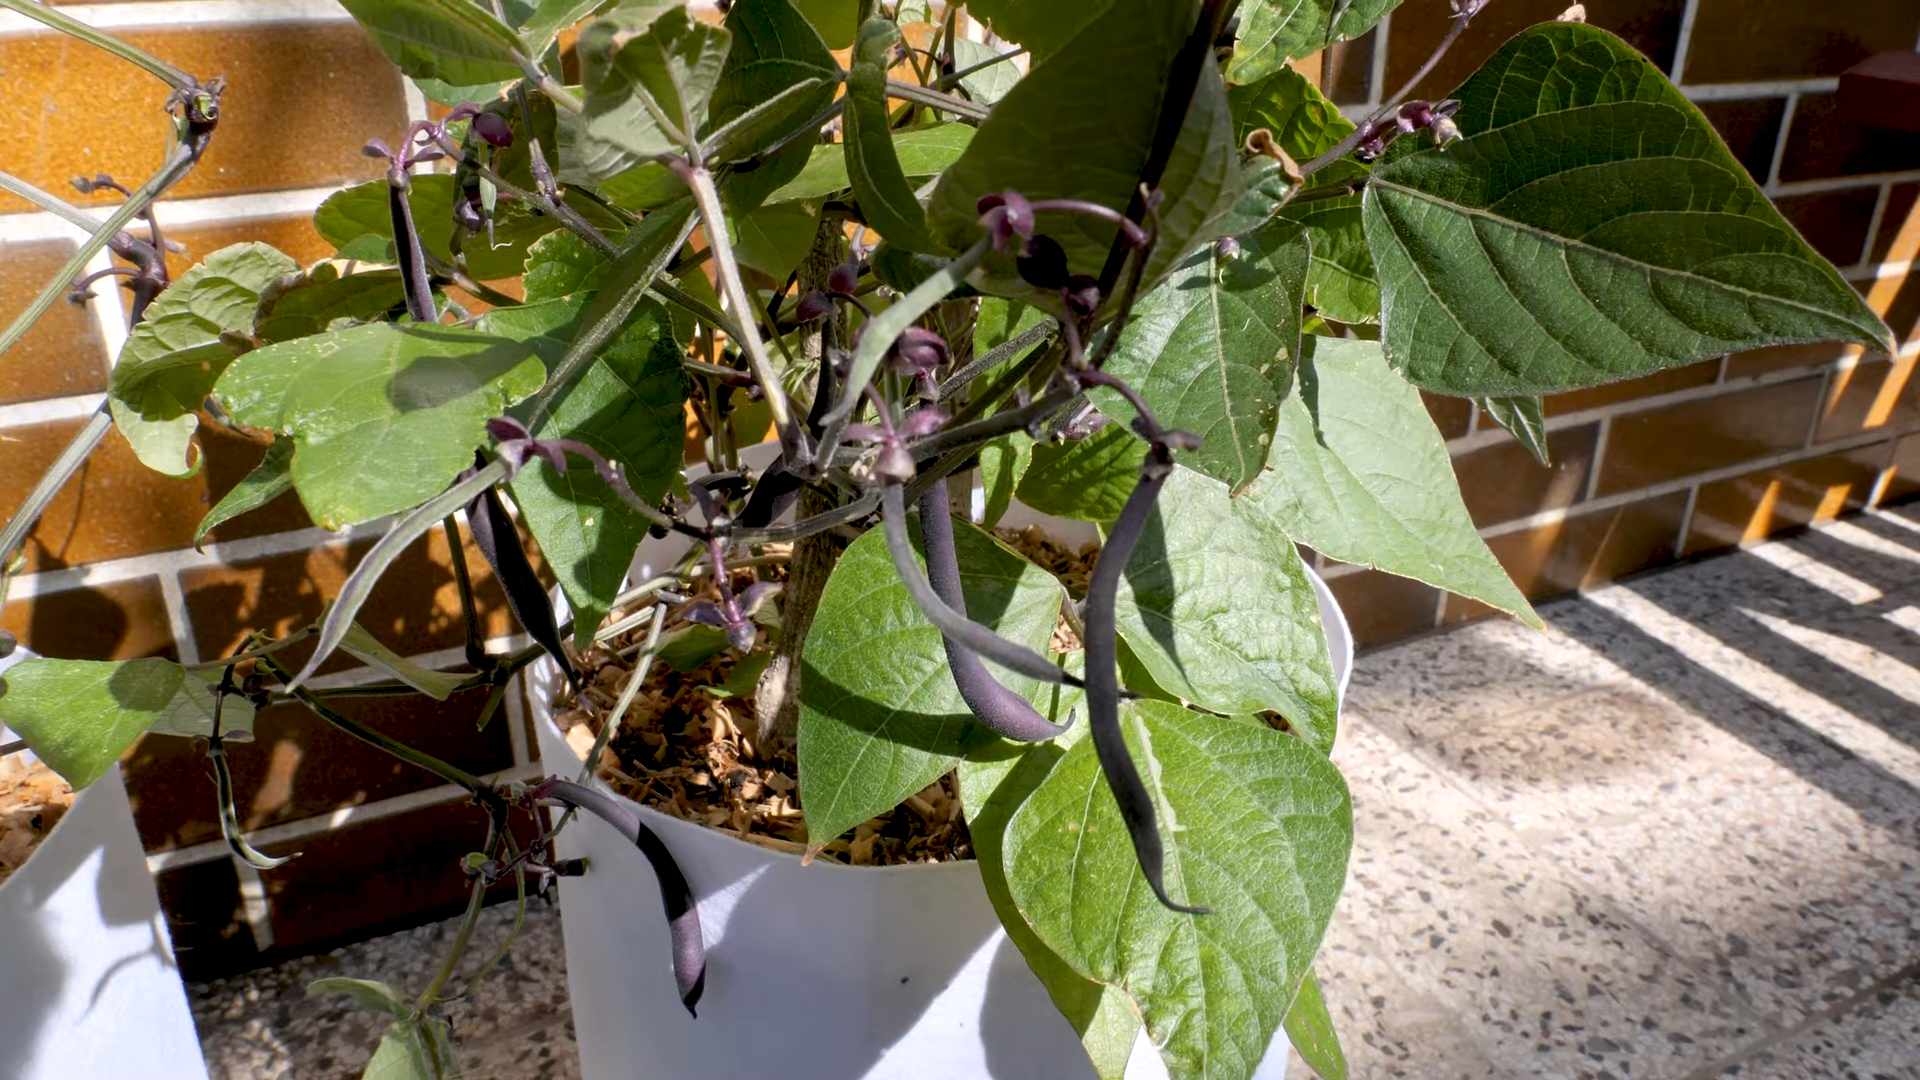
Growing Purple Bush Beans can be a rewarding and visually stunning addition to any home garden! Imagine rows of vibrant purple pods, adding a pop of color to your vegetable patch and a unique twist to your dinner plate. But let’s be honest, getting those beans to thrive can sometimes feel like a bit of a mystery, right? That’s where these DIY tricks and hacks come in!
Beans, in general, have a rich history, dating back thousands of years. They’ve been a staple food source for cultures around the globe, providing essential nutrients and playing a vital role in sustainable agriculture. While the common green bean is a familiar sight, growing purple bush beans offers a fun and exciting alternative, bringing a touch of novelty to a classic garden favorite.
I know, I know, you might be thinking, “Why bother with purple beans when green ones are just fine?” Well, beyond their striking appearance, purple bush beans often boast a slightly sweeter flavor and are packed with antioxidants. Plus, they’re a fantastic conversation starter! But more importantly, these DIY tricks will help you overcome common challenges like pest control, soil preparation, and maximizing your yield. I’m here to share my tried-and-true methods for ensuring a bountiful harvest of these beautiful beans, even if you’re a beginner gardener. So, let’s dive in and unlock the secrets to successfully growing purple bush beans in your own backyard!
Growing Gorgeous Purple Bush Beans: A DIY Guide
Alright, bean enthusiasts! Today, we’re diving into the wonderful world of purple bush beans. Forget those boring green beans – we’re going for vibrant color and delicious flavor! I’m going to walk you through everything you need to know to successfully grow these beauties in your own backyard. Trust me, it’s easier than you think, and the reward of fresh, homegrown purple beans is totally worth it.
Choosing Your Purple Bush Bean Variety
First things first, let’s talk varieties. There are a few different types of purple bush beans out there, and each has its own unique characteristics. Here are a couple of my favorites:
* **Royal Burgundy:** This is a classic choice. Royal Burgundy beans are known for their deep purple color, excellent flavor, and high yields. They’re also relatively early maturing, which is great if you live in a cooler climate.
* **Purple Queen:** As the name suggests, these beans are truly regal! They’re slightly longer than Royal Burgundy and have a slightly sweeter flavor. They also tend to be very productive.
When choosing your seeds, make sure to buy them from a reputable source. Look for seeds that are specifically labeled as “bush beans” to avoid any confusion with pole bean varieties, which require trellises.
Preparing Your Garden Bed
Beans are relatively easy to grow, but they do appreciate a little bit of preparation. Here’s how I get my garden bed ready for planting:
* **Sunlight:** Purple bush beans need at least 6-8 hours of direct sunlight per day. Choose a spot in your garden that gets plenty of sunshine.
* **Soil:** Beans prefer well-drained soil that is rich in organic matter. If your soil is heavy clay or sandy, amend it with compost or well-rotted manure. This will improve drainage and provide essential nutrients.
* **pH:** The ideal soil pH for beans is between 6.0 and 7.0. You can test your soil pH with a simple soil testing kit, which you can find at most garden centers. If your soil is too acidic (pH below 6.0), you can add lime to raise the pH. If it’s too alkaline (pH above 7.0), you can add sulfur to lower the pH.
* **Weed Removal:** Clear the area of any weeds. Weeds compete with your bean plants for nutrients and water, so it’s important to get rid of them before planting.
* **Tilling/Loosening the Soil:** Loosen the soil to a depth of about 6-8 inches. This will make it easier for the bean roots to grow. You can use a garden fork or a tiller to do this.
* **Adding Compost:** Work in a generous amount of compost or well-rotted manure into the soil. This will provide your bean plants with the nutrients they need to thrive.
Planting Your Purple Bush Beans
Now for the fun part – planting! Here’s how I plant my purple bush beans:
1. **Timing is Key:** Plant your purple bush beans after the last frost in your area. Beans are sensitive to frost, so it’s important to wait until the weather has warmed up. Soil temperature should be at least 60°F (16°C). You can check your soil temperature with a soil thermometer.
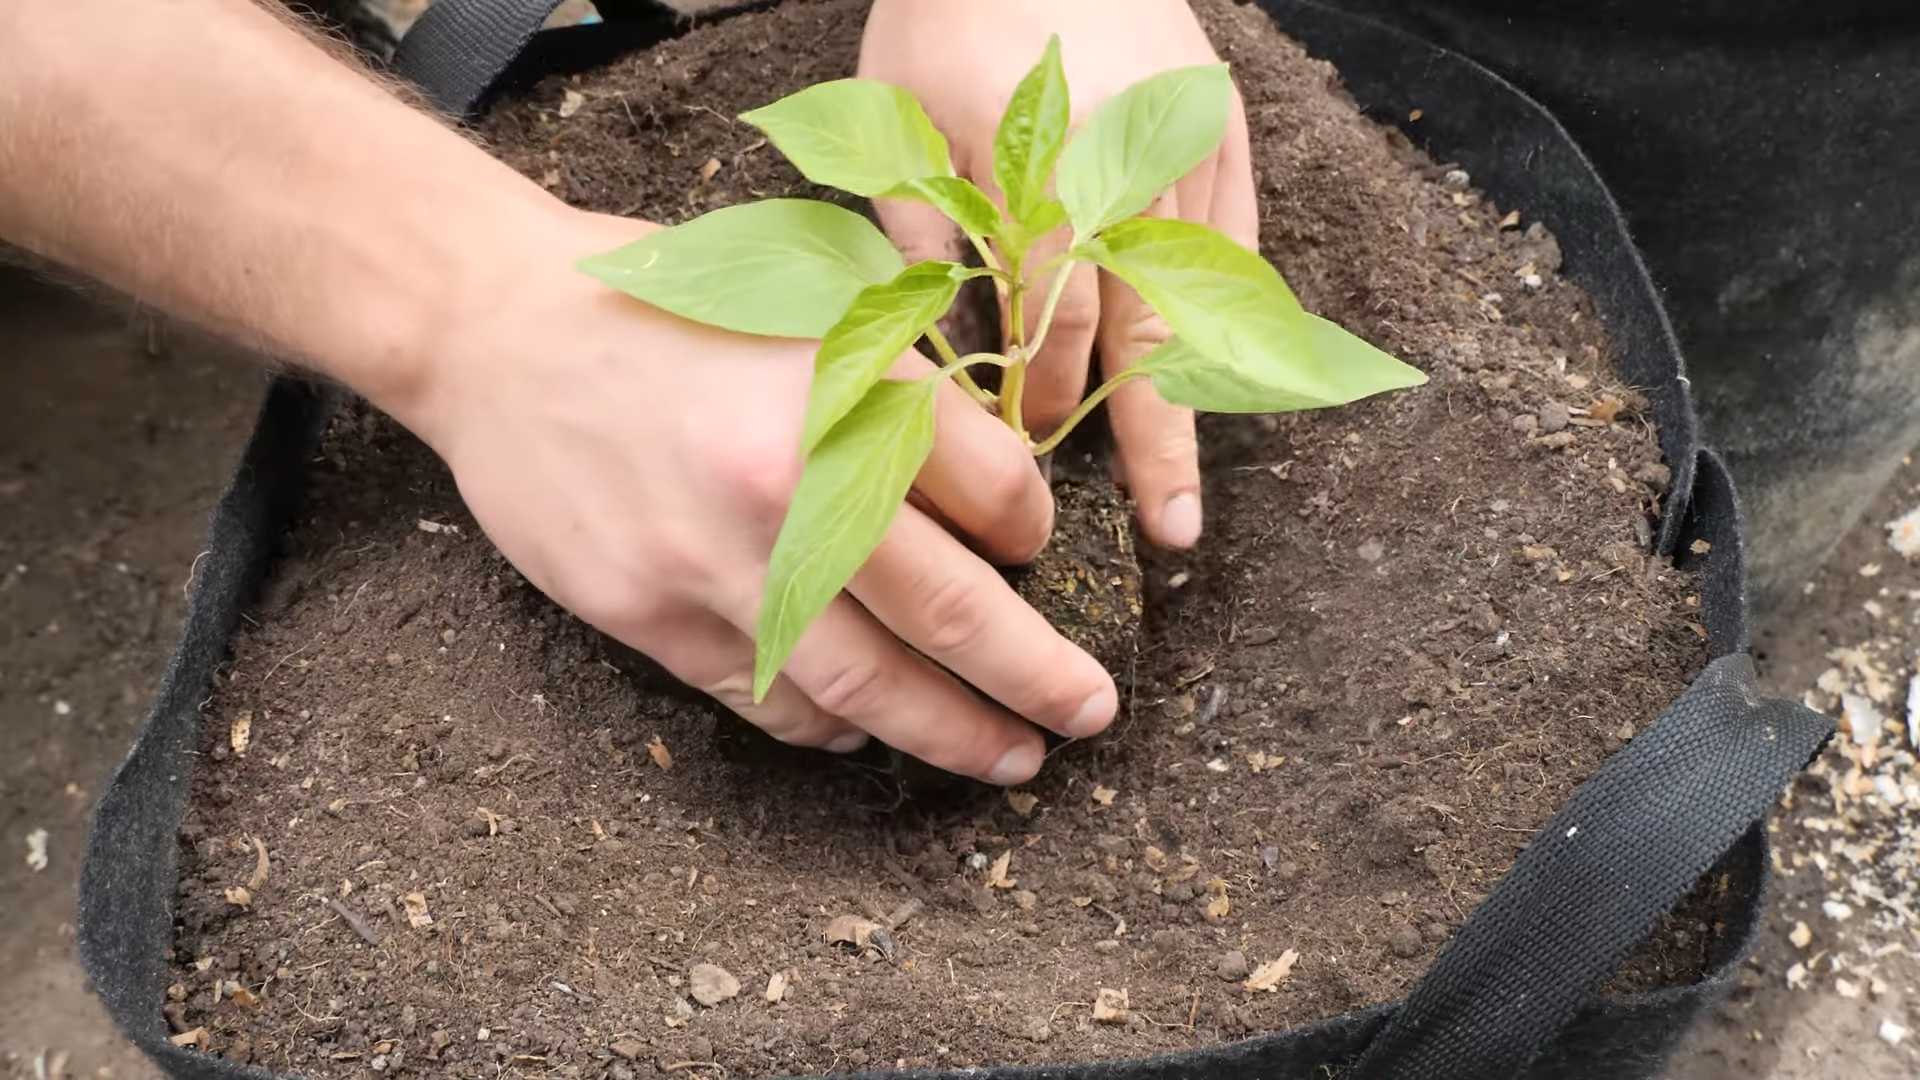
2. **Direct Sowing:** Beans are best direct sown, meaning you plant the seeds directly into the garden bed. They don’t transplant well, so starting them indoors is generally not recommended.
3. **Spacing:** Sow the seeds about 1 inch deep and 2-3 inches apart in rows that are 18-24 inches apart. This spacing allows for good air circulation, which helps to prevent disease.
4. **Watering:** Water the soil thoroughly after planting. Keep the soil consistently moist until the seeds germinate.
5. **Germination:** Bean seeds typically germinate in 5-10 days, depending on the soil temperature and moisture levels.
Caring for Your Purple Bush Beans
Once your bean plants have sprouted, it’s important to provide them with proper care to ensure a bountiful harvest. Here’s what I do to keep my bean plants happy and healthy:
* **Watering:** Water your bean plants regularly, especially during dry periods. Aim to keep the soil consistently moist, but not waterlogged. Water deeply and less frequently, rather than shallowly and often. This encourages deep root growth.
* **Weeding:** Keep the area around your bean plants free of weeds. Weeds compete with your bean plants for nutrients and water. Hand-pull weeds carefully to avoid disturbing the bean roots.
* **Fertilizing:** Beans are legumes, which means they can fix nitrogen from the air. However, they still benefit from a little bit of fertilizer. I like to use a balanced organic fertilizer, such as a 5-10-10, a few weeks after the plants have emerged. Avoid over-fertilizing, as this can lead to excessive foliage growth and reduced bean production.
* **Pest Control:** Keep an eye out for common bean pests, such as aphids, bean beetles, and spider mites. If you notice any pests, you can try spraying your plants with insecticidal soap or neem oil. I prefer to use organic pest control methods whenever possible.
* **Supporting the Plants (Optional):** While bush beans are generally self-supporting, you may want to provide them with some support if they are growing in a windy area or if they are heavily laden with beans. You can use stakes or a small trellis to support the plants.
Harvesting Your Purple Bush Beans
The moment we’ve all been waiting for – harvesting! Here’s how I harvest my purple bush beans:
1. **Timing:** Purple bush beans are typically ready to harvest about 50-60 days after planting. The beans should be firm and plump, but not too large or tough.
2. **Picking:** Pick the beans when they are about the size you want to eat them. The more you pick, the more the plants will produce.
3. **Technique:** Gently snap the beans off the plant, being careful not to damage the stems.
4. **Frequency:** Harvest your beans every few days to encourage continued production.
5. **Color Change:** Don’t be alarmed if your purple beans turn green when you cook them! This is perfectly normal. The purple pigment is heat-sensitive and breaks down during cooking.
Troubleshooting Common Problems
Even with the best care, you may encounter some problems when growing purple bush beans. Here are a few common issues and how to address them:
* **Poor Germination:** If your bean seeds are not germinating, it could be due to several factors, such as cold soil, poor soil drainage, or old seeds. Make sure the soil temperature is at least 60°F (16°C) before planting. Improve soil drainage by adding compost or other organic matter. Use fresh seeds that are less than a year old.
* **Yellowing Leaves:** Yellowing leaves can be a sign of nutrient deficiency, overwatering, or disease. Make sure your bean plants are getting enough nutrients by fertilizing them with a balanced organic fertilizer. Avoid overwatering by allowing the soil to dry out slightly between waterings. Check your plants for signs of disease, such as fungal spots or wilting.
* **Bean Beetle Infestation:** Bean beetles can quickly decimate your bean plants. Hand-pick the beetles and their larvae off the plants and drop them into a bucket of soapy water. You can also spray your plants with insecticidal soap or neem oil.
* **Powdery Mildew:** Powdery mildew is a fungal disease that can affect bean plants, especially in humid conditions. Improve air circulation by spacing your plants properly. Water your plants in the morning so that the foliage has time to dry out during the day. You can also spray your plants with a fungicide.
Saving Seeds for Next Year
If you want to save seeds from your purple bush beans for next year, here’s how I do it:
1. **Select Healthy Plants:** Choose healthy, vigorous plants that produce high-quality beans.
2. **Allow Beans to Mature:** Allow some of the beans to mature fully on the plant. The pods will turn brown and dry.
3. **Harvest the Pods:** Harvest the dried pods and shell the beans.
4. **Dry the Seeds:** Spread the seeds out on a tray and allow them to dry completely in a cool, dry place for several weeks.
5. **Store the Seeds:** Store the dried seeds in an airtight container in a cool, dark place. They should remain viable for several years.
Enjoying Your Harvest
Now that you’ve harvested your beautiful purple bush beans, it’s time to enjoy them! Here are a few of my favorite ways to prepare them:
* **Steamed:** Steamed purple bush beans are a simple and delicious side dish. Just steam them until they are tender-crisp.
* **Sautéed:** Sautéed purple bush beans with garlic and olive oil are another quick and easy option.
* **Roasted:** Roasted purple bush beans are a great way to bring out their natural
Conclusion
So, there you have it! Growing purple bush beans is not only surprisingly simple, but it’s also incredibly rewarding. From the vibrant splash of color they bring to your garden to the delicious and nutritious meals they provide, these beans are a true garden gem. We’ve walked you through the entire process, from selecting the right seeds and preparing your soil to nurturing your plants and harvesting your bountiful crop.
But why is this DIY trick a must-try? Because it empowers you to take control of your food source, connect with nature, and enjoy the unparalleled flavor of homegrown produce. Store-bought beans simply can’t compare to the crisp, fresh taste of beans picked straight from your own garden. Plus, growing your own food is a sustainable and environmentally friendly practice that reduces your carbon footprint.
Beyond the basic method we’ve outlined, there’s plenty of room for experimentation and personalization. Consider these variations to tailor your purple bush bean growing experience:
* Succession Planting: Plant a new batch of seeds every two to three weeks to ensure a continuous harvest throughout the growing season.
* Companion Planting: Plant your purple bush beans alongside beneficial companion plants like carrots, cucumbers, or marigolds to deter pests and improve soil health.
* Vertical Growing: If you’re short on space, try growing your purple bush beans in containers with trellises or supports. This not only saves space but also adds visual interest to your garden.
* Different Varieties: Explore different varieties of purple bush beans, such as ‘Royal Burgundy’ or ‘Purple Queen,’ to discover your favorite flavor and color.
Ultimately, the best way to learn is by doing. Don’t be afraid to get your hands dirty and experiment with different techniques to find what works best for you and your garden. Remember to pay close attention to your plants’ needs and adjust your care accordingly.
We are confident that you’ll find growing purple bush beans to be a fun, fulfilling, and delicious experience. So, grab your seeds, prepare your soil, and get ready to enjoy the vibrant beauty and delectable flavor of homegrown purple bush beans.
Now, we want to hear from you! Have you tried growing purple bush beans before? What tips and tricks have you learned along the way? Share your experiences, successes, and challenges in the comments below. Your insights can help other gardeners embark on their own purple bush bean growing adventures. Let’s create a community of passionate gardeners who are dedicated to growing their own fresh, healthy food. Happy gardening!
Frequently Asked Questions (FAQ)
What are the best conditions for growing purple bush beans?
Purple bush beans thrive in warm weather and require at least six to eight hours of sunlight per day. The ideal soil temperature for germination is between 60°F and 70°F (15°C and 21°C). The soil should be well-draining and rich in organic matter. Amend your soil with compost or aged manure before planting to improve its fertility and drainage. Avoid planting in areas that are prone to waterlogging, as this can lead to root rot.
How often should I water my purple bush beans?
Water your purple bush beans regularly, especially during dry periods. Aim to keep the soil consistently moist but not waterlogged. Water deeply at the base of the plants, avoiding wetting the foliage, which can increase the risk of fungal diseases. A good rule of thumb is to water when the top inch of soil feels dry to the touch. Mulching around the plants can help retain moisture and suppress weeds.
What are some common pests and diseases that affect purple bush beans?
Common pests that can affect purple bush beans include aphids, bean beetles, and spider mites. These pests can damage the leaves and stems of the plants, reducing their yield. To control these pests, you can use insecticidal soap, neem oil, or introduce beneficial insects like ladybugs. Common diseases that can affect purple bush beans include bean rust, powdery mildew, and anthracnose. These diseases can cause spots on the leaves and stems, and can eventually kill the plants. To prevent these diseases, ensure good air circulation around the plants, avoid overhead watering, and use disease-resistant varieties.
When is the best time to harvest purple bush beans?
Purple bush beans are typically ready to harvest about 50 to 60 days after planting. The beans should be firm, plump, and brightly colored. Harvest them when they are about the size of a pencil and before the seeds inside become too large. Regular harvesting encourages the plants to produce more beans. To harvest, gently snap the beans off the plant, being careful not to damage the stems.
Can I save seeds from my purple bush beans for next year?
Yes, you can save seeds from your purple bush beans for next year. To do this, allow some of the beans to mature fully on the plant until they are dry and brown. Once the pods are completely dry, remove the seeds and store them in an airtight container in a cool, dry place. Be sure to label the container with the variety and date. Keep in mind that if you are growing multiple varieties of beans, there is a chance of cross-pollination, which can result in seeds that do not produce true-to-type plants.
Are purple bush beans more nutritious than green beans?
Purple bush beans are just as nutritious as green beans, and they may even offer some additional health benefits due to their unique color. The purple color comes from anthocyanins, which are powerful antioxidants that can help protect against cell damage and reduce the risk of chronic diseases. Purple bush beans are also a good source of fiber, vitamins, and minerals.
Can I grow purple bush beans in containers?
Yes, you can grow purple bush beans in containers, making them a great option for gardeners with limited space. Choose a container that is at least 12 inches deep and wide to provide enough room for the roots to grow. Use a well-draining potting mix and ensure that the container has drainage holes. Place the container in a sunny location and water regularly. You may also need to provide support for the plants, such as a trellis or stakes, as they grow.
How do I improve the soil for growing purple bush beans?
Improving the soil is crucial for successful purple bush bean cultivation. Start by testing your soil’s pH level; beans prefer a slightly acidic to neutral pH (around 6.0 to 7.0). Amend the soil with organic matter like compost, well-rotted manure, or leaf mold to improve drainage, aeration, and nutrient content. Consider adding a slow-release fertilizer specifically formulated for vegetables at planting time. Avoid using fertilizers high in nitrogen, as this can promote excessive foliage growth at the expense of bean production.
What are some creative ways to use purple bush beans in cooking?
Purple bush beans are incredibly versatile in the kitchen. They can be steamed, boiled, sautéed, roasted, or grilled. Their vibrant color makes them a beautiful addition to salads, stir-fries, and side dishes. Try blanching them briefly to retain their color and crispness. They can also be pickled or fermented for a tangy and flavorful treat. Experiment with different herbs and spices to complement their flavor, such as garlic, lemon, thyme, or rosemary.
Why do my purple bush beans turn green when cooked?
The purple color of purple bush beans is due to anthocyanins, which are heat-sensitive pigments. When exposed to heat, these pigments break down, causing the beans to turn green. To minimize color loss, cook the beans quickly and avoid overcooking them. Steaming or blanching are good options for preserving their color. You can also add a splash of vinegar or lemon juice to the cooking water, as the acidity can help stabilize the anthocyanins. While the color may fade, the nutritional value and flavor of the beans remain intact.


Leave a Comment