
Growing Sprouts at Home is easier than you think, and I’m here to show you how! Forget those expensive, pre-packaged sprouts from the grocery store – imagine having a constant supply of fresh, nutritious sprouts right on your kitchen counter. Sounds amazing, right?
Sprouting isn’t just a trendy health kick; it’s an ancient practice. Cultures around the world have recognized the incredible nutritional power of sprouts for centuries. From mung bean sprouts in Asian cuisine to alfalfa sprouts in salads, these tiny powerhouses have been a staple for their concentrated vitamins, minerals, and enzymes. Think of it as unlocking the full potential of a seed!
But why should *you* learn how to grow sprouts at home? Well, for starters, it’s incredibly cost-effective. A small bag of seeds can yield a huge amount of sprouts. Plus, you control the entire process, ensuring they’re grown organically and free from harmful chemicals. In today’s world, where healthy eating can feel complicated and expensive, growing sprouts at home offers a simple, affordable, and incredibly rewarding solution. I’m going to share some easy DIY tricks and hacks that will have you sprouting like a pro in no time. Get ready to add a burst of freshness and nutrition to your meals!
Growing Sprouts at Home: A Beginner’s Guide
Hey there, fellow food enthusiasts! Have you ever considered growing your own sprouts at home? It’s surprisingly easy, incredibly rewarding, and a fantastic way to add a burst of fresh, nutritious goodness to your meals, especially during those long winter months when fresh produce can be a bit pricey. Plus, it’s a super fun project for kids! I’m going to walk you through everything you need to know to become a sprout-growing pro.
Why Grow Sprouts?
Before we dive into the how-to, let’s talk about why you should even bother. Sprouts are packed with vitamins, minerals, and enzymes. They’re a nutritional powerhouse! They’re also incredibly versatile – you can add them to salads, sandwiches, soups, stir-fries, or even just munch on them straight from the jar. And the best part? They’re ready to eat in just a few days!
What You’ll Need
Okay, let’s gather our supplies. The beauty of sprouting is that you don’t need a ton of fancy equipment. Here’s what I recommend:
* Sprouting Seeds: This is the most important part! Make sure you buy seeds specifically labeled for sprouting. Regular garden seeds may be treated with chemicals that you don’t want to ingest. Some popular choices include alfalfa, broccoli, radish, mung beans, lentils, and clover. I usually get mine online or at a local health food store.
* Sprouting Jar or Container: You can use a mason jar, a glass bowl, or even a plastic container. The key is that it needs to be clean and have good drainage. I personally prefer mason jars because they’re easy to find and clean.
* Sprouting Lid or Mesh: You’ll need something to cover the jar that allows for airflow and drainage. You can buy special sprouting lids with mesh screens, or you can simply use a piece of cheesecloth or nylon mesh secured with a rubber band. I’ve even used the plastic mesh bags that oranges come in in a pinch!
* Water: Clean, filtered water is best.
* A Dark Place: Sprouts need darkness to germinate properly. A cupboard or drawer works perfectly.
* A Well-Lit Area: Once the sprouts have germinated, they need light to develop chlorophyll and turn green. A windowsill or countertop works well.
Choosing Your Seeds
Not all seeds are created equal when it comes to sprouting. Here’s a quick rundown of some popular choices:
* Alfalfa: These are probably the most common sprouts. They have a mild, slightly nutty flavor and are great in salads and sandwiches.
* Broccoli: Broccoli sprouts are known for their high levels of sulforaphane, a powerful antioxidant. They have a slightly peppery flavor.
* Radish: Radish sprouts have a spicy, peppery kick. They’re great for adding flavor to salads and wraps.
* Mung Beans: These are the sprouts you often see in Asian cuisine. They’re crunchy and have a mild flavor.
* Lentils: Lentil sprouts are hearty and filling. They’re a good source of protein and fiber.
* Clover: Clover sprouts are mild and slightly sweet. They’re a good source of vitamins and minerals.
I recommend starting with alfalfa or broccoli sprouts, as they’re generally easy to grow and have a pleasant flavor.
The Sprouting Process: Step-by-Step
Alright, let’s get sprouting! Here’s my tried-and-true method:
Phase 1: Soaking
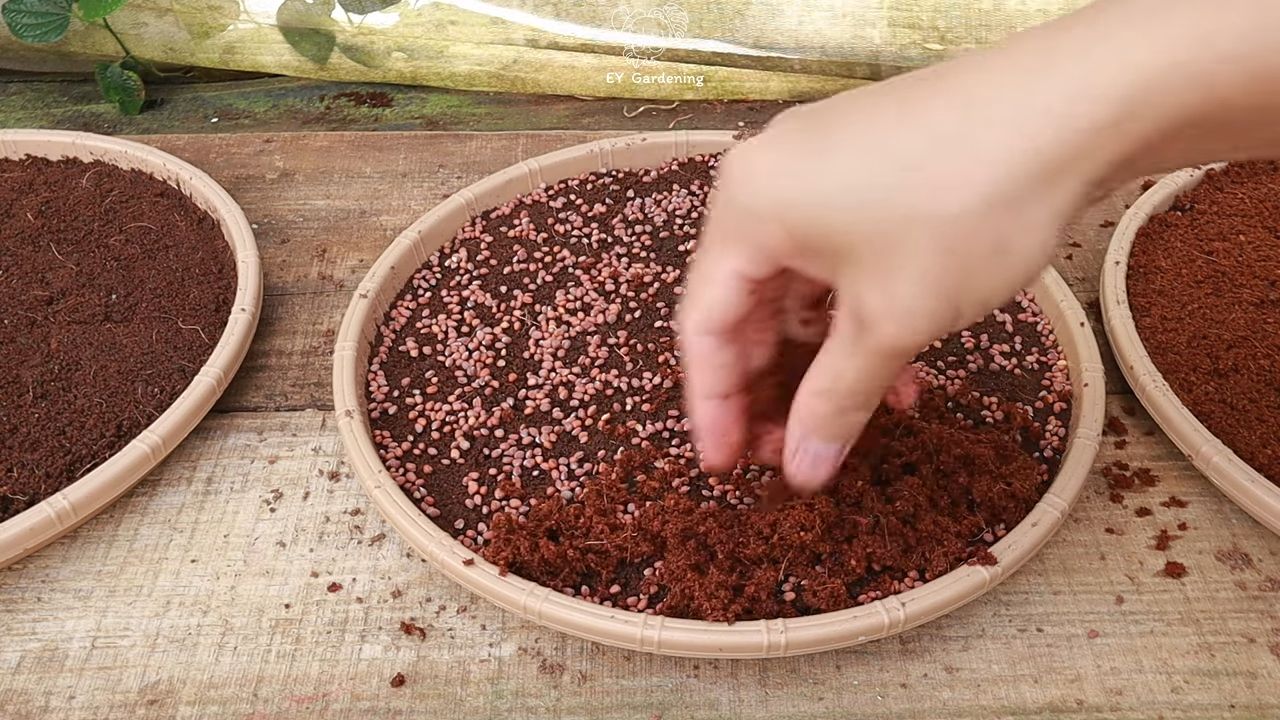
1. Rinse the Seeds: Place about 1-2 tablespoons of seeds in your sprouting jar or container. Rinse them thoroughly with cool water to remove any debris or dust. I usually give them a good swirl and then drain the water.
2. Soak the Seeds: Add enough cool, filtered water to cover the seeds by at least 2-3 times their volume. The seeds will expand as they soak, so you want to make sure they have enough room.
3. Soaking Time: Cover the jar with your sprouting lid or mesh and secure it with a rubber band. Place the jar in a dark place (like a cupboard) and let the seeds soak for the recommended time. Soaking times vary depending on the type of seed:
* Alfalfa: 8-12 hours
* Broccoli: 6-8 hours
* Radish: 4-6 hours
* Mung Beans: 8-12 hours
* Lentils: 8-12 hours
* Clover: 8-12 hours
I usually soak my seeds overnight so they’re ready to go in the morning.
Phase 2: Rinsing and Draining
This is the most important part of the sprouting process! You need to rinse and drain the seeds regularly to keep them moist and prevent mold growth.
1. Rinse Thoroughly: After the soaking period, drain the water from the jar. Then, rinse the seeds thoroughly with cool water. Swirl them around to make sure all the seeds are rinsed.
2. Drain Well: Drain as much water as possible from the jar. This is crucial! Excess water can lead to mold. I usually invert the jar and let it drain for a few minutes.
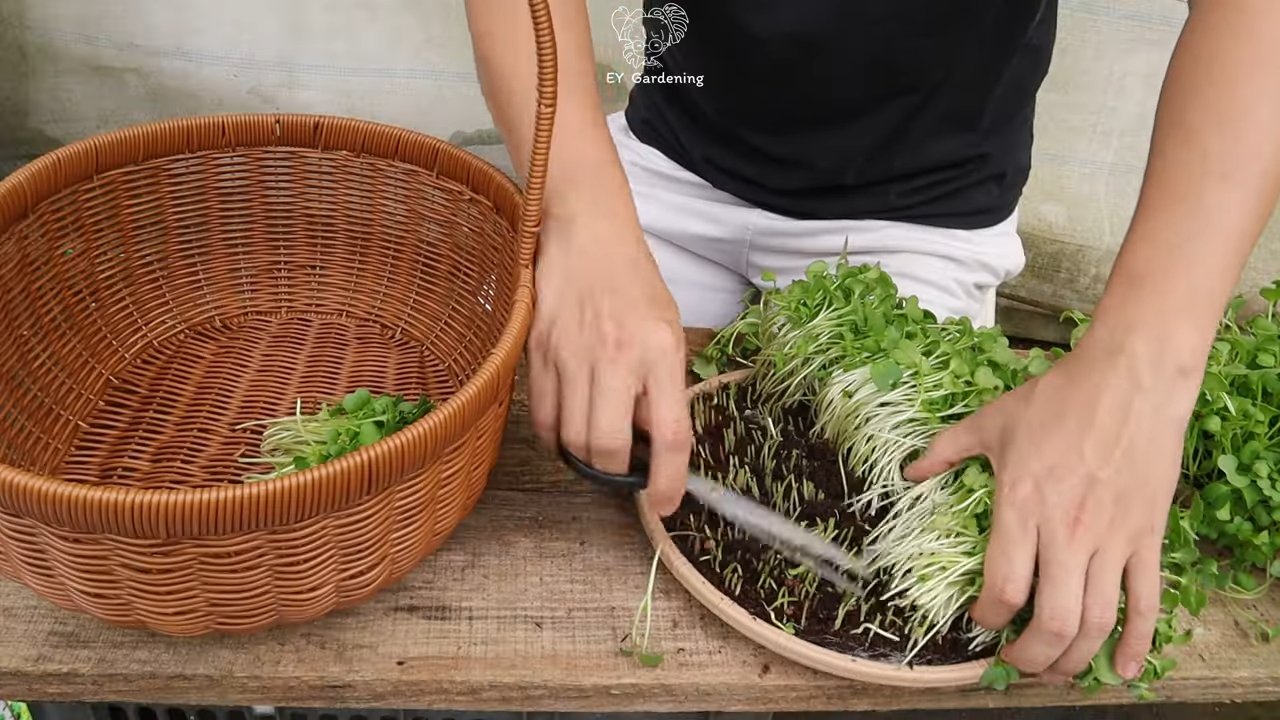
3. Repeat Regularly: Rinse and drain the seeds 2-3 times per day. This is where the sprouting lid or mesh comes in handy – it allows you to easily rinse and drain the seeds without losing them. I usually do it in the morning, afternoon, and before bed.
Phase 3: Sprouting
1. Darkness is Key: After rinsing and draining, place the jar back in the dark place. The seeds need darkness to germinate properly.
2. Maintain Moisture: Continue rinsing and draining the seeds 2-3 times per day.
3. Watch Them Grow: After a day or two, you’ll start to see tiny sprouts emerging from the seeds. This is so exciting!
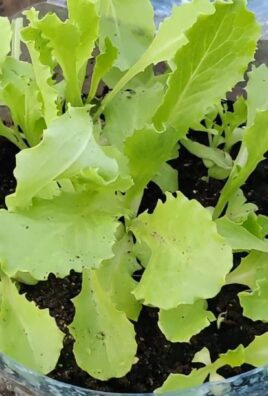
Phase 4: Greening
1. Introduce Light: Once the sprouts have germinated and have small tails, it’s time to introduce them to light. Move the jar to a well-lit area, such as a windowsill or countertop. Avoid direct sunlight, as this can overheat the sprouts.
2. Continue Rinsing: Continue rinsing and draining the sprouts 2-3 times per day.
3. Watch Them Turn Green: Over the next few days, the sprouts will start to develop chlorophyll and turn green. This is a sign that they’re ready to eat!
Harvesting and Storing Your Sprouts
1. Harvest Time: Your sprouts are ready to harvest when they’re green and have reached your desired length. This usually takes 3-7 days, depending on the type of seed and the growing conditions.
2. Final Rinse: Give the sprouts a final rinse with cool water.
3. Drain Thoroughly: Drain the sprouts as thoroughly as possible. Excess moisture can cause them to spoil quickly.
4. Storage: Store the sprouts in a clean, airtight container in the refrigerator. They should last for up to a week. I usually line the container with a paper towel to absorb any excess moisture.
Troubleshooting
Sometimes, things don’t go exactly as planned. Here are a few common problems and how to fix them:
* Mold: Mold is the biggest enemy of sprouts. It’s usually caused by poor drainage or not rinsing the seeds frequently enough. If you see mold, discard the entire batch of sprouts. To prevent mold, make sure you’re rinsing and draining the seeds thoroughly and that the jar has good airflow.
* Slow Growth: Slow growth can be caused by a number of factors, including low temperatures, poor water quality, or old seeds. Make sure you’re using fresh seeds and that the water is clean and cool. You can also try moving the jar to a slightly warmer location.
* Unpleasant Odor: An unpleasant odor is usually a sign of bacterial growth. This can be caused by poor hygiene or contaminated seeds. If you notice an unpleasant odor, discard the entire batch of sprouts. To prevent bacterial growth, make sure you’re using clean equipment and seeds.
Tips and Tricks
Here are a few extra tips to help you succeed:
* Start Small: Don’t try to grow too many sprouts at once. Start with a small amount of seeds and gradually increase the amount as you gain experience.
* Experiment with Different Seeds: Try growing different types of sprouts to find your favorites.
* Use a Sprouting Calendar: Keep track of when you started each batch of sprouts so you know when they’re ready to harvest.
* Enjoy Your Sprouts! Add them to salads, sandwiches, soups, stir-fries, or even just munch on them straight from the jar.
Growing sprouts at
Conclusion
So, there you have it! Growing sprouts at home is not just a fun project; it’s a gateway to fresher, more nutritious meals, all while saving money and reducing your environmental impact. Forget those wilted, overpriced sprouts from the grocery store. With minimal effort and a few simple supplies, you can cultivate a vibrant array of flavors and textures right on your kitchen counter.
The beauty of this DIY trick lies in its adaptability. Experiment with different types of seeds to discover your favorite sprout varieties. Try a spicy radish sprout mix for a zesty kick to your salads, or opt for the mild, nutty flavor of broccoli sprouts to boost your smoothies. Sunflower sprouts offer a satisfying crunch and a wealth of nutrients, while alfalfa sprouts provide a delicate, slightly sweet taste that complements sandwiches and wraps perfectly. Don’t be afraid to blend different seeds together for a unique and personalized sprout experience.
Beyond the seed selection, consider the growing method itself. While the jar method is a classic and reliable starting point, you can also explore using sprouting bags or multi-tiered sprouting trays for larger yields and greater convenience. Sprouting bags are particularly useful for smaller seeds like alfalfa, as they prevent them from falling through the holes of a jar lid. Multi-tiered trays allow you to grow multiple batches of sprouts simultaneously, ensuring a continuous supply of fresh greens.
Growing sprouts at home is a rewarding experience that connects you to the natural world in a tangible way. It’s a reminder that even in the midst of our busy lives, we can cultivate our own food and nourish our bodies with wholesome, homegrown goodness.
We urge you to give this DIY trick a try. It’s easier than you might think, and the rewards are well worth the effort. Once you’ve harvested your first batch of sprouts, be sure to share your experience with us! We’d love to hear about your favorite seed varieties, your preferred growing methods, and any tips or tricks you’ve discovered along the way. Share your photos and stories on social media using [Your Hashtag Here] and let’s inspire others to embrace the joy of growing their own sprouts.
Remember, the key to successful sprouting is consistency and attention to detail. Rinse your sprouts regularly, provide them with adequate drainage, and keep them in a well-ventilated area. With a little practice, you’ll be enjoying a bountiful harvest of fresh, delicious sprouts in no time. So, what are you waiting for? Grab some seeds, a jar, and get sprouting!
Frequently Asked Questions (FAQ)
What types of seeds can I sprout?
Almost any seed can be sprouted, but some are more commonly used and readily available than others. Popular choices include alfalfa, broccoli, radish, clover, mung beans, lentils, sunflower seeds, and wheat berries. Avoid sprouting seeds that are labeled as “treated” or “coated,” as these may contain chemicals that are harmful to consume. Also, avoid sprouting seeds from the nightshade family (tomatoes, peppers, eggplant) as they contain solanine, which is toxic. Ensure you are using seeds specifically intended for sprouting or food consumption, not those meant for planting in the garden, as garden seeds may be treated with fungicides or other chemicals.
How long does it take for sprouts to grow?
The sprouting time varies depending on the type of seed and the growing conditions. Generally, most sprouts will be ready to harvest in 3 to 7 days. Alfalfa and clover sprouts typically take 5 to 6 days, while radish and broccoli sprouts may be ready in as little as 3 to 4 days. Mung beans, on the other hand, can take up to 5 days. Keep an eye on your sprouts and harvest them when they have reached your desired size and flavor. Overgrown sprouts can become bitter and less palatable.
What is the best way to store sprouts?
Once harvested, sprouts should be stored in the refrigerator to slow down their growth and prevent spoilage. Rinse the sprouts thoroughly with cold water and drain them well. Place them in a clean container lined with a paper towel to absorb excess moisture. Store the container in the crisper drawer of your refrigerator. Sprouts will typically last for up to a week when stored properly. Check them regularly for any signs of spoilage, such as a slimy texture or an unpleasant odor.
How often should I rinse my sprouts?
Rinsing your sprouts is crucial for preventing mold and bacterial growth. Rinse them at least twice a day, preferably in the morning and evening. Use cool, clean water and ensure that all the sprouts are thoroughly rinsed. After rinsing, drain the sprouts well to prevent them from becoming waterlogged. Proper drainage is essential for healthy sprout growth.
What if my sprouts start to smell bad?
A foul odor is a sign that your sprouts have spoiled and should be discarded immediately. This is usually caused by bacterial or fungal growth due to inadequate rinsing or drainage. To prevent this, ensure that you are rinsing your sprouts regularly and thoroughly, and that they are draining properly. If you notice any signs of mold or discoloration, discard the entire batch of sprouts.
Can I eat the roots of sprouts?
Yes, the roots of sprouts are perfectly edible and often contain a concentrated amount of nutrients. Some people prefer to eat the entire sprout, including the roots, while others prefer to trim them off. It’s a matter of personal preference. However, be sure to rinse the roots thoroughly to remove any dirt or debris.
Are there any health benefits to eating sprouts?
Yes, sprouts are packed with nutrients and offer a wide range of health benefits. They are a good source of vitamins, minerals, enzymes, and antioxidants. Sprouts are also low in calories and high in fiber, making them a healthy addition to any diet. Some studies have shown that sprouts may help to boost the immune system, improve digestion, and reduce the risk of chronic diseases. Growing sprouts at home ensures you get the freshest and most nutritious sprouts possible.
What are some creative ways to use sprouts in my meals?
Sprouts are incredibly versatile and can be used in a variety of dishes. Add them to salads, sandwiches, wraps, and soups for a boost of flavor and nutrition. Use them as a garnish for tacos, stir-fries, and omelets. Blend them into smoothies or juices for a nutrient-rich drink. You can even use sprouts to make sprout burgers or sprout salads. The possibilities are endless!
What kind of lighting do sprouts need?
Sprouts don’t need direct sunlight, which can actually harm them. Indirect light is best. A spot on your kitchen counter away from direct sunlight is ideal. Once the sprouts have germinated and started to develop leaves, they can benefit from a little more light to encourage chlorophyll production, which will enhance their color and nutritional value. However, avoid exposing them to intense sunlight, as this can cause them to dry out and become bitter.
Is it safe to eat sprouts if I am pregnant or have a compromised immune system?
While sprouts are generally safe to eat, individuals who are pregnant, have a compromised immune system, or are elderly should exercise caution. Sprouts can sometimes harbor bacteria, such as Salmonella or E. coli, which can cause foodborne illness. To minimize the risk, purchase sprouts from a reputable source, rinse them thoroughly before eating, and cook them lightly before consuming. Alternatively, consider growing your own sprouts at home, where you have more control over the growing conditions and can ensure proper hygiene. If you have any concerns, consult with your doctor or a registered dietitian.
Leave a Comment