
Growing Sweet Potatoes at Home might seem daunting, but trust me, it’s an incredibly rewarding experience! Imagine harvesting your own vibrant, sweet, and nutritious potatoes right from your backyard. Forget those bland, store-bought spuds – we’re talking about homegrown goodness bursting with flavor!
Sweet potatoes have a rich history, dating back thousands of years in Central and South America. They were a staple food for ancient civilizations and eventually made their way across the globe, becoming a beloved ingredient in countless cuisines. Today, they’re celebrated for their health benefits and delicious taste.
But why should you bother growing sweet potatoes at home? Well, for starters, you’ll have complete control over what goes into your food. No pesticides, no questionable farming practices – just pure, organic sweetness. Plus, it’s a fantastic way to connect with nature, get some exercise, and impress your friends and family with your green thumb. I’m going to share some simple DIY tricks and hacks that will make growing sweet potatoes at home easier than you ever thought possible. Get ready to dig in and discover the joy of homegrown sweet potatoes!

Growing Sweet Potatoes at Home: A Beginner’s Guide
Okay, sweet potato lovers, gather ’round! I’m going to walk you through the surprisingly simple process of growing your own sweet potatoes right at home. Forget those grocery store prices; we’re going to have a bountiful harvest of these delicious and nutritious tubers. Trust me, there’s nothing quite like the taste of a sweet potato you’ve nurtured from sprout to supper.
What You’ll Need
Before we dive in, let’s make sure you have everything you need. This is a pretty low-cost project, which is always a win in my book!
* Sweet Potatoes: Obviously! Choose organic sweet potatoes if possible, as they are less likely to be treated with sprout inhibitors. You’ll need at least one, but I recommend starting with a few to increase your chances of success.
* Glass Jars or Containers: These will be used to sprout your sweet potatoes. Mason jars work great, but any container that can hold water and suspend the sweet potato will do.
* Toothpicks: These are crucial for suspending the sweet potato in the water.
* Potting Soil: A good quality potting mix is essential for healthy growth.
* Large Pots or Raised Garden Bed: Sweet potatoes need plenty of room to grow, so choose appropriately sized containers or prepare a garden bed.
* Water: For sprouting and watering your plants.
* Sunlight: Sweet potatoes thrive in full sun (at least 6-8 hours per day).
* Optional: Rooting Hormone: This can help speed up the rooting process, but it’s not strictly necessary.
* Optional: Compost or Aged Manure: To enrich the soil and provide extra nutrients.
Sprouting Your Sweet Potatoes (Creating Slips)
This is where the magic begins! We’re going to coax those sweet potatoes into producing “slips,” which are the leafy sprouts that will eventually become our sweet potato plants.
1. Prepare the Sweet Potatoes: Wash your sweet potatoes thoroughly to remove any dirt or debris.
2. Insert Toothpicks: Insert toothpicks around the middle of each sweet potato, spacing them evenly. These toothpicks will act as supports to suspend the sweet potato in the water. I usually use 4-6 toothpicks per potato.
3. Suspend in Water: Fill your glass jars or containers with water. Carefully place the sweet potatoes in the jars, using the toothpicks to suspend them so that the bottom half of the potato is submerged in water. The top half should remain above the water line.
4. Find a Sunny Spot: Place the jars in a warm, sunny location. A windowsill is ideal.
5. Change the Water Regularly: Change the water every few days to prevent it from becoming cloudy or stagnant. This will also help to keep the sweet potatoes healthy and encourage sprouting.
6. Wait Patiently: This is the hardest part! It can take several weeks for the sweet potatoes to sprout. Be patient and keep an eye on them. You should start to see roots emerging from the bottom of the potato and sprouts appearing on the top.
7. Harvesting the Slips: Once the slips are about 6-8 inches long, they’re ready to be harvested. Gently twist or cut them off the sweet potato. I prefer to twist them off, as it seems to cause less damage to the potato.
Rooting the Slips
Now that we have our slips, we need to encourage them to develop roots before we plant them in soil.
1. Prepare a Container of Water: Fill a clean container with fresh water.
2. Place Slips in Water: Place the harvested slips in the water, making sure that the bottom portion of the stem is submerged.
3. Optional: Use Rooting Hormone: If you’re using rooting hormone, dip the cut end of each slip into the hormone powder before placing it in the water. This can help to speed up the rooting process.
4. Find a Sunny Spot: Place the container in a warm, sunny location.
5. Change the Water Regularly: Change the water every few days to prevent it from becoming cloudy or stagnant.
6. Wait for Roots to Develop: It should take about a week or two for the slips to develop roots. You’ll know they’re ready to plant when the roots are about 1-2 inches long.
Planting Your Sweet Potato Slips
Alright, we’re almost there! Now it’s time to get those rooted slips into the soil where they can really thrive.
1. Prepare the Soil: Sweet potatoes prefer well-drained soil that is rich in organic matter. Amend your potting soil with compost or aged manure to improve its fertility and drainage. If you’re planting in a raised garden bed, make sure the soil is loose and well-tilled.
2. Choose Your Planting Location: Sweet potatoes need plenty of sunlight, so choose a location that receives at least 6-8 hours of direct sunlight per day.
3. Dig Holes: Dig holes that are about 4-6 inches deep and spaced about 12 inches apart. If you’re planting in rows, space the rows about 3 feet apart.
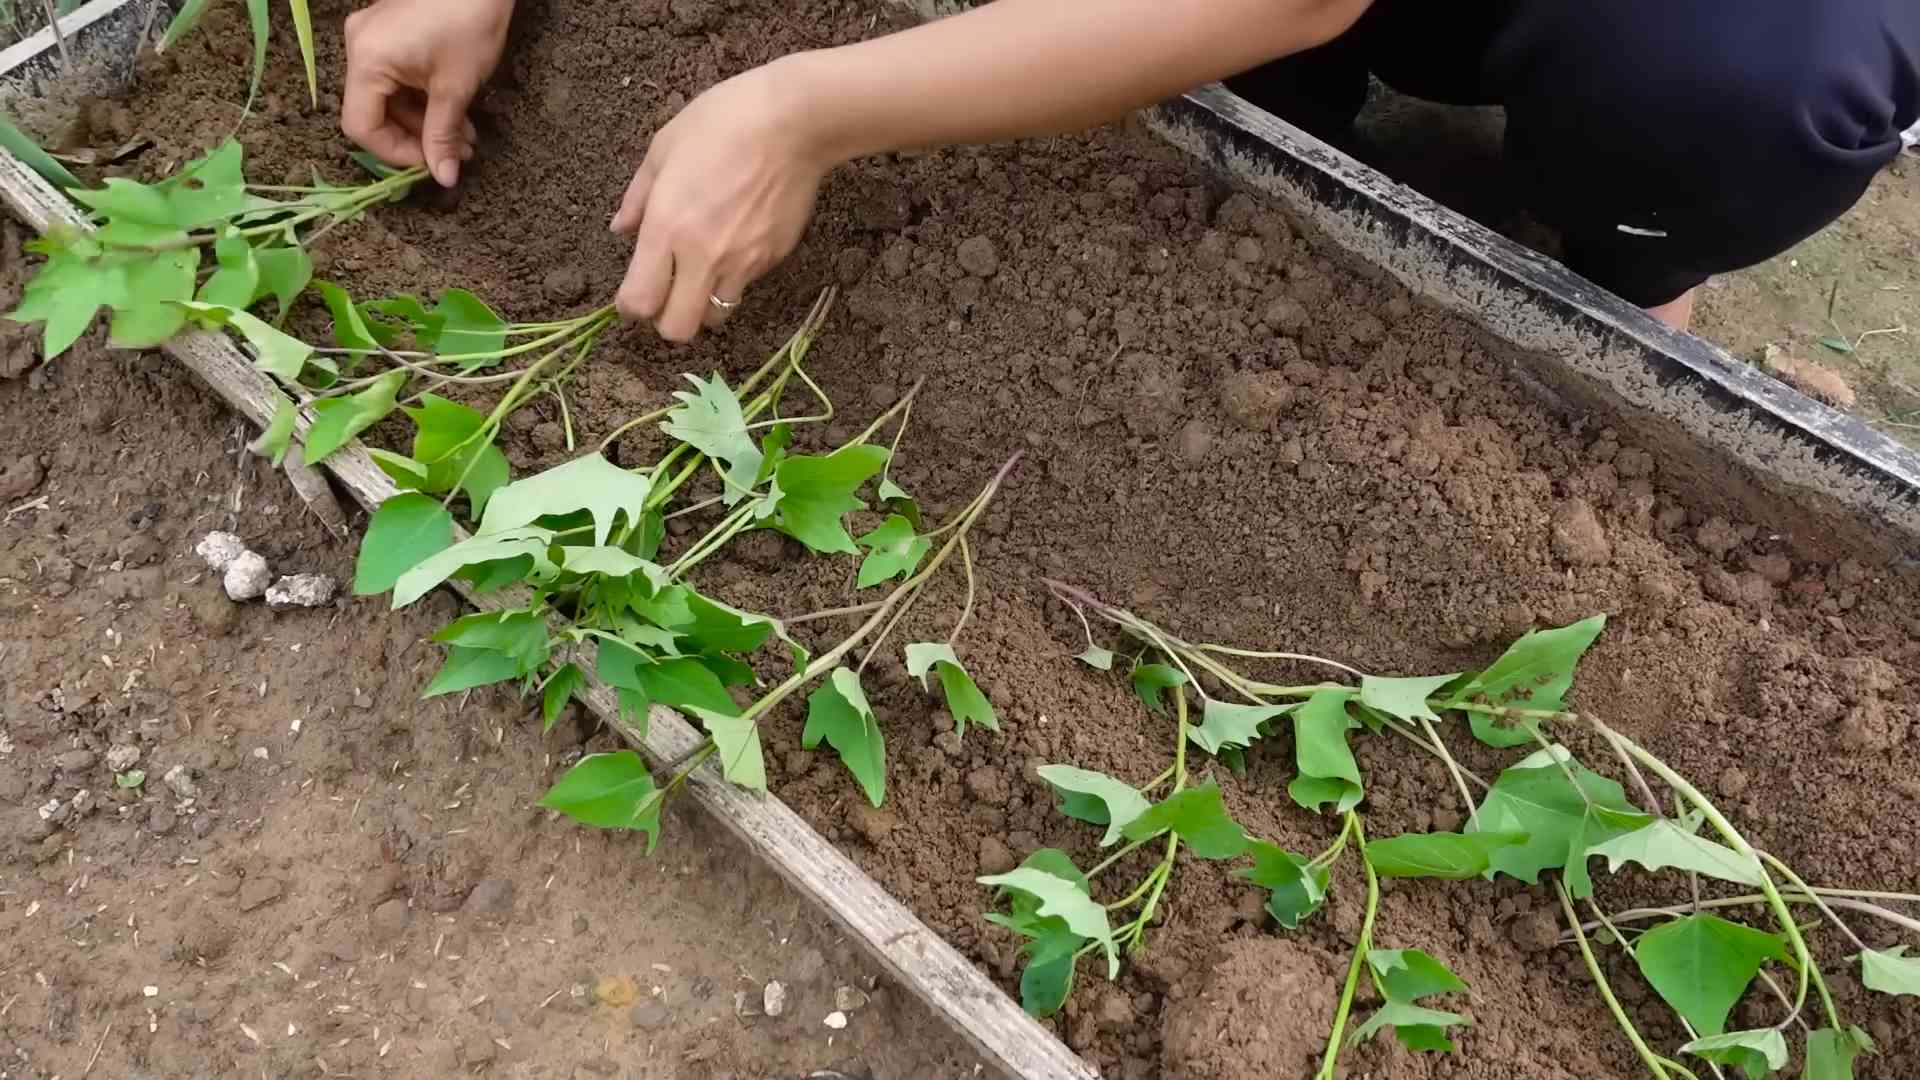
4. Plant the Slips: Carefully remove the rooted slips from the water and plant them in the holes. Make sure to bury the roots and the bottom portion of the stem.
5. Water Thoroughly: Water the newly planted slips thoroughly to help them settle in.
6. Mulch (Optional): Mulching around the plants can help to retain moisture, suppress weeds, and regulate soil temperature. I like to use straw or shredded leaves as mulch.
Caring for Your Sweet Potato Plants
Now that your sweet potato plants are in the ground, it’s important to provide them with the care they need to grow and produce a bountiful harvest.
1. Water Regularly: Sweet potatoes need consistent moisture, especially during the first few weeks after planting. Water deeply whenever the soil feels dry to the touch.
2. Fertilize (Optional): If your soil is poor, you may need to fertilize your sweet potato plants. Use a balanced fertilizer or a fertilizer that is specifically formulated for root crops. Follow the instructions on the fertilizer package. I usually side-dress with a little compost tea every few weeks.
3. Weed Regularly: Keep the area around your sweet potato plants free of weeds. Weeds can compete with the plants for nutrients and water.
4. Control Pests and Diseases: Sweet potatoes are generally resistant to pests and diseases, but it’s still important to keep an eye out for any problems. Common pests include aphids, flea beetles, and sweet potato weevils. Common diseases include fungal leaf spots and stem rot. If you notice any problems, take action to control them promptly. I prefer to use organic pest control methods whenever possible.
5. Vine Management: Sweet potato vines can grow quite long and sprawling. You can prune them back if they start to take over your garden, but be careful not to remove too much foliage, as this can reduce your yield. Some people train the vines to grow up a trellis or fence.
Harvesting Your Sweet Potatoes
The moment we’ve all been waiting for! Harvesting your sweet potatoes is the most rewarding part of the process.
1. Timing is Key: Sweet potatoes are typically ready to harvest about 90-120 days after planting. The exact timing will depend on the variety of sweet potato you’re growing and the growing conditions in your area. A good indicator is when the vines start to yellow and die back.
2. Choose a Dry Day: Harvest your sweet potatoes on a dry day to prevent them from rotting.
3. Dig Carefully: Use a garden fork or shovel to carefully dig around the plants, being careful not to damage the sweet potatoes. Start digging a foot or so away from the base of the plant.
4. Lift the Plants: Gently lift the plants from the ground, using the fork or shovel to loosen the soil around the sweet potatoes.
5. Brush Off the Dirt: Brush off any excess dirt from the sweet potatoes.
6. Curing Your Sweet Potatoes: This is a crucial step for improving the flavor and storage life of your sweet potatoes. Cure them in a warm, humid place (80-85°F and 85-90% humidity) for about a week. A greenhouse or a warm, sunny room with a humidifier works well.
7. Store Your Sweet Potatoes: After curing, store your sweet potatoes in a cool, dry, and dark place (55-60°F). They should keep for several months.
And there you have it! You’ve successfully grown your own sweet potatoes. Now go enjoy the fruits (or rather, tubers) of your labor! I hope this guide has been helpful. Happy gardening!
Conclusion
So, there you have it! Growing sweet potatoes at home isn’t just a gardening project; it’s a gateway to fresher, more flavorful produce and a deeper connection with the food you eat. We’ve walked through the entire process, from sprouting slips to harvesting your bountiful crop. The beauty of this DIY trick lies in its simplicity and accessibility. You don’t need acres of land or a green thumb of mythical proportions. With a little patience, some sunlight, and a few basic supplies, you can cultivate your own sweet potato patch, right in your backyard or even on your balcony.
Why is this a must-try? Beyond the satisfaction of growing your own food, home-grown sweet potatoes offer a superior taste and texture compared to store-bought varieties. They’re fresher, haven’t traveled long distances, and are free from the waxes and preservatives often used to extend shelf life. Plus, you have complete control over the growing process, ensuring your sweet potatoes are organic and free from harmful chemicals.
But the fun doesn’t stop there! Feel free to experiment with different varieties of sweet potatoes. Beauregard, with its vibrant orange flesh, is a classic choice, but don’t be afraid to try Japanese sweet potatoes with their purple skin and creamy white flesh, or even the Covington variety, known for its disease resistance. You can also explore different growing methods. While we focused on traditional in-ground planting, sweet potatoes thrive in raised beds and containers as well. Consider adding companion plants like beans or peas to enrich the soil and deter pests.
And speaking of pests, keep a watchful eye on your plants and address any issues promptly. Regularly check for signs of damage and take appropriate action to protect your precious sweet potato crop. Remember, a little vigilance goes a long way in ensuring a successful harvest.
Ultimately, growing sweet potatoes at home is a rewarding experience that connects you to the natural world and provides you with delicious, nutritious food. It’s a sustainable practice that reduces your carbon footprint and promotes a healthier lifestyle. So, ditch the grocery store sweet potatoes and embrace the joy of growing your own.
We wholeheartedly encourage you to give this DIY trick a try. It’s easier than you think, and the rewards are well worth the effort. Once you’ve harvested your first batch of home-grown sweet potatoes, we’d love to hear about your experience! Share your photos, tips, and stories in the comments below. Let’s create a community of sweet potato enthusiasts and inspire others to embark on this fulfilling gardening journey. Let us know what challenges you faced and what worked best for you. Did you try a unique variety? Did you discover a secret to maximizing your yield? Your insights could be invaluable to fellow gardeners.
Don’t forget to explore different ways to enjoy your home-grown sweet potatoes. From classic sweet potato fries and pies to savory stews and salads, the possibilities are endless. Get creative in the kitchen and discover new and exciting ways to savor the flavor of your hard-earned harvest.
So, what are you waiting for? Grab your gardening gloves, gather your supplies, and get ready to experience the joy of growing your own sweet potatoes. It’s a journey you won’t regret!
Frequently Asked Questions (FAQ)
What is the best time of year to start growing sweet potatoes?
The ideal time to start growing sweet potatoes is in late spring or early summer, after the last frost. Sweet potatoes are warm-weather crops and require soil temperatures of at least 65°F (18°C) for optimal growth. Starting them too early in colder temperatures can stunt their growth or even kill them. If you live in a region with a shorter growing season, you can start your sweet potato slips indoors 6-8 weeks before the last expected frost to give them a head start.
How much sunlight do sweet potatoes need?
Sweet potatoes need at least 6-8 hours of direct sunlight per day to thrive. Choose a planting location that receives plenty of sunlight throughout the day. If you’re growing them in containers, make sure to place them in a sunny spot on your patio or balcony. Insufficient sunlight can result in smaller yields and less flavorful sweet potatoes.
What kind of soil is best for growing sweet potatoes?
Sweet potatoes prefer well-drained, sandy loam soil with a pH between 6.0 and 6.5. Heavy clay soil can hinder root development and lead to misshapen sweet potatoes. If your soil is heavy or compacted, amend it with compost, sand, or other organic matter to improve drainage and aeration. Raised beds are also a great option for growing sweet potatoes in areas with poor soil.
How often should I water my sweet potato plants?
Water your sweet potato plants regularly, especially during dry periods. Aim to keep the soil consistently moist but not waterlogged. Overwatering can lead to root rot and other problems. Water deeply and less frequently, rather than shallowly and more often. A good rule of thumb is to water when the top inch of soil feels dry to the touch. During hot weather, you may need to water more frequently.
How do I know when my sweet potatoes are ready to harvest?
Sweet potatoes are typically ready to harvest about 90-120 days after planting. The leaves will start to turn yellow and the vines will begin to die back. You can also gently dig around the base of a plant to check the size of the sweet potatoes. They should be at least a few inches long and wide. Harvest before the first frost, as frost can damage the sweet potatoes and reduce their storage life.
How do I cure sweet potatoes after harvesting?
Curing sweet potatoes is essential for improving their flavor and storage life. After harvesting, gently brush off any excess soil and allow the sweet potatoes to dry in a warm, humid place (80-85°F or 27-29°C) for 7-10 days. This process allows the skins to harden and heal any minor cuts or bruises. After curing, store the sweet potatoes in a cool, dry, and well-ventilated place (55-60°F or 13-16°C) for several months.
Can I grow sweet potatoes in containers?
Yes, you can definitely grow sweet potatoes in containers! Choose a large container that is at least 12 inches deep and wide. Fill it with well-draining potting mix and plant your sweet potato slips. Make sure the container receives plenty of sunlight and water regularly. Container-grown sweet potatoes may not produce as large of a yield as those grown in the ground, but they can still provide you with a delicious harvest.
What are some common pests and diseases that affect sweet potatoes?
Some common pests that can affect sweet potatoes include sweet potato weevils, flea beetles, and aphids. Diseases include stem rot, black rot, and scurf. Regularly inspect your plants for signs of pests or diseases and take appropriate action to control them. Organic pest control methods, such as neem oil or insecticidal soap, can be effective for managing pests. Choose disease-resistant varieties of sweet potatoes to minimize the risk of disease.
Can I eat the sweet potato leaves?
Yes, sweet potato leaves are edible and nutritious! They can be cooked and eaten like spinach or other leafy greens. Harvest young, tender leaves for the best flavor. Sweet potato leaves are a good source of vitamins A and C, as well as fiber and antioxidants.
How do I store sweet potatoes long-term?
Proper storage is crucial for extending the shelf life of your sweet potatoes. After curing, store them in a cool, dry, and well-ventilated place (55-60°F or 13-16°C). Avoid storing them in the refrigerator, as this can cause them to develop a hard core and lose their flavor. Store them in a single layer in a cardboard box or basket, and check them periodically for signs of spoilage. Properly stored sweet potatoes can last for several months.

Leave a Comment