
Growing Watermelons at Home might seem like a daunting task reserved for seasoned farmers, but I’m here to tell you it’s absolutely achievable, even in your own backyard! Forget those grocery store watermelons that lack that homegrown sweetness; imagine biting into a juicy, crimson watermelon you nurtured from seed to fruit. Sounds amazing, right?
Watermelons have a rich history, dating back thousands of years to Africa, where they were prized for their hydrating properties in arid climates. Over time, their cultivation spread across the globe, becoming a symbol of summer and refreshment in countless cultures. Today, the joy of harvesting your own watermelon connects us to this long tradition.
But why bother with the effort? Well, for starters, the taste is unparalleled. Homegrown watermelons are bursting with flavor, ripened to perfection under the sun. Plus, you control everything – from the soil to the watering schedule – ensuring a healthy and organic treat for you and your family. And let’s be honest, there’s a certain satisfaction that comes from nurturing something from seed to table. In this article, I’ll share my favorite DIY tricks and hacks for growing watermelons at home, even if you have limited space or experience. Get ready to impress your friends and family with your watermelon-growing prowess!
Growing Watermelons at Home: A Beginner’s Guide
Okay, so you want to grow watermelons? Awesome! It’s totally doable, even if you don’t have a huge farm. I’ve grown some pretty impressive watermelons in my backyard, and I’m going to share all my secrets with you. Get ready for some sweet, juicy success!
Choosing the Right Watermelon Variety
First things first, you need to pick the right watermelon variety. Not all watermelons are created equal, and some are definitely better suited for home gardens than others. Consider your climate, space, and personal preferences.
* **Climate:** If you live in a cooler climate, opt for shorter-season varieties like ‘Sugar Baby’ or ‘Bush Sugar Baby’. These mature faster and are more likely to ripen before the first frost. If you’re in a warmer climate, you have more options!
* **Space:** Watermelons need a lot of space to sprawl. If you’re short on space, consider bush varieties like ‘Bush Sugar Baby’ or ‘Golden Midget’. These are more compact and can even be grown in large containers. Vining varieties like ‘Crimson Sweet’ or ‘Jubilee’ will need plenty of room to roam.
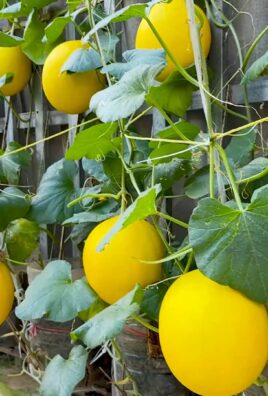
* **Taste:** Do you prefer red or yellow flesh? Seeded or seedless? Think about what kind of watermelon you enjoy eating the most. ‘Crimson Sweet’ is a classic red-fleshed variety with excellent flavor. ‘Yellow Doll’ is a popular yellow-fleshed option. ‘Triploid’ varieties are seedless, but they require a seeded pollinator variety nearby to produce fruit.
Preparing Your Garden Bed
Watermelons are heavy feeders, so preparing your garden bed properly is crucial. They need well-drained soil that’s rich in organic matter.
* **Sunlight:** Watermelons need at least 6-8 hours of direct sunlight per day. Choose a location in your garden that gets plenty of sun.
* **Soil:** Watermelons prefer sandy loam soil with a pH between 6.0 and 6.8. If your soil is heavy clay, amend it with compost, aged manure, or peat moss to improve drainage.
* **Nutrients:** Watermelons need plenty of nutrients to grow and produce fruit. Before planting, amend your soil with a generous amount of compost and a balanced fertilizer. I like to use a fertilizer with an NPK ratio of 10-10-10.
Starting Watermelon Seeds
You can either start watermelon seeds indoors or direct sow them in your garden. Starting them indoors gives you a head start, especially if you live in a cooler climate.
* **Starting Indoors:** Start seeds 4-6 weeks before the last expected frost. Sow seeds in peat pots or biodegradable containers filled with seed-starting mix. Keep the soil moist and warm (around 80-85°F). Once the seedlings have developed a few true leaves, you can transplant them into your garden.
* **Direct Sowing:** Direct sow seeds after the last expected frost when the soil temperature has warmed to at least 70°F. Sow seeds 1 inch deep and 2-3 feet apart. Water thoroughly.
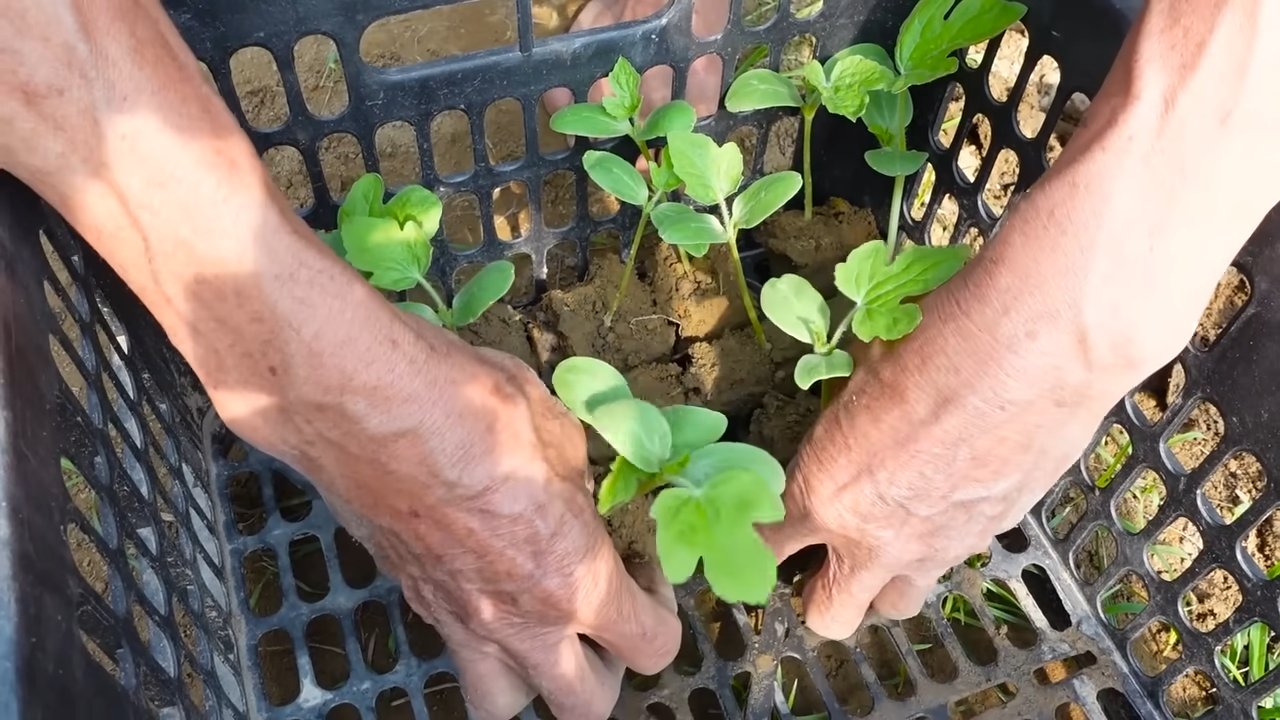
Planting Watermelon Seedlings
Whether you started your seeds indoors or bought seedlings from a nursery, planting them properly is essential for their success.
1. **Harden Off Seedlings:** If you started your seeds indoors, you’ll need to harden them off before transplanting them into your garden. This means gradually exposing them to outdoor conditions over a period of 7-10 days. Start by placing them in a sheltered location for a few hours each day, gradually increasing the amount of time they spend outdoors.
2. **Prepare Planting Holes:** Dig holes that are slightly larger than the root balls of your seedlings. Space the holes 2-3 feet apart for bush varieties and 4-6 feet apart for vining varieties.
3. **Plant Seedlings:** Gently remove the seedlings from their containers and place them in the planting holes. Make sure the top of the root ball is level with the surrounding soil.
4. **Backfill and Water:** Backfill the holes with soil and gently firm the soil around the seedlings. Water thoroughly.
5. **Mulch:** Apply a layer of mulch around the seedlings to help retain moisture, suppress weeds, and regulate soil temperature. I like to use straw or shredded leaves.
Caring for Your Watermelon Plants
Once your watermelon plants are in the ground, you’ll need to provide them with proper care to ensure they thrive.
* **Watering:** Watermelons need consistent moisture, especially during fruit development. Water deeply and regularly, especially during hot, dry weather. Aim for about 1-2 inches of water per week. Avoid overhead watering, as this can promote fungal diseases. Drip irrigation is a great option.
* **Fertilizing:** Watermelons are heavy feeders, so you’ll need to fertilize them regularly. After the plants start to vine, fertilize them with a fertilizer that’s higher in phosphorus and potassium. This will help promote fruit development. I like to use a fertilizer with an NPK ratio of 5-10-10.
* **Weeding:** Keep your garden bed free of weeds, as they can compete with your watermelon plants for nutrients and water. Hand-pull weeds regularly or use a hoe to cultivate the soil.
* **Pruning:** Pruning watermelons isn’t strictly necessary, but it can help improve air circulation and reduce the risk of fungal diseases. You can prune away any dead or diseased leaves or vines.
* **Pollination:** Watermelons need to be pollinated in order to produce fruit. Bees are the primary pollinators, so encourage them to visit your garden by planting flowers that attract them. If you’re not seeing a lot of bees, you can hand-pollinate your watermelon flowers. To do this, use a small paintbrush to transfer pollen from the male flowers to the female flowers. Female flowers have a small fruit at the base of the flower, while male flowers do not.
Protecting Your Watermelons from Pests and Diseases
Watermelons are susceptible to a variety of pests and diseases. Here are some common problems and how to deal with them:
* **Cucumber Beetles:** These small, yellow beetles can damage watermelon leaves and transmit diseases. Control them with insecticides or by covering your plants with row covers.
* **Squash Bugs:** These brown bugs can suck the sap from watermelon leaves, causing them to wilt and die. Control them by hand-picking them off your plants or by using insecticides.
* **Aphids:** These small, sap-sucking insects can weaken watermelon plants. Control them by spraying them with insecticidal soap or by releasing beneficial insects like ladybugs.
* **Powdery Mildew:** This fungal disease causes a white, powdery coating on watermelon leaves. Prevent it by providing good air circulation and avoiding overhead watering. Treat it with fungicides if necessary.
* **Anthracnose:** This fungal disease causes dark, sunken lesions on watermelon leaves and fruit. Prevent it by rotating your crops and avoiding overhead watering. Treat it with fungicides if necessary.
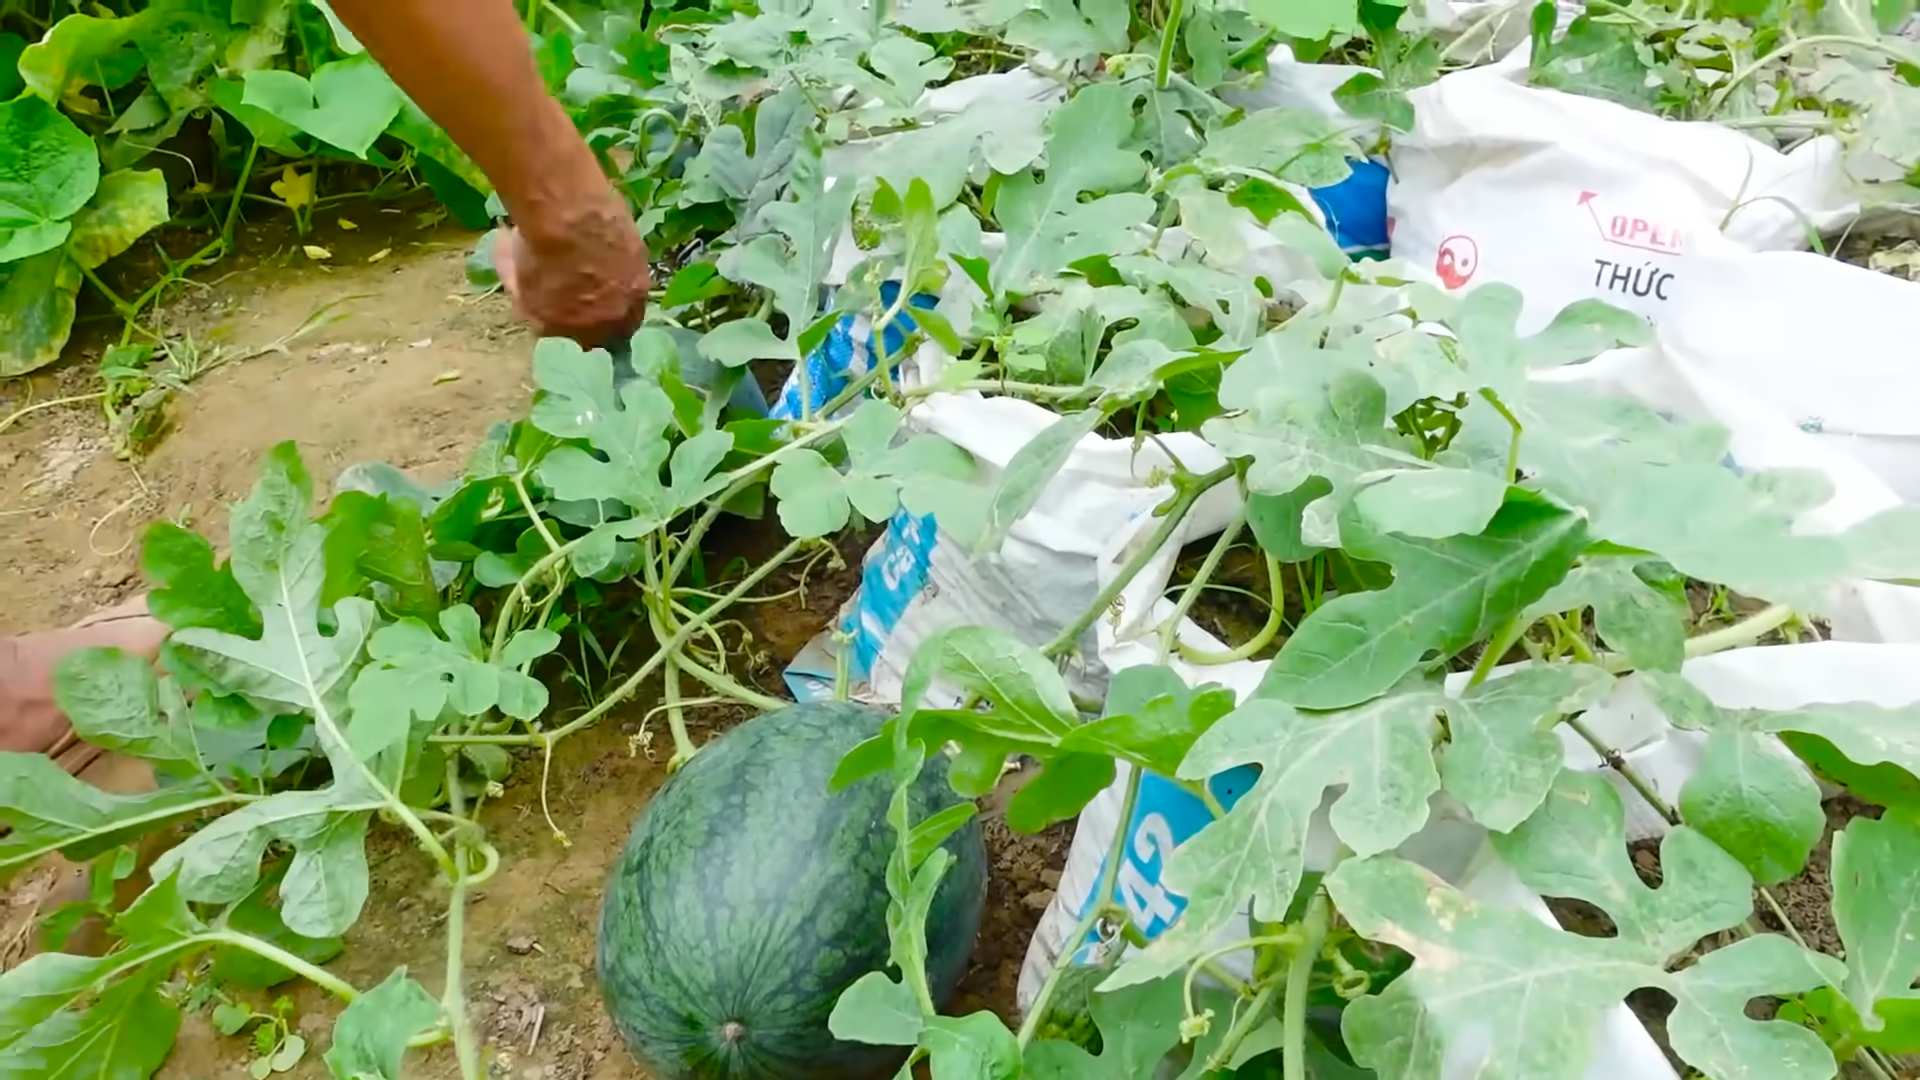
Harvesting Your Watermelons
Knowing when to harvest your watermelons is key to getting that perfect, juicy flavor. It’s not always easy to tell when a watermelon is ripe, but here are a few things to look for:
1. **The Tendril:** The tendril closest to the fruit should be brown and dry.
2. **The Ground Spot:** The spot where the watermelon rests on the ground should be yellow or cream-colored.
3. **The Sound:** When you thump the watermelon, it should sound hollow.
4. **Days to Maturity:** Check the seed packet or plant tag for the number of days to maturity. This will give you a general idea of when your watermelons should be ripe.
Once you think your watermelon is ripe, carefully cut it from the vine with a sharp knife. Leave a few inches of stem attached.
Enjoying Your Homegrown Watermelons
Congratulations! You’ve successfully grown your own watermelons. Now it’s time to enjoy the fruits (or rather, the vegetables) of your labor.
* **Storage:** Store your watermelons in a cool, dry place. They’ll keep for several weeks.
* **Serving:** Watermelons are delicious on their own, but they can also be used in a variety of recipes. Try adding them to salads, smoothies, or even grilling them.
* **Seed Saving:** If you want to grow watermelons again next year, you can save the seeds from your ripe watermelons. Simply scoop out the seeds, rinse them, and let them dry completely. Store them in an airtight container in a cool, dry place.
Growing watermelons at home is a rewarding experience. With a little bit of planning and effort, you can enjoy fresh, juicy watermelons all summer long. Happy gardening!
Conclusion
So, there you have it! Growing watermelons at home, while it might seem daunting at first, is an incredibly rewarding experience. Imagine biting into a juicy, sweet watermelon that you nurtured from a tiny seed – the taste is simply unmatched. Forget those bland, store-bought watermelons that lack flavor; with a little effort and these simple DIY tricks, you can cultivate watermelons bursting with sweetness and freshness right in your own backyard.
This isn’t just about saving money; it’s about connecting with nature, understanding the growing process, and enjoying the fruits (literally!) of your labor. The satisfaction of harvesting your own watermelon is truly unparalleled. Plus, you’ll know exactly what went into growing it, ensuring a healthy and delicious treat for you and your family.
We’ve covered everything from seed starting and soil preparation to pollination and harvesting. Remember, patience is key. Watermelons take time to mature, but the wait is well worth it. Don’t be discouraged if your first attempt isn’t perfect. Gardening is a learning process, and each season brings new opportunities to refine your skills.
Consider these variations to personalize your watermelon growing experience:
* Try different varieties: Explore heirloom watermelons like ‘Moon and Stars’ or ‘Black Diamond’ for unique flavors and appearances. Experiment with smaller, personal-sized watermelons like ‘Sugar Baby’ if you have limited space.
* Vertical gardening: If you’re short on ground space, train your watermelon vines to grow vertically on a trellis. This not only saves space but also improves air circulation and reduces the risk of fungal diseases.
* Companion planting: Plant beneficial companion plants like marigolds, nasturtiums, or basil near your watermelons to deter pests and attract pollinators.
* Watermelon infused water: Once you have harvested your watermelons, use them to create refreshing watermelon infused water. Simply cube the watermelon and add it to a pitcher of water with some mint leaves and lemon slices.
We’ve shared our best tips and tricks for successful watermelon cultivation, but the real magic happens when you get your hands dirty and start experimenting. Don’t be afraid to try new things and adapt our suggestions to suit your specific climate and growing conditions.
We are confident that with these tips, you will be able to grow delicious and juicy watermelons at home.
So, what are you waiting for? Grab some seeds, prepare your garden, and embark on your watermelon-growing adventure today! We’re eager to hear about your experiences. Share your photos, tips, and challenges in the comments below. Let’s build a community of watermelon enthusiasts and learn from each other. Happy growing!
Frequently Asked Questions (FAQs)
Q: How long does it take to grow a watermelon from seed?
A: Growing watermelons from seed typically takes between 70 and 90 days, depending on the variety and growing conditions. Some smaller, personal-sized watermelons may mature slightly faster, while larger varieties may take longer. Keep a close eye on your watermelons and monitor their size and color to determine when they are ready to harvest.
Q: What kind of soil is best for growing watermelons?
A: Watermelons thrive in well-drained, sandy loam soil that is rich in organic matter. The soil should have a pH between 6.0 and 6.8. Before planting, amend your soil with compost or well-rotted manure to improve its fertility and drainage. Avoid heavy clay soils, as they can retain too much moisture and lead to root rot.
Q: How much sun do watermelons need?
A: Watermelons require at least 6-8 hours of direct sunlight per day to grow and produce sweet, juicy fruit. Choose a planting location that receives full sun throughout the day. If you live in a particularly hot climate, some afternoon shade may be beneficial to prevent the watermelons from overheating.
Q: How often should I water my watermelons?
A: Watermelons need consistent moisture, especially during fruit development. Water deeply and regularly, aiming for about 1-2 inches of water per week. Avoid overhead watering, as this can promote fungal diseases. Instead, water at the base of the plant or use a soaker hose. Reduce watering as the watermelons approach maturity to concentrate the sugars and enhance their sweetness.
Q: How do I know when my watermelon is ripe?
A: Determining when a watermelon is ripe can be tricky, but here are a few indicators to look for:
* The tendril closest to the fruit turns brown and dries up.
* The underside of the watermelon (where it rests on the ground) turns from white to a creamy yellow color.
* The watermelon sounds dull and hollow when you thump it.
* The skin becomes slightly dull and less shiny.
It may take some practice to master the art of watermelon ripeness detection, but with experience, you’ll be able to tell when your watermelons are perfectly ripe.
Q: What are some common pests and diseases that affect watermelons?
A: Watermelons can be susceptible to various pests and diseases, including:
* Aphids: Small, sap-sucking insects that can weaken plants.
* Cucumber beetles: Beetles that feed on leaves and transmit diseases.
* Squash vine borers: Larvae that bore into the stems of plants.
* Powdery mildew: A fungal disease that causes a white, powdery coating on leaves.
* Anthracnose: A fungal disease that causes dark, sunken lesions on leaves and fruit.
To prevent pest and disease problems, practice good garden hygiene, such as removing plant debris and weeds. Use organic pest control methods, such as insecticidal soap or neem oil, to control pests. Choose disease-resistant watermelon varieties and provide good air circulation to minimize the risk of fungal diseases.
Q: Can I grow watermelons in containers?
A: Yes, you can grow watermelons in containers, but you’ll need a large container (at least 20 gallons) and a dwarf or bush variety of watermelon. Ensure the container has good drainage and use a high-quality potting mix. Water container-grown watermelons more frequently than those grown in the ground, as the soil in containers tends to dry out faster. You may also need to provide support for the vines as they grow.
Q: How do I pollinate my watermelons if there are no bees?
A: Watermelons require pollination to set fruit. If you don’t see many bees in your garden, you may need to hand-pollinate your watermelons. To do this, use a small paintbrush to transfer pollen from the male flowers to the female flowers. Male flowers have a long, thin stem, while female flowers have a small, immature watermelon at the base. Pollinate your watermelons in the morning, when the pollen is most viable.
Q: Can I save seeds from my watermelons to plant next year?
A: Yes, you can save seeds from your watermelons, but keep in mind that hybrid watermelons may not produce true-to-type offspring. If you want to save seeds, choose an open-pollinated or heirloom watermelon variety. To save seeds, scoop them out of the watermelon, rinse them thoroughly, and spread them out on a paper towel to dry completely. Store the dried seeds in an airtight container in a cool, dark place.

Leave a Comment