
Hanging strawberries DIY projects are not just a fun weekend activity; they’re a gateway to fresh, delicious berries right outside your door! Imagine plucking ripe, juicy strawberries, still warm from the sun, for your morning cereal or a refreshing summer salad. Sounds idyllic, right? Well, it’s more achievable than you think, and I’m here to show you how.
The concept of vertical gardening, including hanging baskets, has been around for centuries. From the Hanging Gardens of Babylon (one of the Seven Wonders of the Ancient World!) to the more practical use of window boxes in European cities, people have always sought ways to bring greenery into limited spaces. Today, with smaller living spaces and a growing desire for locally sourced food, the appeal of hanging strawberries DIY solutions is stronger than ever.
But why should *you* embark on this DIY adventure? Let’s face it, store-bought strawberries can be expensive and often lack the vibrant flavor of homegrown ones. Plus, growing your own strawberries in hanging baskets offers several advantages: it saves space, protects your precious berries from pests like slugs and snails, and elevates them away from soilborne diseases. It’s a win-win-win! So, grab your gardening gloves, and let’s get started on creating your own beautiful and bountiful hanging strawberry garden. I promise, you’ll be amazed at how easy and rewarding it is!
DIY Hanging Strawberry Planter: A Sweet Treat for Your Balcony or Garden
Hey there, fellow gardening enthusiasts! I’m so excited to share this project with you. If you’re like me, you love fresh strawberries, but maybe you’re short on garden space. Or perhaps you just want to add a touch of whimsy to your balcony. Well, look no further! This DIY hanging strawberry planter is the perfect solution. It’s surprisingly easy to make, looks fantastic, and provides you with a delicious harvest right at your fingertips. Let’s get started!
What You’ll Need:
Before we dive in, let’s gather our supplies. This is what I used, but feel free to adapt it based on what you have available.
* A large plastic bucket or container: Think about the size you want. A 5-gallon bucket works great, but you can go bigger or smaller depending on your space and how many plants you want. Make sure it’s sturdy!
* Potting soil: You’ll need a good quality potting mix. I prefer one that’s specifically formulated for fruits and vegetables, but a general-purpose mix will also work.
* Strawberry plants: Choose everbearing varieties for a continuous harvest throughout the season. I usually get around 6-8 plants for a 5-gallon bucket.
* Drill with various sized drill bits: This is crucial for creating drainage holes and planting holes.
* Utility knife or sharp scissors: For making larger planting holes.
* Landscape fabric (optional): This helps prevent soil from washing out of the planting holes.
* Measuring tape or ruler: For accurate hole placement.
* Pencil or marker: To mark where you’ll be drilling.
* Strong rope or chain: For hanging your planter. Make sure it’s strong enough to support the weight of the bucket, soil, and plants.
* Gloves: To protect your hands.
* Watering can or hose: For watering your strawberries.
* Safety glasses: Always a good idea when drilling!
Preparing the Bucket: Drainage and Planting Holes
This is a crucial step, so take your time and be precise. Proper drainage is essential for healthy strawberry plants.
1. Drill Drainage Holes: Start by drilling drainage holes in the bottom of the bucket. I recommend at least 6-8 holes, evenly spaced. Use a drill bit that’s about 1/4 inch in diameter. You don’t want the holes to be too big, or the soil will wash out.
2. Mark Planting Holes: Now, let’s mark where you’ll be planting your strawberries. This is where the measuring tape and pencil come in handy. I like to stagger the holes in rows around the bucket.
* Bottom Row: Start about 4-6 inches from the bottom of the bucket. Mark evenly spaced points around the circumference. For a 5-gallon bucket, I usually mark about 4-5 holes in this row.
* Middle Row: Move up another 4-6 inches and mark another row of holes, staggering them between the holes in the bottom row. Again, aim for 4-5 holes.
* Top Row: If you have a tall bucket, you can add a third row, staggering the holes as before.
3. Drill Planting Holes: Now, carefully drill out the planting holes. This is where the utility knife or sharp scissors might come in handy. You want the holes to be large enough to easily insert the strawberry plants, but not so large that the soil falls out. I usually start with a smaller drill bit (around 1 inch) and then use the utility knife to carefully enlarge the holes as needed. Aim for holes that are about 2-3 inches in diameter.
4. (Optional) Line Planting Holes with Landscape Fabric: This step is optional, but I highly recommend it. Cut small squares of landscape fabric and carefully insert them into each planting hole, creating a little pocket. This will help prevent the soil from washing out when you water your plants.
Planting Your Strawberries
Now for the fun part! Let’s get those strawberry plants into their new home.
1. Add Potting Soil: Start by adding a layer of potting soil to the bottom of the bucket, filling it up to just below the bottom row of planting holes.
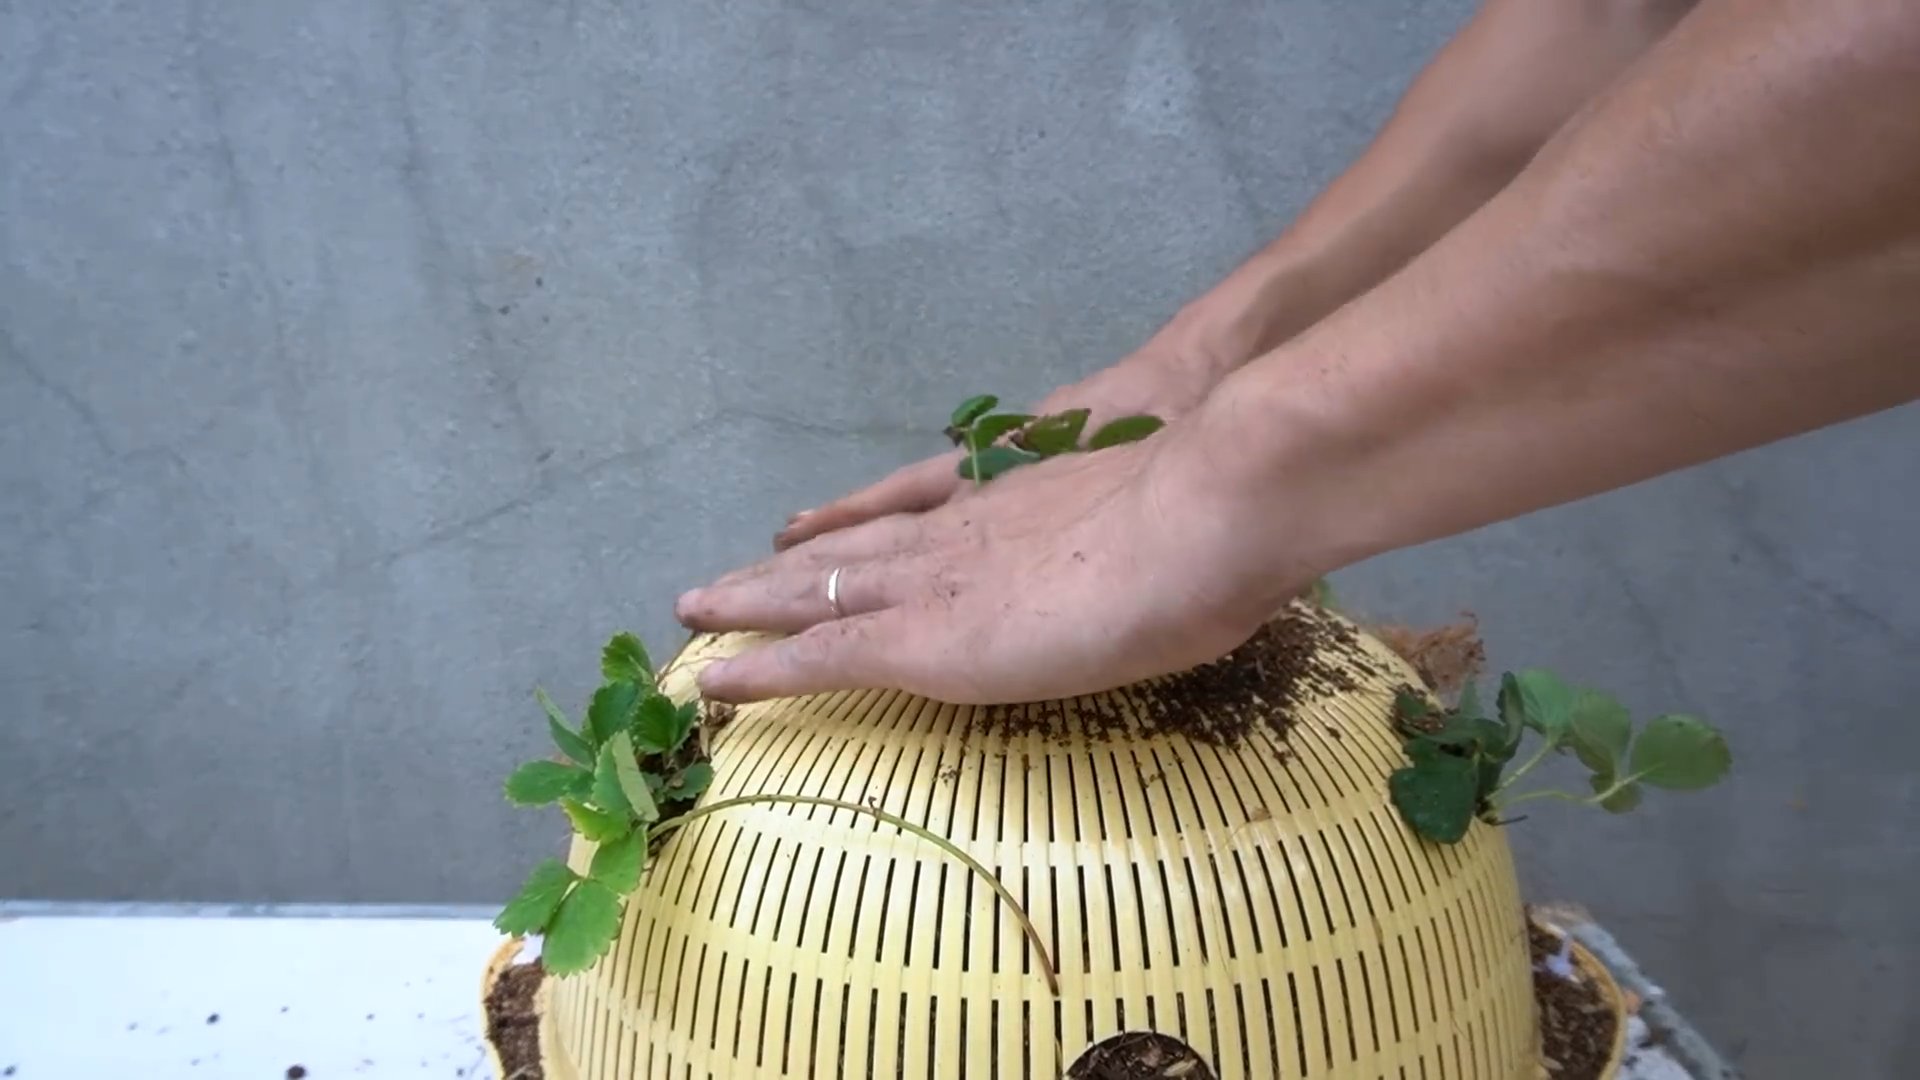
2. Plant the Bottom Row: Gently remove a strawberry plant from its container, being careful not to damage the roots. Loosen the roots slightly and carefully insert the plant into one of the bottom planting holes. Make sure the crown of the plant (where the stems meet the roots) is level with the edge of the hole. Add more potting soil around the plant to secure it in place. Repeat this process for all the planting holes in the bottom row.
3. Add More Potting Soil: Add another layer of potting soil, filling the bucket up to just below the middle row of planting holes.
4. Plant the Middle Row: Repeat the planting process for the middle row of planting holes.
5. Add More Potting Soil: If you have a third row of planting holes, add more potting soil and plant the top row as well.
6. Plant the Top: Finally, fill the rest of the bucket with potting soil, leaving a few inches of space at the top. Plant the remaining strawberry plants in the top of the bucket, spacing them evenly.
7. Water Thoroughly: Once all the plants are in place, water the planter thoroughly until water drains out of the drainage holes at the bottom. This will help settle the soil and ensure that the plants are well-hydrated.
Hanging Your Strawberry Planter
Almost there! Now it’s time to hang your beautiful strawberry planter.
1. Drill Hanging Holes: Drill three or four holes evenly spaced around the top rim of the bucket. These holes should be large enough to accommodate your rope or chain.
2. Attach Rope or Chain: Cut three or four equal lengths of rope or chain. Thread each length through one of the hanging holes and tie a secure knot or use a chain connector to attach it to the bucket.
3. Gather the Ropes or Chains: Gather the loose ends of the ropes or chains and tie them together at the desired hanging height. Make sure the knot is strong and secure. You can also use a metal ring or hook to connect the ropes or chains.
4. Hang Your Planter: Find a sturdy place to hang your strawberry planter. A strong tree branch, a porch railing, or a hanging basket bracket will all work well. Make sure the location receives at least 6-8 hours of sunlight per day.
Caring for Your Hanging Strawberry Planter
Now that your planter is hanging, it’s important to provide proper care to ensure a bountiful harvest.
* Watering: Strawberries need consistent moisture, especially when they’re actively growing and fruiting. Water your planter regularly, especially during hot, dry weather. Check the soil moisture by sticking your finger into the soil. If the top inch feels dry, it’s time to water. Be careful not to overwater, as this can lead to root rot.
* Fertilizing: Feed your strawberry plants with a balanced fertilizer every 2-3 weeks. I like to use a liquid fertilizer diluted according to the package instructions.
* Sunlight: Strawberries need at least 6-8 hours of sunlight per day to thrive. Make sure your planter is located in a sunny spot.
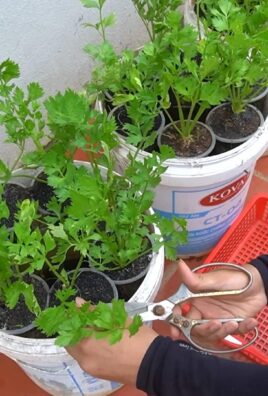
* Pruning: Remove any dead or yellowing leaves to keep your plants healthy and productive. You can also pinch off runners (the long stems that the plants send out) to encourage the plants to focus their energy on producing fruit.
* Pest Control: Keep an eye out for pests such as aphids, slugs, and snails. If you notice any pests, treat them with an appropriate insecticide or organic pest control method.
* Winter Care: In colder climates, you’ll need to protect your strawberry plants from freezing temperatures. You can move the planter indoors to a sunny location or wrap it in burlap or blankets to insulate it.
Enjoy Your Harvest!
With a little care and attention, your hanging strawberry planter will reward you with a delicious harvest of fresh, juicy strawberries all season long. Enjoy them straight from the plant, in smoothies, desserts, or however you like! I hope you found this guide helpful. Happy gardening!
Conclusion
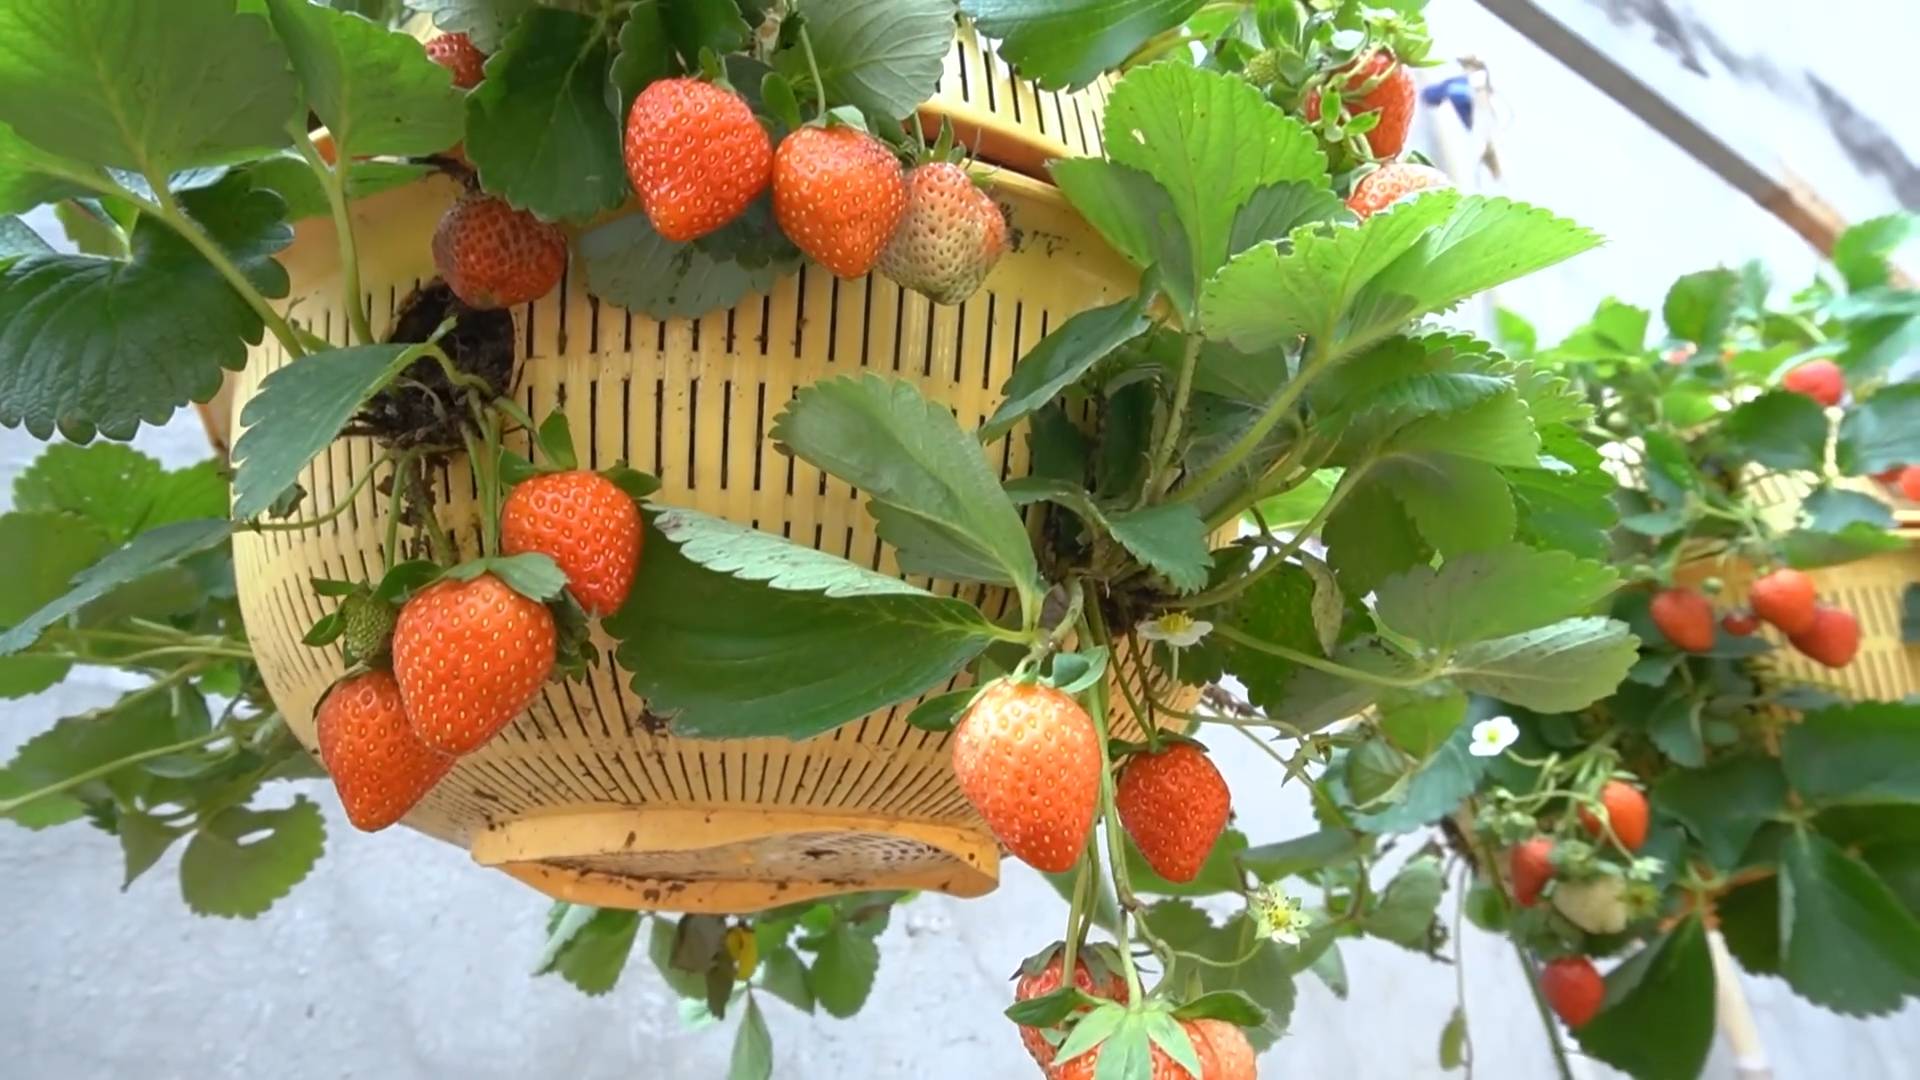
So, there you have it! Creating your own hanging strawberry planter is not just a fun weekend project; it’s a gateway to enjoying fresh, delicious strawberries right outside your door. Forget those expensive, pre-made planters that often lack the personal touch and the satisfaction of knowing you built something beautiful and functional yourself. This DIY hanging strawberry planter trick is a game-changer for anyone with limited garden space, a balcony, or simply a love for homegrown goodness.
Why is this a must-try? Because it’s incredibly rewarding. Imagine stepping outside and plucking ripe, juicy strawberries straight from your hanging garden. The taste is unparalleled compared to store-bought berries, and the visual appeal of a lush, green planter overflowing with red fruit is simply stunning. Plus, you’re in complete control of the growing environment, ensuring your strawberries are free from harmful pesticides and grown with love.
But the beauty of this project lies in its adaptability. Feel free to experiment with different materials for your planter. While we’ve focused on using a readily available plastic container, you could repurpose old burlap sacks for a rustic look, or even try a tiered system using multiple smaller containers for a cascading effect. Consider adding companion plants like basil or marigolds to deter pests and enhance the flavor of your strawberries. You can also adjust the size of the planter to suit your space and the number of strawberry plants you want to grow. For a more decorative touch, paint the container with vibrant colors or add stencils.
Don’t be afraid to get creative with the hanging mechanism either. Instead of using rope, you could use chains for a more industrial look, or even repurpose old belts for a unique and eco-friendly touch. The possibilities are endless!
We are confident that this DIY hanging strawberry planter will transform your gardening experience. It’s a simple, cost-effective, and incredibly satisfying way to enjoy fresh, homegrown strawberries. We encourage you to give it a try and discover the joy of harvesting your own delicious berries.
Most importantly, we want to hear about your experience! Share your photos, tips, and variations in the comments below. Let us know what worked for you, what challenges you faced, and any creative twists you added to the project. Your feedback will not only inspire others but also help us refine and improve this guide for future gardeners. So, grab your tools, gather your supplies, and get ready to create your own hanging strawberry paradise! Happy gardening!
Frequently Asked Questions (FAQ)
What kind of strawberries are best for hanging planters?
Day-neutral and everbearing strawberry varieties are generally the best choices for hanging planters. Day-neutral varieties produce fruit throughout the growing season, regardless of day length, while everbearing varieties produce two to three crops per year. Some popular options include:
* **’Tristan’:** Known for its beautiful pink flowers and delicious berries.
* **’Seascape’:** A reliable everbearing variety with excellent flavor.
* **’Albion’:** A day-neutral variety that produces large, firm berries.
* **’Temptation’:** A compact everbearing variety ideal for smaller planters.
Avoid June-bearing varieties, as they produce only one large crop per year, which may not be ideal for a continuous harvest in a hanging planter.
How often should I water my hanging strawberry planter?
Hanging planters tend to dry out more quickly than in-ground gardens, so regular watering is crucial. Check the soil moisture daily, especially during hot and windy weather. Water thoroughly when the top inch of soil feels dry to the touch. Aim to keep the soil consistently moist but not waterlogged. Overwatering can lead to root rot, so ensure your planter has adequate drainage. A good rule of thumb is to water deeply until you see water draining from the bottom of the container.
What kind of soil should I use for my hanging strawberry planter?
Use a high-quality potting mix specifically formulated for containers. Avoid using garden soil, as it can become compacted in a container and hinder drainage. A good potting mix should be lightweight, well-draining, and rich in organic matter. You can also amend the potting mix with compost or other organic materials to improve its fertility and water-retention capacity. Look for potting mixes that contain ingredients like peat moss, perlite, vermiculite, and composted bark.
How much sunlight do strawberries need in a hanging planter?
Strawberries thrive in full sun, which means they need at least 6-8 hours of direct sunlight per day. Choose a location for your hanging planter that receives ample sunlight throughout the day. If you live in a particularly hot climate, providing some afternoon shade can help prevent the plants from overheating. Insufficient sunlight can result in reduced fruit production and smaller, less flavorful berries.
How do I fertilize my hanging strawberry planter?
Strawberries are heavy feeders and benefit from regular fertilization. Use a balanced fertilizer specifically formulated for strawberries or fruits and vegetables. Follow the instructions on the fertilizer package for application rates and frequency. You can also use organic fertilizers like compost tea or fish emulsion. Fertilize your strawberry plants every 2-4 weeks during the growing season to ensure they receive the nutrients they need to produce abundant fruit. Avoid over-fertilizing, as this can lead to excessive foliage growth at the expense of fruit production.
How do I protect my strawberries from pests and diseases?
Regularly inspect your strawberry plants for signs of pests and diseases. Common pests that affect strawberries include aphids, spider mites, and slugs. You can control these pests with insecticidal soap, neem oil, or by handpicking them off the plants. To prevent fungal diseases like powdery mildew and gray mold, ensure good air circulation around the plants and avoid overwatering. Remove any dead or diseased leaves promptly to prevent the spread of disease. You can also use organic fungicides if necessary. Consider using netting to protect your strawberries from birds and other animals.
How do I overwinter my hanging strawberry planter?
In colder climates, you’ll need to protect your hanging strawberry planter from freezing temperatures. Bring the planter indoors to a cool, bright location, such as a garage or unheated sunroom. Water sparingly during the winter months, allowing the soil to dry out slightly between waterings. Alternatively, you can insulate the planter by wrapping it in burlap or bubble wrap. In milder climates, you may be able to leave the planter outdoors, but be sure to protect it from frost. Mulching around the base of the plants can help insulate the roots.
Can I grow other plants with my strawberries in the hanging planter?
Yes, you can grow companion plants with your strawberries in the hanging planter. Companion planting can help deter pests, attract beneficial insects, and improve the flavor of your strawberries. Some good companion plants for strawberries include:
* **Basil:** Repels aphids and other pests.
* **Marigolds:** Repel nematodes and other soil pests.
* **Thyme:** Attracts beneficial insects and repels cabbage moths.
* **Borage:** Attracts pollinators and repels tomato hornworms.
* **Garlic:** Repels aphids and other pests.
Avoid planting strawberries near members of the cabbage family, such as broccoli and cauliflower, as they can inhibit strawberry growth.

Leave a Comment