
Honeyberry Garden Tour: Ever dreamt of strolling through your backyard, plucking sweet, juicy berries straight from the bush, and knowing you grew them yourself? I know I have! That’s why I’m so excited to take you on a virtual honeyberry garden tour, packed with DIY tricks and hacks to help you cultivate your own thriving honeyberry patch, no matter your experience level.
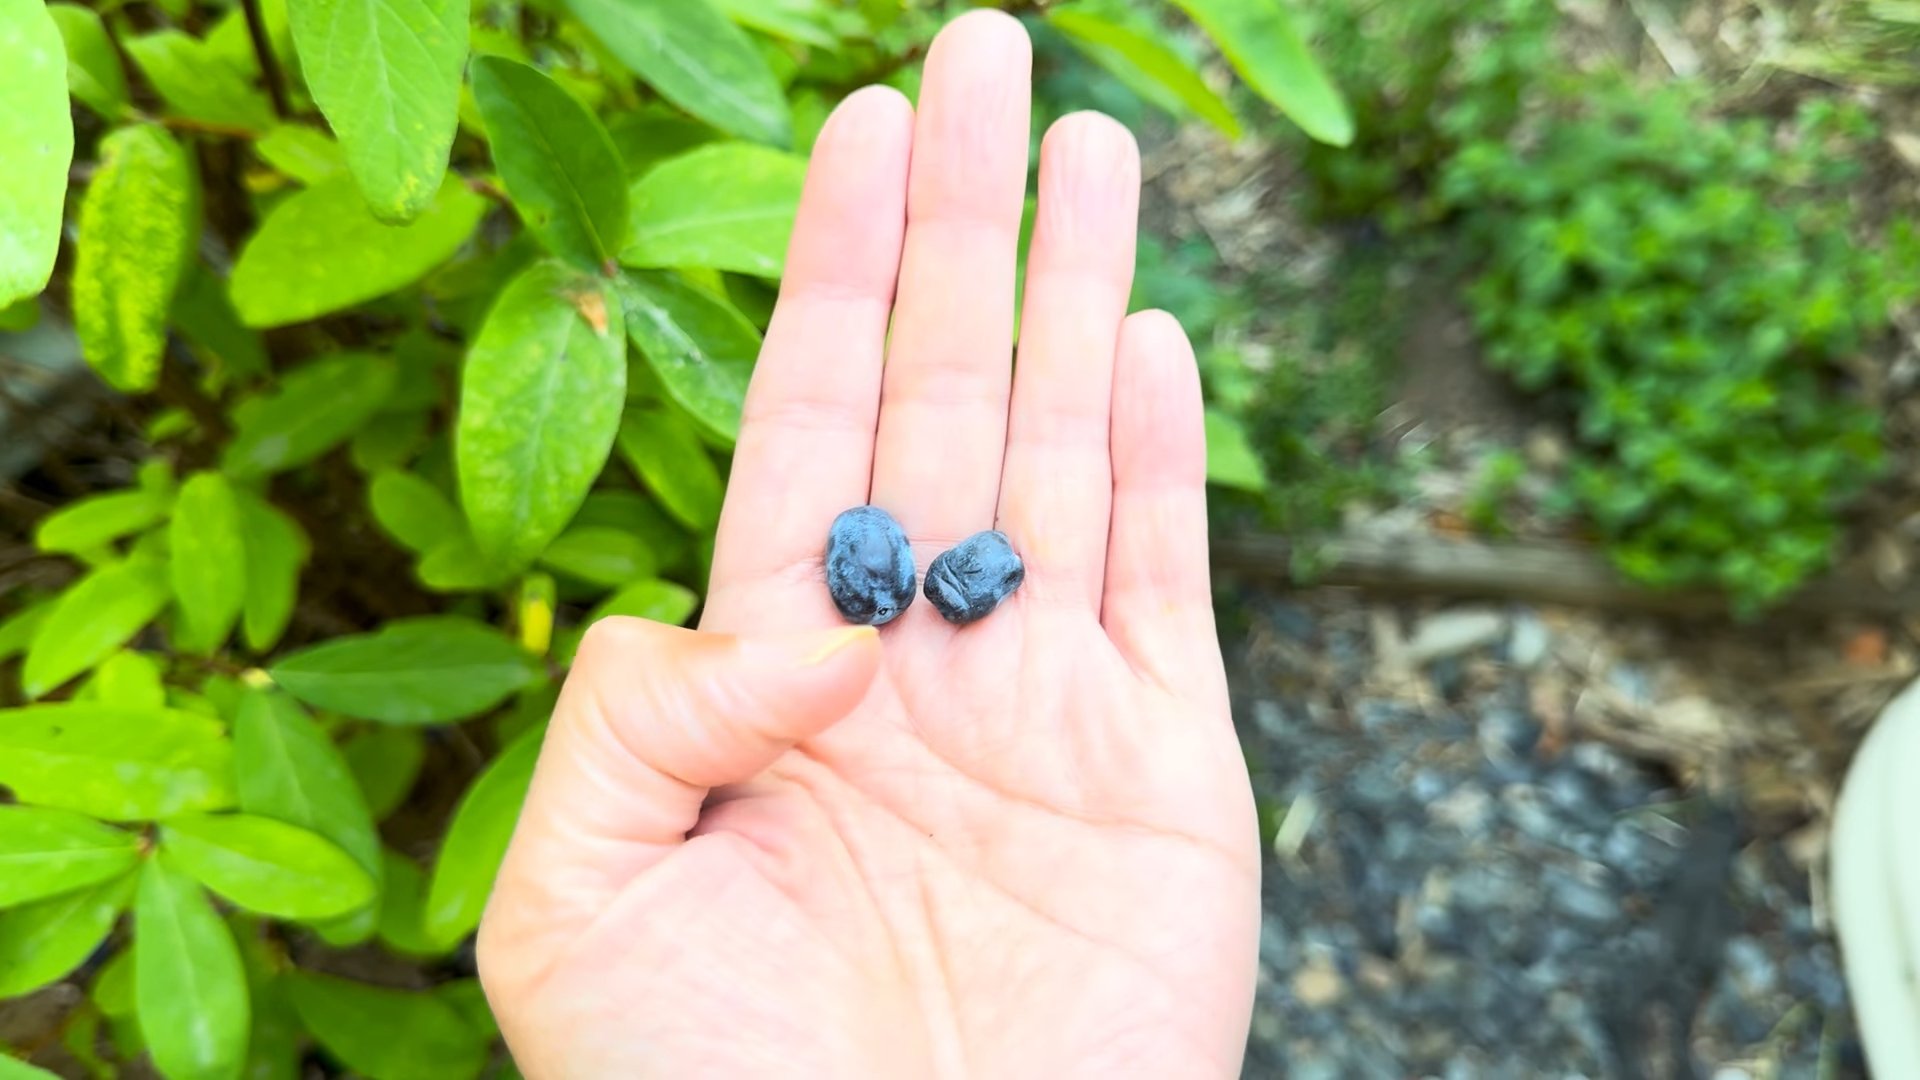
Honeyberries, also known as Haskap berries, have a fascinating history, originating in colder climates like Russia and Japan. For centuries, these hardy berries have been cherished for their unique sweet-tart flavor and incredible nutritional benefits. They’re packed with antioxidants and vitamins, making them a delicious and healthy addition to your diet.
But why should you bother with a honeyberry garden? Well, for starters, they’re incredibly low-maintenance compared to other berry bushes. Plus, they’re one of the first fruits to ripen in the spring, giving you a head start on the berry season! In this article, I’ll share my favorite DIY tricks for everything from choosing the right honeyberry varieties for your climate to building simple, effective supports to maximize your harvest. Get ready to discover how easy and rewarding it can be to grow your own delicious honeyberries with this comprehensive honeyberry garden tour and DIY guide!
DIY Vertical Strawberry Tower from Recycled Materials
Okay, friends, let’s dive into a super fun and rewarding DIY project: building a vertical strawberry tower! Not only is this a fantastic way to grow a ton of strawberries in a small space, but it’s also a great way to recycle and upcycle materials. I’m going to walk you through every step, so even if you’re a beginner, you can totally nail this. Get ready to have fresh, juicy strawberries right outside your door!
Materials You’ll Need
Before we get started, let’s gather our supplies. The beauty of this project is that you can often find many of these items lying around your house or in your neighbor’s recycling bin (with their permission, of course!).
* Large Plastic Container: Think a large trash can (unused, please!), a sturdy storage bin, or even a large plastic barrel. The bigger, the better, as it will hold more soil and plants. I used an old, slightly damaged storage bin that was destined for the landfill.
* Smaller PVC Pipe: This will be the irrigation system for your tower. A 2-3 inch diameter PVC pipe works perfectly. The length should be slightly longer than the height of your large container.
* Drill with Various Drill Bits: You’ll need a large drill bit for creating planting holes in the large container and smaller bits for the PVC pipe.
* Landscape Fabric or Burlap: This will line the inside of the large container to help retain moisture and prevent soil from washing out.
* Potting Soil: Use a high-quality potting mix specifically formulated for fruits and vegetables. This is crucial for healthy strawberry plants.
* Gravel or Small Rocks: For drainage at the bottom of the container.
* Strawberry Plants: Choose everbearing varieties for a continuous harvest throughout the growing season. I recommend starting with at least 10-15 plants, depending on the size of your container.
* Measuring Tape or Ruler: For accurate hole placement.
* Permanent Marker: To mark the drilling spots.
* Safety Glasses: Always protect your eyes when drilling!
* Gloves: To keep your hands clean.
* Utility Knife or Scissors: For cutting the landscape fabric.
* Optional: Compost or slow-release fertilizer to enrich the soil.
Preparing the Large Container
This is where we transform our plastic container into a strawberry-growing paradise!
1. Clean the Container: Thoroughly wash the large plastic container with soap and water to remove any dirt or debris. Make sure it’s completely dry before proceeding.
2. Drill Drainage Holes: Drill several drainage holes (about 1/2 inch in diameter) at the bottom of the container. This is essential to prevent waterlogging, which can kill your strawberry plants. Space them evenly around the bottom.
3. Line with Landscape Fabric: Cut the landscape fabric or burlap to fit the inside of the container. You’ll want to line the entire inside, leaving some excess at the top to fold over later. This will help keep the soil in place and prevent it from washing out through the planting holes. Secure the fabric with staples or strong tape if needed.
4. Add Drainage Layer: Pour a layer of gravel or small rocks (about 2-3 inches deep) at the bottom of the container. This will further improve drainage and prevent the soil from becoming waterlogged.
Creating the Irrigation System
Now, let’s build the internal watering system that will keep our strawberry plants happy and hydrated.
1. Drill Holes in the PVC Pipe: Using a small drill bit (about 1/4 inch), drill holes all along the PVC pipe. Space the holes about 2-3 inches apart and stagger them around the pipe. This will ensure even water distribution throughout the tower. Make sure you drill holes along the entire length of the pipe, except for the bottom few inches, which will be buried in the gravel.
2. Cap the Bottom of the PVC Pipe (Optional): You can cap the bottom of the PVC pipe to prevent soil from entering and clogging the irrigation system. This is optional, but I find it helps keep things cleaner. You can use a PVC pipe cap or simply seal the bottom with strong tape.
3. Wrap the PVC Pipe (Optional): To further prevent soil from entering the irrigation system, you can wrap the PVC pipe with landscape fabric or burlap. Secure the fabric with tape or twine. This step is also optional, but it can be beneficial in the long run.
Creating the Planting Holes
This is where the magic happens! We’ll be creating the holes where our strawberry plants will thrive.
1. Mark the Planting Holes: Using a measuring tape or ruler and a permanent marker, mark the locations for the planting holes on the outside of the large container. Space the holes about 6-8 inches apart, both vertically and horizontally. Stagger the holes in each row to maximize space and create a visually appealing design. I like to start with the bottom row about 6 inches from the base.
2. Drill the Planting Holes: Using a larger drill bit (the size will depend on the size of your strawberry plants, but a 2-3 inch diameter bit is usually sufficient), drill the planting holes at the marked locations. Be careful not to drill too quickly, as this can crack the plastic.
3. Smooth the Edges (Optional): If the edges of the planting holes are rough, you can smooth them down with sandpaper or a utility knife. This will prevent the edges from damaging the strawberry plants.
Assembling the Strawberry Tower
Time to put everything together and create our vertical strawberry garden!
1. Position the PVC Pipe: Place the PVC pipe in the center of the large container, standing upright. Make sure the bottom of the pipe is buried in the gravel layer.
2. Add Potting Soil: Gradually add potting soil to the large container, filling it up to the first row of planting holes. As you add the soil, gently pack it down to remove any air pockets.
3. Plant the First Row of Strawberries: Carefully insert the strawberry plants into the planting holes, making sure the roots are well covered with soil. Gently pack the soil around the plants to secure them in place.
4. Continue Adding Soil and Planting: Continue adding potting soil and planting strawberry plants in each row of planting holes, working your way up the tower. Remember to pack the soil gently around the plants as you go.
5. Top Off with Soil: Once you’ve reached the top of the container, fill it with potting soil, leaving a few inches of space at the top. You can plant a few more strawberry plants on top of the tower if you like.
6. Water Thoroughly: Water the strawberry tower thoroughly, pouring water into the top of the PVC pipe. This will distribute water evenly throughout the tower and ensure that all the plants are well hydrated.
Caring for Your Strawberry Tower
Now that your strawberry tower is complete, it’s important to provide proper care to ensure a bountiful harvest.
* Watering: Water the strawberry tower regularly, especially during hot, dry weather. Check the soil moisture by sticking your finger into the soil. If it feels dry, it’s time to water. Water through the PVC pipe to ensure even distribution.
* Fertilizing: Fertilize your strawberry plants every 2-3 weeks with a balanced fertilizer specifically formulated for fruits and vegetables. Follow the instructions on the fertilizer package.
* Sunlight: Place the strawberry tower in a location that receives at least 6-8 hours of sunlight per day. Strawberries need plenty of sunlight to produce fruit.
* Pruning: Remove any dead or yellowing leaves from the strawberry plants to prevent disease. Also, pinch off any runners (long, trailing stems) that the plants produce, as these will divert energy away from fruit production.
* Pest Control: Keep an eye out for pests such as aphids, slugs, and snails. If you notice any pests, treat them with an appropriate insecticide or organic pest control method.
* Harvesting: Harvest the strawberries when they are fully ripe and red. Gently pluck the berries from the plant, being careful not to damage the surrounding foliage.
Troubleshooting
Even with the best planning, sometimes things don’t go exactly as expected. Here are a few common issues you might encounter and how to solve them:
* Plants are wilting: This could be due to underwatering, overwatering, or lack of sunlight. Check the soil moisture and adjust your watering schedule accordingly. Make sure the tower is in a sunny location.
* Leaves are turning yellow: This could be due to nutrient deficiency. Fertilize your plants with a balanced fertilizer.
* No fruit production: This could be due to lack of sunlight, improper watering, or lack of pollination. Make sure the tower is in a sunny location, water regularly, and consider hand-pollinating the flowers if necessary.
* Pests are attacking the plants:
Conclusion
So, there you have it! This simple, yet incredibly effective DIY trick for propagating honeyberries is a game-changer for any gardener looking to expand their patch without breaking the bank. We’ve walked you through the process, highlighting the ease and affordability of this method. But why is this a must-try?
Firstly, it’s cost-effective. Instead of purchasing expensive new plants, you can multiply your existing honeyberry stock using materials you likely already have on hand. This allows you to create a thriving honeyberry garden without a significant financial investment. Imagine filling your garden with these delicious and nutritious berries, all thanks to a little DIY ingenuity!
Secondly, it’s rewarding. There’s a unique satisfaction that comes from nurturing a new plant from a simple cutting. Watching your honeyberry cuttings take root and flourish is an incredibly fulfilling experience, connecting you more deeply to the natural world and the process of growth.
Thirdly, it’s sustainable. Propagating your own plants reduces the demand for commercially grown plants, which often come with a larger environmental footprint. By embracing this DIY approach, you’re contributing to a more sustainable and eco-friendly gardening practice.
But the beauty of this DIY trick lies not only in its simplicity but also in its adaptability. Feel free to experiment with different rooting mediums. While we’ve recommended a specific mix, you could try using perlite, vermiculite, or even a combination of different materials to see what works best for your specific environment and honeyberry variety.
Consider also experimenting with different cutting lengths and thicknesses. Some gardeners find that slightly longer cuttings with more nodes tend to root more readily. Others prefer thinner cuttings, believing they are less prone to rotting. The key is to observe and learn from your own experiences.
Another variation to consider is the use of rooting hormones. While not strictly necessary, rooting hormones can significantly increase the success rate of your cuttings, especially for more challenging honeyberry varieties. Simply dip the cut end of the cutting into the rooting hormone powder or liquid before planting it in the rooting medium.
Finally, remember that patience is key. Rooting can take several weeks, and it’s important to provide the cuttings with consistent moisture and warmth during this time. Don’t be discouraged if some cuttings fail to root. It’s all part of the learning process.
We wholeheartedly encourage you to try this DIY trick for propagating your own honeyberries. It’s a fun, affordable, and rewarding way to expand your garden and enjoy even more of these delicious and nutritious berries. Once you’ve given it a try, we’d love to hear about your experience! Share your tips, tricks, and successes in the comments below. Let’s build a community of honeyberry enthusiasts and learn from each other’s experiences. Your insights could be invaluable to other gardeners embarking on their own honeyberry propagation journey. So, get out there, get your hands dirty, and start propagating! You’ll be amazed at how easy it is to create your own thriving honeyberry patch with this simple DIY trick.
Frequently Asked Questions (FAQ)
What is the best time of year to take honeyberry cuttings?
The ideal time to take honeyberry cuttings is during the dormant season, typically in late winter or early spring before the buds begin to swell. This is when the plant’s energy is concentrated in the roots and stems, making it more likely for the cuttings to root successfully. Avoid taking cuttings during the growing season, as they are less likely to root and may be more susceptible to disease. Taking cuttings in late winter or early spring allows the new plants to establish themselves before the heat of summer arrives.
What type of honeyberry cutting should I take?
The best type of honeyberry cutting to take is a hardwood cutting. These are taken from mature, dormant wood that is at least one year old. Look for stems that are healthy, straight, and free from any signs of disease or damage. The cuttings should be about 4-6 inches long and have at least 2-3 nodes (the points where leaves or buds emerge). Avoid taking cuttings from very thin or weak stems, as they are less likely to root successfully.
What is the best rooting medium for honeyberry cuttings?
A well-draining rooting medium is essential for successful honeyberry propagation. A mixture of equal parts perlite and peat moss is a popular choice, as it provides good aeration and moisture retention. You can also use a mixture of sand and peat moss, or even just straight perlite or vermiculite. The key is to choose a medium that will hold moisture without becoming waterlogged, as this can lead to root rot. Ensure the container you use has drainage holes to prevent water from accumulating at the bottom.
How long does it take for honeyberry cuttings to root?
Honeyberry cuttings typically take 4-8 weeks to root, depending on the variety, the rooting medium, and the environmental conditions. It’s important to be patient and provide the cuttings with consistent moisture and warmth during this time. You can check for root development by gently tugging on the cuttings. If they resist being pulled out of the rooting medium, it’s a good sign that they have rooted. You can also carefully remove a cutting from the medium to inspect the roots directly.
How do I care for honeyberry cuttings while they are rooting?
While honeyberry cuttings are rooting, it’s important to keep the rooting medium consistently moist but not waterlogged. You can achieve this by misting the cuttings regularly or by covering them with a plastic dome or bag to create a humid environment. Place the cuttings in a warm location with indirect sunlight. Avoid direct sunlight, as this can scorch the cuttings. Once the cuttings have rooted, you can gradually acclimate them to more sunlight before transplanting them into individual pots or directly into the garden.
Can I use rooting hormone on honeyberry cuttings?
Yes, using rooting hormone can significantly increase the success rate of honeyberry propagation, especially for more challenging varieties. Rooting hormone contains auxins, which are plant hormones that promote root development. Simply dip the cut end of the cutting into the rooting hormone powder or liquid before planting it in the rooting medium. Be sure to follow the instructions on the rooting hormone package. While not strictly necessary, rooting hormone can give your cuttings a boost and help them root more quickly and reliably.
What do I do after the honeyberry cuttings have rooted?
Once the honeyberry cuttings have developed a good root system, they are ready to be transplanted. You can either transplant them into individual pots or directly into the garden. If you choose to transplant them into pots, use a well-draining potting mix and gradually acclimate them to more sunlight before planting them in their permanent location. When planting honeyberries in the garden, choose a sunny location with well-drained soil. Space the plants about 4-5 feet apart to allow for adequate growth. Water the newly transplanted plants regularly until they are established.
What are some common problems when propagating honeyberries from cuttings?
Some common problems when propagating honeyberries from cuttings include root rot, fungal diseases, and failure to root. Root rot can occur if the rooting medium is too wet or poorly drained. To prevent root rot, use a well-draining rooting medium and avoid overwatering. Fungal diseases can also affect honeyberry cuttings, especially in humid environments. To prevent fungal diseases, ensure good air circulation around the cuttings and avoid overcrowding them. Failure to root can be caused by a variety of factors, including poor cutting quality, improper rooting medium, or unfavorable environmental conditions. To increase your chances of success, use healthy, mature cuttings, a well-draining rooting medium, and provide the cuttings with consistent moisture, warmth, and indirect sunlight.
Which honeyberry varieties are easiest to propagate from cuttings?
Some honeyberry varieties are easier to propagate from cuttings than others. Generally, the more vigorous and fast-growing varieties tend to root more readily. Some popular varieties that are known for their ease of propagation include ‘Borealis’, ‘Honeybee’, and ‘Aurora’. However, with proper care and attention, you can successfully propagate most honeyberry varieties from cuttings. Don’t be afraid to experiment and see what works best for you.
How do I ensure my newly propagated honeyberry plants thrive?
To ensure your newly propagated honeyberry plants thrive, provide them with the proper care and attention. Plant them in a sunny location with well-drained soil. Water them regularly, especially during dry periods. Fertilize them in the spring with a balanced fertilizer. Prune them annually to remove dead or damaged wood and to encourage new growth. Protect them from pests and diseases. With proper care, your honeyberry plants will reward you with years of delicious and nutritious berries.

Leave a Comment