
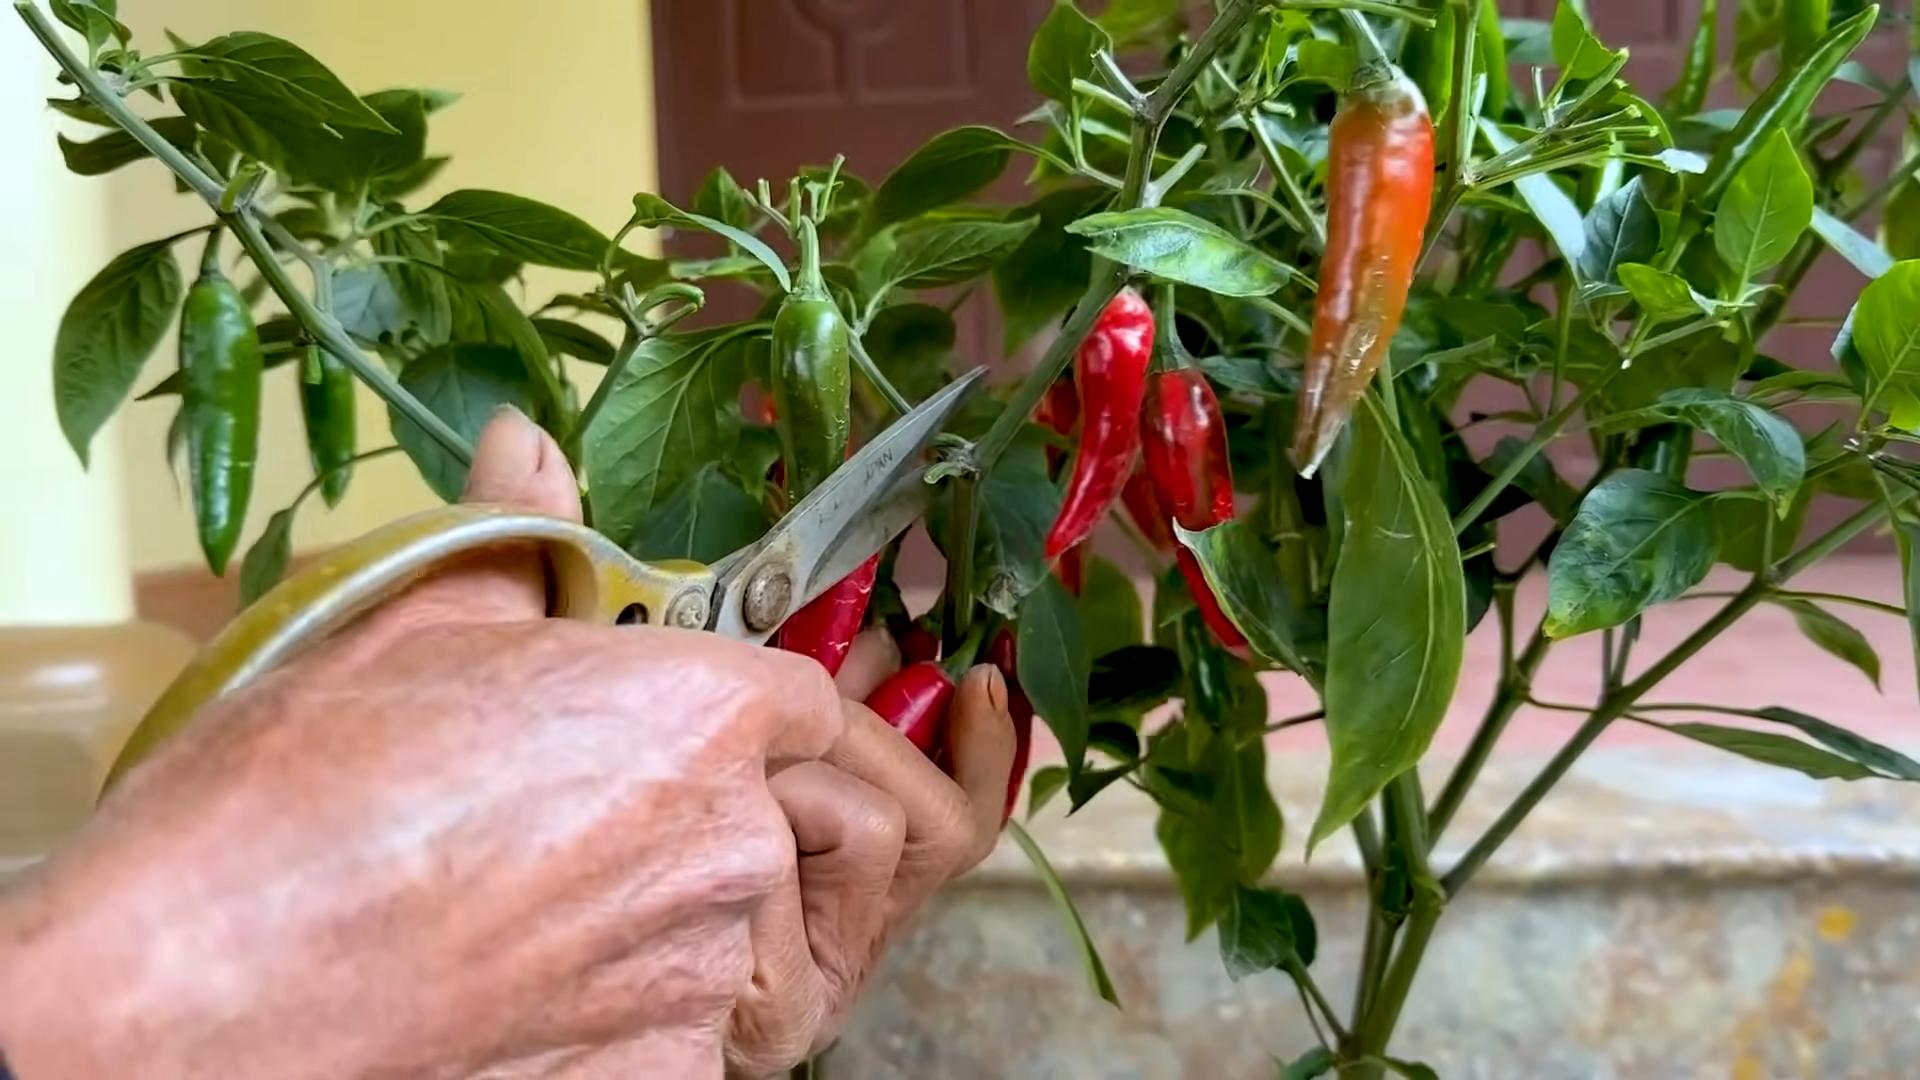
Huge chili harvest tips are what every chili lover dreams about, right? Imagine baskets overflowing with vibrant red, green, and yellow chilies, ready to spice up your meals and share with friends. Forget those tiny, disappointing yields – we’re talking about a chili bonanza!
For centuries, chilies have been more than just a spice; they’ve been woven into the fabric of cultures worldwide. From the fiery curries of India to the smoky salsas of Mexico, chilies have added depth and complexity to cuisines for generations. They even played a role in ancient trade routes, becoming a valuable commodity exchanged across continents. But you don’t need to be a seasoned farmer or have acres of land to achieve a bountiful harvest.
Let’s face it, store-bought chilies can be expensive and sometimes lack that fresh, vibrant flavor we crave. That’s where these DIY tricks come in! I’m going to share my tried-and-true secrets to help you maximize your chili production, even in a small garden or balcony. Whether you’re a beginner or a seasoned gardener, these huge chili harvest tips will empower you to grow a chili crop that will make your taste buds sing and your neighbors envious. Get ready to unlock the secrets to a chili pepper paradise!
Turning a Chili Harvest into Hot Sauce Gold: A DIY Guide
Okay, so you’ve got a mountain of chilies. Congratulations! Now what? Don’t let them go to waste! I’m going to walk you through my favorite way to preserve that fiery goodness: homemade hot sauce. This isn’t just any hot sauce; it’s *your* hot sauce, crafted with love (and a healthy dose of capsaicin).
Gathering Your Arsenal: Ingredients and Equipment
Before we dive in, let’s make sure we have everything we need. This is crucial for a smooth and enjoyable hot sauce-making experience.
* **Chilies:** Obviously! The type and quantity depend on your preference. A mix of different chilies adds complexity. I usually aim for about a pound of fresh chilies for a good-sized batch.
* **Vinegar:** White vinegar is a classic choice, but apple cider vinegar, rice vinegar, or even a blend can add interesting flavors. I usually go for white vinegar for a clean, sharp taste.
* **Garlic:** Fresh garlic is a must. Don’t skimp!
* **Onion:** Yellow or white onion works well.
* **Salt:** Kosher salt or sea salt.
* **Sugar:** A little sugar balances the heat and acidity. Brown sugar adds a touch of molasses flavor.
* **Optional Flavor Boosters:** These are where you can really get creative!
* **Fruits:** Mango, pineapple, peaches, or even berries can add sweetness and depth.
* **Vegetables:** Carrots, bell peppers, or roasted red peppers can add body and flavor.
* **Spices:** Cumin, coriander, smoked paprika, or chili powder can enhance the overall flavor profile.
* **Herbs:** Oregano, thyme, or rosemary can add an earthy note.
* **Citrus:** Lime or lemon juice adds brightness and acidity.
* **Fermented Ingredients:** Miso paste or kimchi can add umami and complexity.
* **Equipment:**
* **Gloves:** Trust me, you’ll want these. Chili oil on your skin is no fun.
* **Cutting board:** A sturdy one.
* **Knife:** A sharp knife for chopping.
* **Large pot:** Stainless steel or enamel-coated is best. Avoid reactive metals like aluminum.
* **Blender or food processor:** For pureeing the sauce. A high-speed blender will give you the smoothest results.
* **Bottles:** Sterilized glass bottles for storing your hot sauce. You can reuse old hot sauce bottles or purchase new ones online.
* **Funnel:** For easily filling the bottles.
* **pH meter (optional):** For ensuring the sauce is acidic enough for safe storage.
* **Kitchen scale:** For precise measurements, especially if you’re following a specific recipe.
* **Long-handled spoon:** For stirring the sauce.
* **Tongs:** For handling hot chilies.
Step-by-Step: From Chili to Sauce
Alright, let’s get started! Remember to wear gloves throughout the process to protect your skin from the chili oils.
1. **Prepare the Chilies:**
* Wash the chilies thoroughly.
* Remove the stems. You can leave the seeds in for extra heat, or remove them for a milder sauce. I usually leave some seeds in for a good kick.
* Roughly chop the chilies.
2. **Sauté the Aromatics:**
* In the large pot, heat a tablespoon or two of oil (olive oil, vegetable oil, or coconut oil all work) over medium heat.
* Add the chopped onion and garlic and sauté until softened and fragrant, about 5-7 minutes. Don’t let them brown too much.
3. **Combine and Simmer:**
* Add the chopped chilies, vinegar, salt, sugar, and any other optional flavor boosters (fruits, vegetables, spices, herbs) to the pot.
* Bring the mixture to a simmer, then reduce the heat to low, cover, and let it simmer for at least 30 minutes, or up to an hour. The longer it simmers, the more the flavors will meld together. Stir occasionally to prevent sticking.
4. **Puree the Sauce:**
* Carefully transfer the hot sauce mixture to a blender or food processor. Be careful, as the mixture will be hot!
* Blend until smooth. You may need to do this in batches, depending on the size of your blender.
* If you want an extra-smooth sauce, you can strain it through a fine-mesh sieve after blending. This will remove any remaining seeds or skins.
5. **Adjust the Flavor:**
* Taste the sauce and adjust the seasoning as needed. Add more salt, sugar, vinegar, or spices to your liking.
* If the sauce is too thick, add a little water or vinegar to thin it out.
* If the sauce is too thin, simmer it for a few more minutes to reduce it.
6. **pH Testing (Optional but Recommended):**
* For safe storage, your hot sauce should have a pH of 4.6 or lower. This acidity level prevents the growth of harmful bacteria.
* Use a pH meter to test the pH of your sauce. If it’s above 4.6, add more vinegar or lemon juice until it reaches the desired level.
7. **Bottle and Store:**
* Sterilize your glass bottles by boiling them in water for 10 minutes or running them through a dishwasher on the sanitize cycle.
* Carefully pour the hot sauce into the sterilized bottles using a funnel, leaving a little headspace at the top.
* Wipe the rims of the bottles clean and seal them tightly with the lids.
* You can process the bottles in a boiling water bath for 10 minutes to ensure a longer shelf life, but this isn’t strictly necessary if your sauce has a low pH and you’re storing it in the refrigerator.
* Let the bottles cool completely before storing them in the refrigerator.
Creative Variations: Spice Up Your Life!
This basic recipe is just a starting point. Feel free to experiment with different ingredients and flavor combinations to create your own signature hot sauce. Here are a few ideas to get you started:
* **Smoked Hot Sauce:** Smoke the chilies before making the sauce for a smoky flavor.
* **Fermented Hot Sauce:** Ferment the chilies for a few days or weeks before making the sauce for a tangy, complex flavor.
* **Fruit-Infused Hot Sauce:** Add fruits like mango, pineapple, or peaches for a sweet and fruity flavor.
* **Vegetable-Packed Hot Sauce:** Add roasted red peppers, carrots, or bell peppers for a richer, more complex flavor.
* **Herbaceous Hot Sauce:** Add fresh herbs like oregano, thyme, or rosemary for an earthy, aromatic flavor.
* **Super-Hot Hot Sauce:** Use super-hot chilies like ghost peppers, Scotch bonnets, or habaneros for an intense heat. Be careful!
Troubleshooting: Common Issues and Solutions
Even with the best instructions, things can sometimes go wrong. Here are a few common issues and how to fix them:
* **Sauce is too hot:** Add more sweet ingredients like sugar, honey, or fruit. You can also add dairy, like a splash of cream or yogurt, to help cool it down.
* **Sauce is too mild:** Add more chilies or chili powder. You can also add a pinch of cayenne pepper for an extra kick.
* **Sauce is too acidic:** Add a pinch of baking soda to neutralize the acidity. Be careful, as this can cause the sauce to foam up.
* **Sauce is too thick:** Add a little water or vinegar to thin it out.
* **Sauce is too thin:** Simmer it for a few more minutes to reduce it.
* **Sauce is too bitter:** This can be caused by overcooking the garlic or onions. Try adding a little sugar or honey to balance the bitterness.
* **Sauce is separating:** This can happen if the sauce isn’t emulsified properly. Try blending it again or adding a little xanthan gum to help stabilize it.
Safety First: Handling Chilies with Care
Working with chilies can be a bit risky if you’re not careful. Here are a few safety tips to keep in mind:
* **Wear gloves:** This is the most important thing you can do to protect your skin from chili oils.
* **Avoid touching your face:** Especially your eyes, nose, and mouth.
* **Wash your hands thoroughly:** After handling chilies, wash your hands with soap and water.
* **Ventilate the area:** Open a window or turn on a fan to ventilate the area while you’re working with chilies.
* **Be careful when blending:** Hot sauce
Conclusion
So, there you have it! Transforming your overwhelming chili harvest into a pantry full of vibrant, flavorful ingredients is not only achievable but incredibly rewarding. This DIY trick, turning your excess chilies into a versatile chili powder, is a game-changer for any home cook who loves to add a kick to their dishes. Forget store-bought powders filled with questionable additives and lackluster flavor. With this method, you control every aspect, from the heat level to the overall taste profile.
Why is this a must-try? Because it’s sustainable, cost-effective, and delivers a superior product. You’re minimizing food waste by utilizing your entire harvest, saving money by avoiding expensive store-bought alternatives, and creating a chili powder that’s bursting with fresh, intense flavor that no commercially produced spice can match. Plus, the aroma that fills your kitchen during the drying and toasting process is simply intoxicating!
But the beauty of this DIY chili powder doesn’t stop there. Feel free to experiment with different chili varieties to create unique flavor blends. Want a smoky heat? Include some smoked paprika peppers in your mix. Prefer a sweeter profile? Add a few ancho chilies. The possibilities are endless! You can also adjust the level of heat by removing the seeds and membranes from some of the chilies before drying. For a milder powder, remove most of them; for a fiery kick, leave them all in.
Consider adding other complementary spices during the grinding process. A pinch of cumin, coriander, or even a touch of oregano can elevate your chili powder to new heights. Think about the dishes you typically use chili powder in and tailor your blend accordingly. For example, a chili powder intended for Mexican cuisine might benefit from the addition of Mexican oregano and a hint of cocoa powder.
Another variation to consider is creating a chili flake blend instead of a powder. Simply crush the dried chilies coarsely instead of grinding them finely. This is perfect for sprinkling over pizzas, pasta dishes, or stir-fries for an extra burst of flavor and texture.
Don’t be intimidated by the process. It’s surprisingly simple and requires minimal effort. The most important thing is to ensure that your chilies are completely dry before grinding them to prevent clumping and mold growth. A dehydrator is ideal, but an oven on its lowest setting works just as well.
We are confident that once you try this DIY chili powder trick, you’ll never go back to store-bought again. The flavor difference is simply undeniable. So, gather your chilies, dust off your spice grinder, and get ready to create a chili powder that will transform your cooking.
We encourage you to try this method and share your experiences with us! What chili varieties did you use? What flavor combinations did you create? What dishes did you use your homemade chili powder in? We can’t wait to hear about your culinary adventures. Share your photos and recipes on social media using #HomemadeChiliPowder and let’s inspire others to embrace the joy of DIY spice making! Let us know if you have any questions, and happy grinding!
Frequently Asked Questions (FAQ)
What types of chilies are best for making chili powder?
The best chilies for chili powder depend entirely on your personal preference. You can use a single variety for a consistent flavor profile or blend different chilies to create a more complex and nuanced taste. Popular choices include ancho chilies (mild and fruity), guajillo chilies (slightly sweet and smoky), chipotle chilies (smoked jalapeños, adding a smoky heat), and cayenne peppers (for a significant kick). Experiment with different combinations to find your perfect blend. Remember to consider the heat level of each chili and adjust accordingly. For example, if you’re using a very hot chili like habanero, use it sparingly in your blend.
How do I dry my chilies if I don’t have a dehydrator?
If you don’t have a dehydrator, you can dry your chilies in the oven. Preheat your oven to its lowest setting (ideally below 200°F or 93°C). Wash and dry the chilies thoroughly. You can either leave them whole or cut them in half lengthwise to speed up the drying process. Spread the chilies in a single layer on a baking sheet lined with parchment paper. Leave the oven door slightly ajar to allow moisture to escape. Drying time will vary depending on the thickness of the chilies and the temperature of your oven, but it typically takes several hours to a day. Check the chilies periodically and flip them over to ensure even drying. They are ready when they are brittle and snap easily. You can also air dry them by stringing them together and hanging them in a dry, well-ventilated area, but this method takes much longer and is not suitable for humid climates.
How do I store my homemade chili powder?
To ensure your homemade chili powder stays fresh and flavorful for as long as possible, store it in an airtight container in a cool, dark, and dry place. A spice jar or a small glass container with a tight-fitting lid is ideal. Avoid storing it near heat sources or in direct sunlight, as this can degrade the flavor and color. Properly stored, your chili powder should last for at least six months to a year. Check for any signs of moisture or clumping before using it. If it smells musty or looks discolored, it’s best to discard it.
Can I use frozen chilies to make chili powder?
Yes, you can use frozen chilies to make chili powder, but you’ll need to thaw them completely and pat them dry before drying them. Freezing can alter the texture of the chilies slightly, but it shouldn’t significantly affect the flavor of the final product. Make sure to remove as much moisture as possible before drying to prevent mold growth.
How do I control the heat level of my chili powder?
The heat level of your chili powder is primarily determined by the type and amount of chilies you use. To control the heat, you can remove the seeds and membranes from the chilies before drying them. The seeds and membranes contain most of the capsaicin, the compound that gives chilies their heat. Removing them will significantly reduce the heat level. You can also blend different chilies with varying heat levels to achieve your desired level of spiciness. For example, you could combine mild ancho chilies with a small amount of cayenne pepper for a balanced flavor with a moderate kick.
What if my chili powder clumps up?
Clumping is usually caused by moisture. If your chili powder clumps up, it means it wasn’t dried thoroughly enough or it has absorbed moisture from the air. You can try to break up the clumps by placing the chili powder in a dry skillet over low heat for a few minutes, stirring constantly. This will help to evaporate any excess moisture. Allow it to cool completely before returning it to its airtight container. To prevent clumping in the future, ensure your chilies are completely dry before grinding and store your chili powder in a cool, dry place. You can also add a desiccant packet (like those found in vitamin bottles) to the container to absorb any excess moisture.
Can I add other spices to my chili powder blend?
Absolutely! Adding other spices to your chili powder blend is a great way to customize the flavor and create unique combinations. Some popular additions include cumin, coriander, oregano, garlic powder, onion powder, smoked paprika, and even a touch of cocoa powder for a richer, more complex flavor. Experiment with different spices and amounts to find your perfect blend. Start with small amounts and taste as you go, adding more until you achieve the desired flavor profile.
Is it safe to handle chilies when making chili powder?
Yes, but it’s important to take precautions to avoid skin irritation. Chilies contain capsaicin, which can cause a burning sensation if it comes into contact with your skin, especially your eyes. Wear gloves when handling chilies, especially hot varieties. Avoid touching your face, eyes, or other sensitive areas while working with chilies. After handling chilies, wash your hands thoroughly with soap and water. If you do experience skin irritation, wash the affected area with soap and water and apply a soothing lotion.
Leave a Comment