
Mushroom Growing at Home: Imagine stepping into your kitchen and harvesting fresh, flavorful mushrooms, cultivated right in your own home! Forget those bland, store-bought varieties. This isn’t just a dream; it’s a deliciously achievable reality with our ultimate guide to DIY mushroom cultivation.
For centuries, mushroom cultivation has been a revered practice, deeply rooted in cultures across the globe. From ancient Chinese medicinal practices to the sophisticated truffle farms of Europe, the art of growing fungi has been passed down through generations. Now, you can tap into this rich history and bring the magic of mushroom farming into your own living space.
Why should you embark on this fascinating journey? Well, beyond the sheer satisfaction of nurturing your own food, mushroom growing at home offers a sustainable and cost-effective way to enjoy these culinary delights. Plus, it’s a fantastic way to reduce your carbon footprint and connect with nature, even in the heart of the city. We’ll show you simple, step-by-step techniques and clever hacks to transform your spare room, basement, or even a small corner into a thriving mushroom farm. Get ready to unlock the secrets of the fungal kingdom and savor the unmatched taste of homegrown mushrooms!
Grow Your Own Gourmet Mushrooms at Home: A Beginner’s Guide
Hey there, fellow fungi fanatics! Ever dreamt of harvesting your own delicious, fresh mushrooms right in your kitchen? Well, dream no more! I’m going to walk you through a simple and rewarding DIY project: growing mushrooms at home. It’s easier than you think, and the taste of homegrown mushrooms is simply unbeatable. We’ll focus on growing oyster mushrooms, as they are relatively easy for beginners and incredibly versatile in the kitchen.
What You’ll Need: The Essential Supplies
Before we dive in, let’s gather our supplies. This is crucial for a smooth and successful mushroom-growing experience.
* Oyster Mushroom Spawn: This is the “seed” of your mushrooms. You can purchase it online or at a local gardening supply store. Make sure it’s a reputable source to ensure healthy spawn. Look for grain spawn, as it’s easy to work with.
* Substrate: This is the food source for your mushrooms. Straw is an excellent and readily available option. You can also use coffee grounds, but we’ll stick with straw for this guide.
* Large Container: A bucket, plastic tub, or even a large bag will work. Just make sure it’s clean and can hold the straw and spawn. A 5-gallon bucket is a good starting point.
* Large Pot or Kettle: For pasteurizing the straw.
* Thermometer: To monitor the water temperature during pasteurization.
* Spray Bottle: For misting the mushrooms as they grow.
* Gloves: To maintain cleanliness and prevent contamination.
* Drill (Optional): To create drainage and ventilation holes in your container.
* Clear Plastic Wrap or a Humidity Tent: To maintain humidity levels.
* Rubbing Alcohol: For sanitizing surfaces and tools.
Preparing the Substrate: Pasteurization is Key
This is arguably the most important step. Pasteurization kills off competing organisms that could prevent your mushrooms from growing. We don’t want any unwanted guests crashing our mushroom party!
1. Chop the Straw: Cut the straw into smaller pieces, about 2-3 inches long. This will make it easier to pack into the container and for the mushroom mycelium to colonize. I like to use garden shears for this.
2. Soak the Straw: Place the chopped straw in your large pot or kettle and cover it with water. Make sure all the straw is submerged.
3. Heat the Water: Bring the water to a temperature of 160-180°F (71-82°C). Use your thermometer to monitor the temperature. Maintain this temperature for 60-90 minutes. This is the pasteurization process. Don’t let the water boil, as this can damage the straw.
4. Drain the Straw: After pasteurization, carefully drain the hot water from the straw. Be careful, as the straw will be very hot! I usually use a colander or a large strainer.
5. Cool the Straw: Allow the straw to cool down to room temperature. This is crucial, as hot straw can kill the mushroom spawn. You want the straw to be damp, but not soaking wet. Squeeze out any excess water. It should feel like a wrung-out sponge.
Inoculation: Planting the Mushroom Seeds
Now for the fun part: introducing the mushroom spawn to the prepared straw.
1. Sanitize Your Work Area: Before you start, clean your work surface with rubbing alcohol. This will help prevent contamination.
2. Prepare Your Container: If you’re using a bucket or tub, drill some small holes in the bottom for drainage and a few around the sides for ventilation. This will help prevent the straw from becoming waterlogged and provide fresh air for the mushrooms.
3. Layer the Straw and Spawn: In your container, create alternating layers of straw and mushroom spawn. Start with a layer of straw, then sprinkle a layer of spawn on top. Repeat this process until you’ve used all the straw and spawn. Aim for about 4-5 layers. The final layer should be straw. I usually use about 1 part spawn to 10 parts straw.
4. Pack the Straw: Gently pack the straw down in the container. This will help ensure good contact between the straw and the spawn.
5. Cover the Container: Cover the container with clear plastic wrap or create a humidity tent. This will help maintain a high humidity level, which is essential for mushroom growth. You can use a large plastic bag or even a clear storage container placed over the bucket.
Incubation: The Waiting Game
This is where patience comes in. The mushroom mycelium needs time to colonize the straw.
1. Find a Suitable Location: Place the container in a dark, warm place with a temperature of around 65-75°F (18-24°C). A closet, basement, or spare room works well. Avoid direct sunlight, as this can dry out the straw and inhibit growth.
2. Monitor Humidity: Check the humidity level regularly. The straw should remain damp, but not soaking wet. If it starts to dry out, mist it lightly with water using your spray bottle.
3. Wait for Colonization: Over the next 2-3 weeks, the mushroom mycelium will spread throughout the straw. You’ll see white, fuzzy growth on the straw. This is a good sign! The straw should eventually be almost completely covered in white mycelium.
Fruiting: Time to Harvest!
Once the straw is fully colonized, it’s time to initiate fruiting. This means creating the conditions that will encourage the mushrooms to form.
1. Introduce Light: Move the container to a location with indirect light. Mushrooms need some light to fruit properly. A north-facing window is ideal.
2. Increase Ventilation: Remove the plastic wrap or humidity tent to increase ventilation. Fresh air is essential for fruiting.
3. Maintain Humidity: Continue to mist the straw regularly to maintain a high humidity level. You may need to mist several times a day, depending on the humidity in your environment.
4. Watch for Pinheads: After a few days, you should start to see small mushroom “pinheads” forming on the surface of the straw. These are the baby mushrooms!
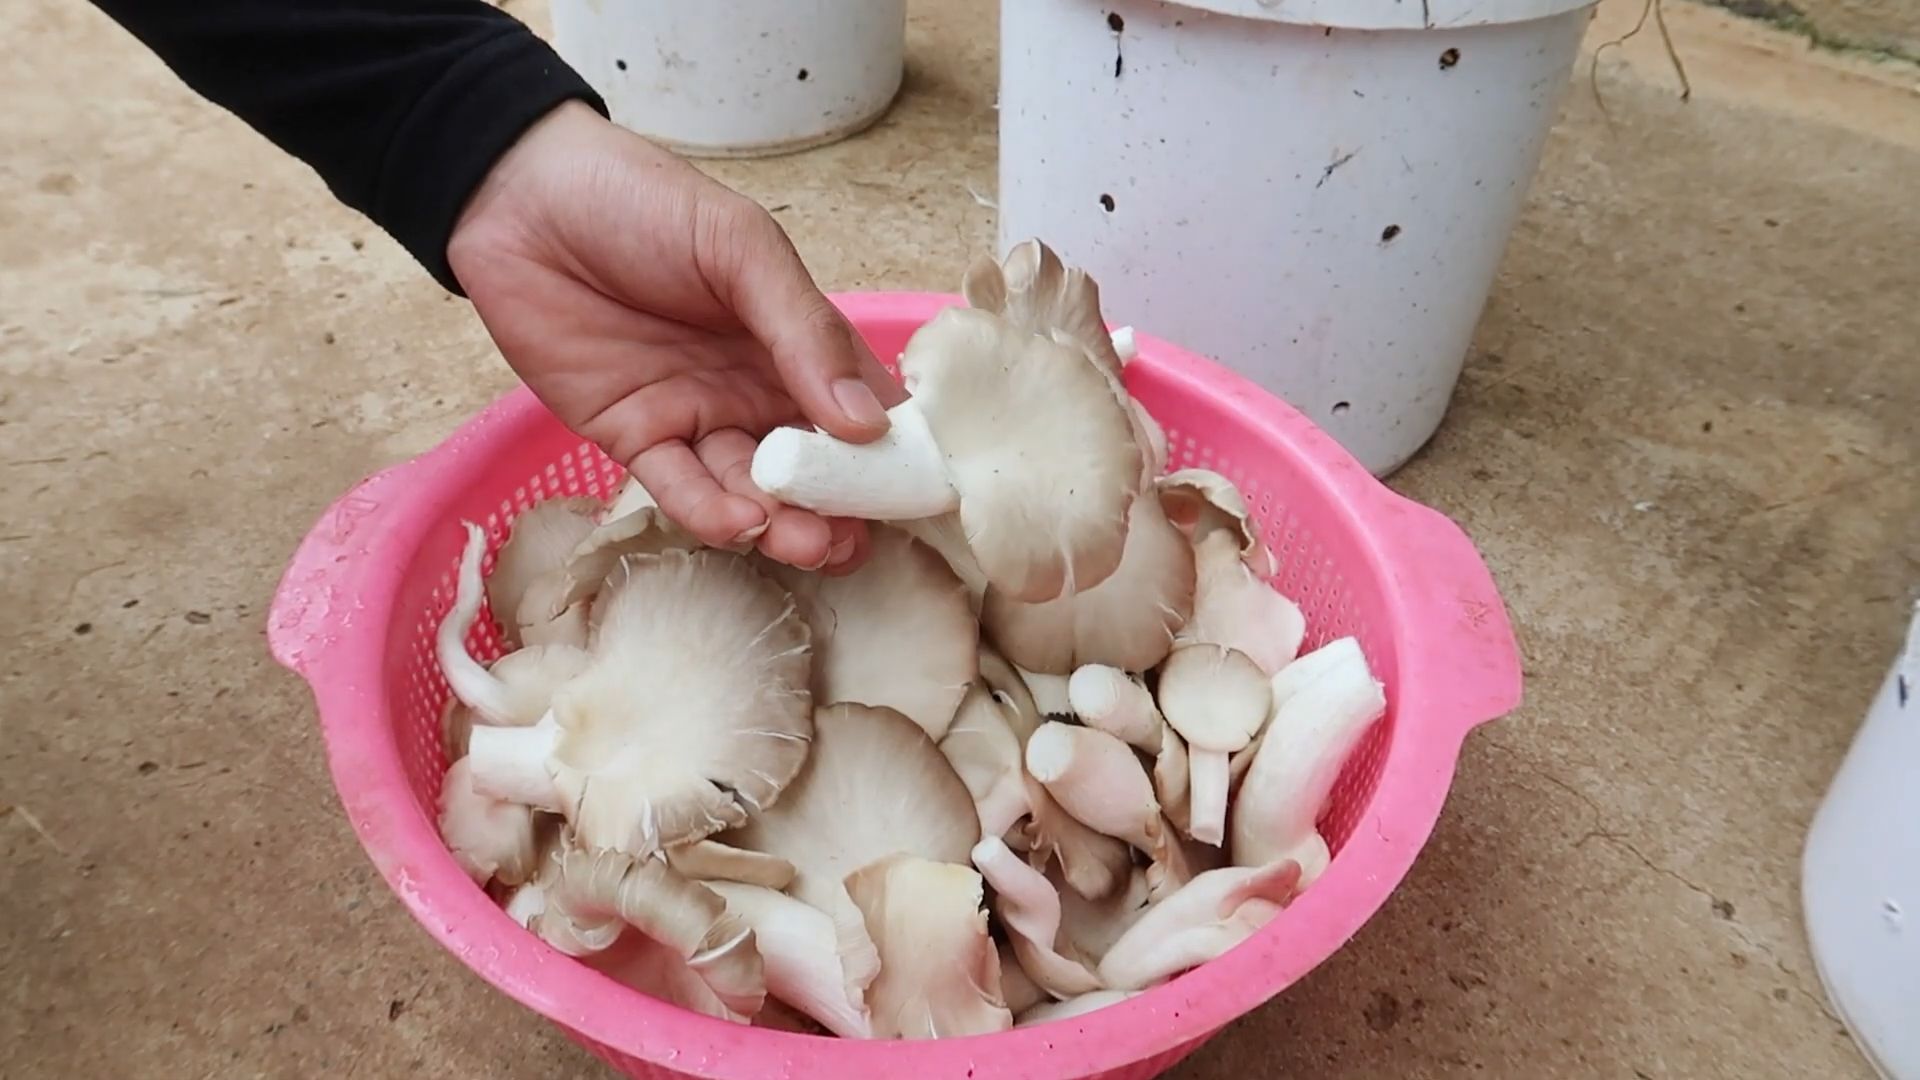
5. Harvest the Mushrooms: The mushrooms will grow rapidly over the next few days. Harvest them when the caps are fully formed but before they start to release spores. You can gently twist or cut the mushrooms off the straw.
Troubleshooting: Common Issues and Solutions
Even with the best preparation, you might encounter some challenges. Here are a few common issues and how to address them:
* Contamination: If you see green, black, or other colored mold growing on the straw, it’s likely contaminated. Unfortunately, you’ll need to discard the contaminated straw and start over. To prevent contamination, make sure to pasteurize the straw properly and maintain a clean work environment.
* Slow Colonization: If the mycelium is growing slowly, the temperature may be too low. Try moving the container to a warmer location.
* Dry Straw: If the straw is drying out, mist it more frequently. You can also try covering the container with a humidity tent to help retain moisture.
* No Fruiting: If the straw is fully colonized but no mushrooms are forming, make sure you’re providing enough light and ventilation. You may also need to lower the temperature slightly.
Enjoy Your Homegrown Mushrooms!
Congratulations! You’ve successfully grown your own oyster mushrooms at home. Now it’s time to enjoy the fruits (or rather, fungi) of your labor. Use your homegrown mushrooms in your favorite recipes, from stir-fries and soups to omelets and pasta dishes. The possibilities are endless!
Remember, mushroom growing is a learning process. Don’t be discouraged if you don’t succeed on your first try. Keep experimenting and learning, and you’ll be harvesting delicious mushrooms in no time. Happy growing!
Conclusion
So, there you have it! Cultivating your own mushrooms at home isn’t just a fun project; it’s a gateway to fresh, flavorful ingredients right at your fingertips. We’ve walked you through a simple, effective method that demystifies the process, making it accessible even for beginners. Forget those expensive, often lackluster mushrooms from the grocery store. Imagine the satisfaction of harvesting your own bounty, knowing exactly where it came from and how it was grown.
This DIY approach to mushroom growing at home offers a multitude of benefits. You’ll save money, reduce your carbon footprint by minimizing transportation, and gain a deeper appreciation for the natural world. Plus, the taste of freshly grown mushrooms is simply unparalleled. They’re more vibrant, more aromatic, and packed with a depth of flavor that you just can’t find in commercially produced varieties.
But the best part? This is just the beginning! Once you’ve mastered the basics, you can experiment with different mushroom varieties. Try growing oyster mushrooms for their delicate, seafood-like flavor, or shiitake mushrooms for their rich, umami notes. You can even explore more exotic options like lion’s mane, known for its unique texture and potential cognitive benefits.
Consider these variations to personalize your mushroom growing experience:
* Substrate Experimentation: While we’ve focused on a simple straw-based substrate, you can experiment with other materials like coffee grounds, cardboard, or even wood chips, depending on the type of mushroom you’re growing. Research which substrates are best suited for your chosen variety.
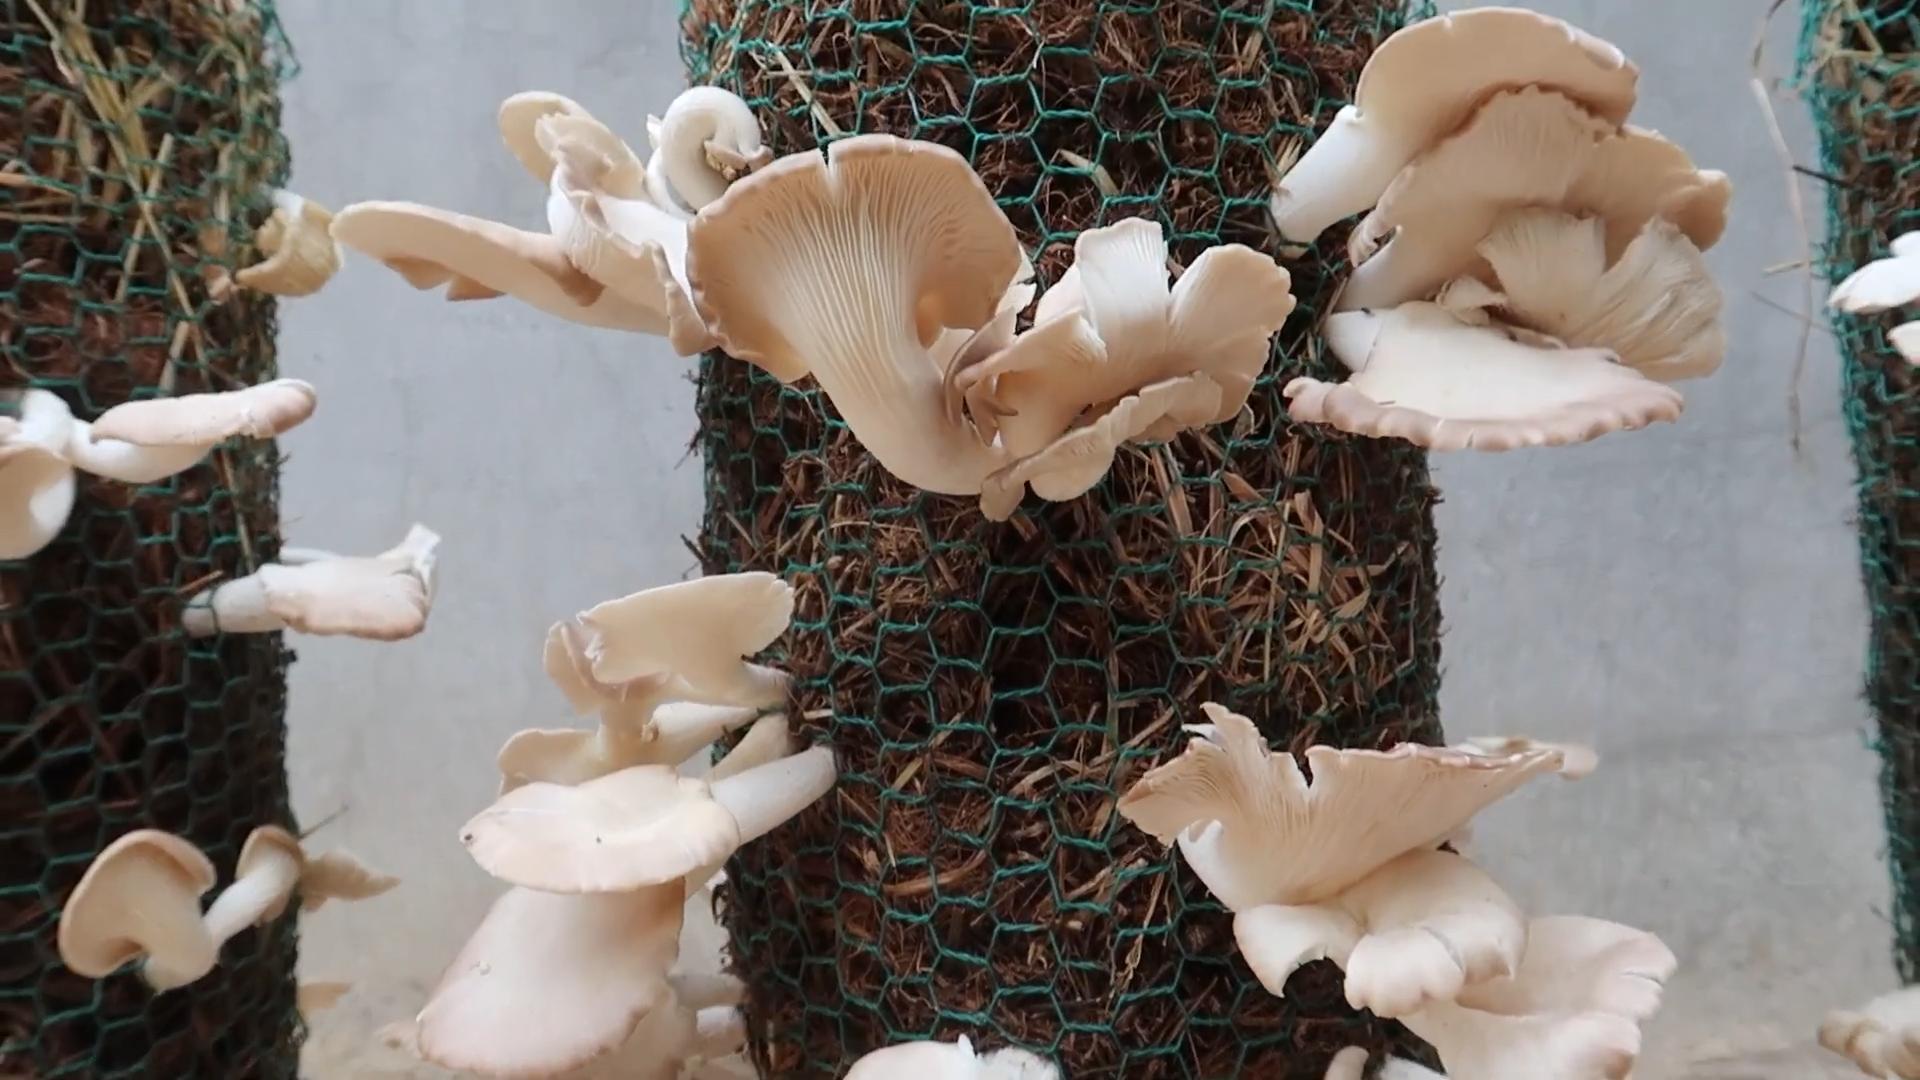
* Vertical Growing: If you’re short on space, consider a vertical growing system. You can stack multiple containers or bags to maximize your yield in a small area.
* Outdoor Growing: Depending on your climate, you may be able to grow mushrooms outdoors in a shaded, humid environment. This can be a great way to supplement your indoor growing efforts.
* Mushroom Logs: For a longer-term project, inoculate logs with mushroom spawn. This method requires more patience but can yield mushrooms for several years.
Don’t be afraid to get creative and adapt the process to your specific needs and preferences. The beauty of DIY is that it’s all about learning and experimenting.
We understand that venturing into the world of mushroom cultivation can seem daunting at first, but trust us, it’s incredibly rewarding. The sense of accomplishment you’ll feel when you harvest your first batch of homegrown mushrooms is truly special.
So, what are you waiting for? Gather your supplies, follow our simple steps, and embark on your own mushroom growing adventure. We’re confident that you’ll be amazed by the results.
And most importantly, we want to hear about your experience! Share your successes, your challenges, and your tips with us in the comments below. Let’s build a community of home mushroom growers and learn from each other. Your insights could inspire others to take the plunge and discover the joys of mushroom growing at home. Happy growing!
Frequently Asked Questions (FAQ)
What are the easiest mushrooms to grow at home for beginners?
Oyster mushrooms are generally considered the easiest mushrooms to grow for beginners. They are relatively fast-growing, tolerant of a wider range of conditions, and can thrive on a variety of substrates, including straw, coffee grounds, and even cardboard. Shiitake mushrooms are also a good option, although they require a bit more patience and attention to detail. Avoid more complex varieties like morels or truffles when you’re just starting out.
How long does it take to grow mushrooms at home?
The time it takes to grow mushrooms at home varies depending on the variety and the growing conditions. Oyster mushrooms can typically be harvested within 2-3 weeks of inoculation, while shiitake mushrooms may take several months to fruit. Factors such as temperature, humidity, and light can also affect the growth rate. Be patient and monitor your mushrooms closely, and you’ll be rewarded with a delicious harvest.
What kind of substrate should I use for growing mushrooms?
The best substrate for growing mushrooms depends on the specific variety you’re cultivating. Straw is a popular and readily available option for oyster mushrooms, while wood chips or sawdust are often used for shiitake mushrooms. Coffee grounds can also be a good supplement to other substrates. Make sure to properly pasteurize or sterilize your substrate before inoculation to prevent contamination.
How do I prevent contamination when growing mushrooms?
Contamination is a common challenge in mushroom growing, but there are several steps you can take to minimize the risk. First, ensure that your substrate is properly pasteurized or sterilized to kill any competing organisms. Second, maintain a clean and sanitary growing environment. Wear gloves and a mask when handling the substrate and spawn, and disinfect your work surfaces regularly. Finally, monitor your mushrooms closely for any signs of contamination, such as mold or unusual odors. If you detect contamination, remove the affected area immediately to prevent it from spreading.
What are the ideal temperature and humidity levels for growing mushrooms?
The ideal temperature and humidity levels for growing mushrooms vary depending on the variety. Oyster mushrooms typically prefer temperatures between 60-75°F (15-24°C) and humidity levels of 80-90%, while shiitake mushrooms prefer slightly cooler temperatures and lower humidity. Research the specific requirements for your chosen variety and adjust your growing environment accordingly. You can use a humidifier or a spray bottle to increase humidity, and a heater or cooler to regulate temperature.
How much light do mushrooms need to grow?
Mushrooms don’t need a lot of light to grow, but they do need some light to trigger fruiting. Indirect sunlight or artificial light is sufficient. Avoid exposing your mushrooms to direct sunlight, as this can dry them out. A simple fluorescent light or LED grow light can provide adequate illumination.
What if my mushrooms don’t fruit?
If your mushrooms aren’t fruiting, there could be several reasons why. First, make sure that the temperature and humidity levels are within the optimal range for your chosen variety. Second, check that the substrate is properly hydrated. Third, ensure that the mushrooms are receiving enough light. Finally, be patient. Sometimes it takes a little time for mushrooms to fruit, especially if they’re grown from spores.
Can I eat mushrooms that I’ve grown at home?
Yes, you can eat mushrooms that you’ve grown at home, as long as you’re certain that they are the correct variety and that they haven’t been contaminated. It’s crucial to properly identify your mushrooms before consuming them, as some wild mushrooms are poisonous. If you’re unsure about the identity of your mushrooms, consult with a mycologist or experienced mushroom grower.
Where can I buy mushroom spawn?
Mushroom spawn can be purchased from a variety of sources, including online retailers, garden centers, and specialty mushroom suppliers. Look for reputable suppliers that offer high-quality spawn and provide clear instructions for growing.
Is mushroom growing at home expensive?
No, mushroom growing at home doesn’t have to be expensive. You can start with a simple setup using readily available materials like straw, coffee grounds, and plastic bags. As you gain experience, you can invest in more sophisticated equipment, such as grow tents, humidifiers, and automated watering systems. However, even with a basic setup, you can still enjoy a bountiful harvest of homegrown mushrooms.
Leave a Comment