
Grow Mint Indoors? Absolutely! Imagine stepping into your kitchen and snipping fresh, fragrant mint leaves for your morning tea, a refreshing mojito, or a vibrant addition to your favorite dish. No more sad, wilted herbs from the grocery store – just the invigorating scent and taste of homegrown mint, right at your fingertips. For centuries, mint has been cherished not only for its culinary uses but also for its medicinal properties and symbolic significance, representing hospitality and warmth in many cultures.
But let’s be honest, sometimes gardening feels like a daunting task, especially when space is limited or the weather isn’t cooperating. That’s where these DIY tricks and hacks come in! I’m here to show you that you don’t need a sprawling garden to enjoy the delights of fresh herbs. Whether you’re a seasoned gardener or a complete beginner, I’ll guide you through simple, effective methods to successfully grow mint indoors, regardless of your living situation.
This article is packed with practical tips and easy-to-follow instructions that will empower you to cultivate your own thriving indoor mint garden. Say goodbye to expensive store-bought herbs and hello to a sustainable, flavorful, and rewarding experience. Let’s get started!
Grow Your Own Fresh Mint Indoors: A Beginner’s Guide
Hey there, fellow plant enthusiasts! Ever dreamt of having fresh, fragrant mint readily available for your mojitos, teas, or culinary creations? Well, dream no more! Growing mint indoors is surprisingly easy, and I’m here to guide you through every step of the process. Get ready to unleash your inner gardener and enjoy the delightful aroma of homegrown mint all year round!
Choosing the Right Mint Variety
First things first, let’s talk mint varieties. While all mints share that characteristic refreshing flavor, they do differ in subtle ways. Here are a few popular choices for indoor growing:
* Peppermint: This is your classic, strong mint flavor, perfect for teas and desserts.
* Spearmint: A milder, sweeter mint, often used in chewing gum and sauces.
* Chocolate Mint: Yes, you read that right! This variety has a hint of chocolate aroma and flavor, making it a fun and unique addition to your indoor garden.
* Apple Mint: A fruity and slightly fuzzy mint, great for adding a subtle sweetness to drinks and salads.
I personally love growing spearmint because of its versatility, but feel free to experiment and find your favorite!
Gathering Your Supplies
Before we dive into the planting process, let’s make sure you have everything you need. Here’s a checklist:
* Mint Seeds or Cuttings: You can start from seeds, but I find that cuttings are much easier and faster. You can get cuttings from a friend’s garden, a local nursery, or even a grocery store (just make sure the stems are healthy and haven’t been treated with anything that would prevent rooting).
* Pot: Choose a pot that’s at least 6 inches in diameter and has drainage holes. Mint can be quite invasive, so it’s best to keep it contained in a pot rather than planting it directly in your garden.
* Potting Mix: Use a well-draining potting mix specifically formulated for containers. Avoid using garden soil, as it can become compacted and doesn’t provide adequate drainage.
* Watering Can or Spray Bottle: For gentle watering.
* Sunny Location: Mint thrives in bright, indirect sunlight. A windowsill that receives morning sun is ideal.
* Optional: Rooting hormone (if using cuttings), fertilizer.
Planting Your Mint
Now for the fun part! Let’s get those mint plants growing.
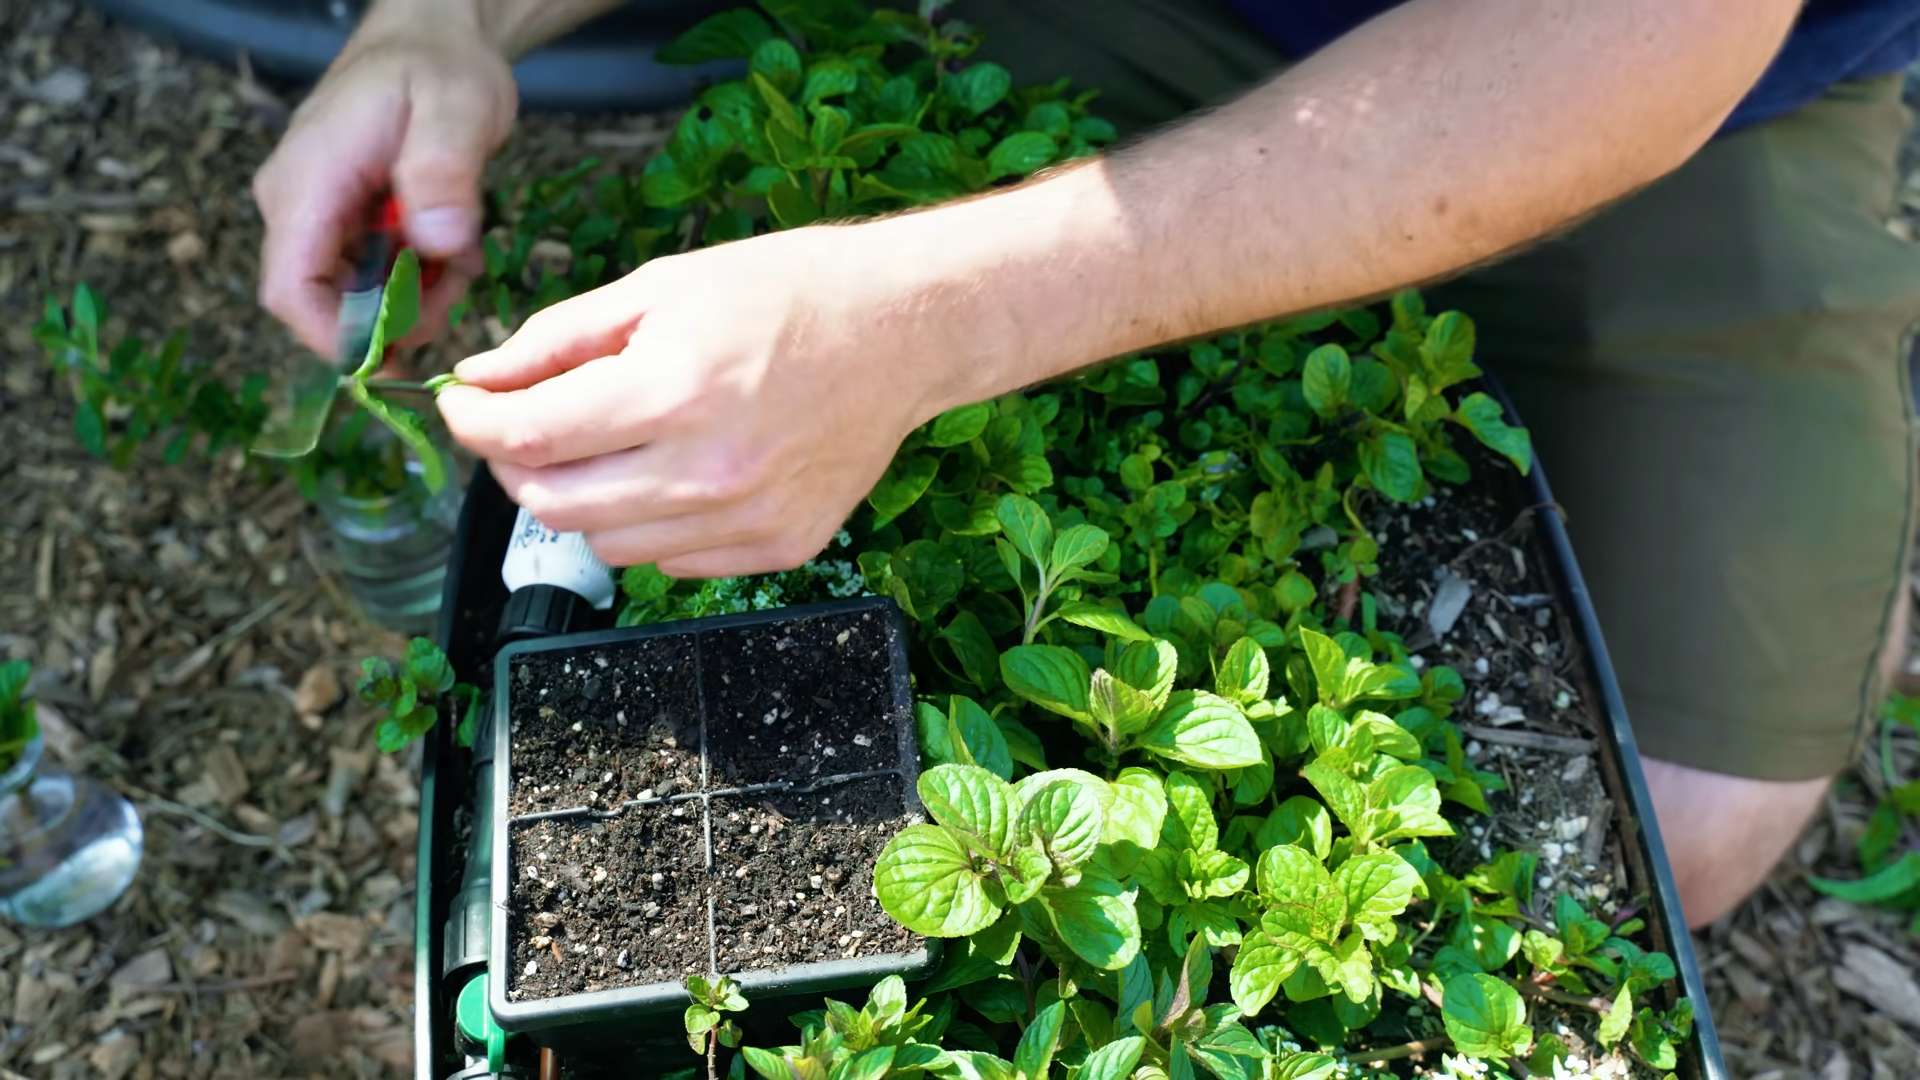
Starting from Cuttings:
1. Prepare the Cuttings: If you’re using cuttings, remove the leaves from the bottom inch or two of the stem. This will encourage root growth. If you have rooting hormone, dip the cut ends of the stems into it. This step is optional but can help speed up the rooting process.
2. Plant the Cuttings: Fill your pot with potting mix, leaving about an inch of space at the top. Make small holes in the soil and gently insert the cuttings, spacing them about 2-3 inches apart.
3. Water Thoroughly: Water the soil until it’s evenly moist but not soggy.
4. Provide Humidity: Mint cuttings root best in a humid environment. You can create a mini-greenhouse by covering the pot with a clear plastic bag or placing it inside a humidity dome. Make sure to vent the bag or dome occasionally to prevent mold growth.
5. Wait for Roots to Develop: It usually takes about 2-3 weeks for roots to develop. You’ll know the cuttings have rooted when you see new growth.
Starting from Seeds:
1. Sow the Seeds: Fill your pot with potting mix. Sprinkle the mint seeds evenly over the surface of the soil. Mint seeds are tiny, so don’t bury them too deep. Gently press them into the soil.
2. Water Gently: Water the soil using a spray bottle to avoid disturbing the seeds.
3. Cover with Plastic Wrap: Cover the pot with plastic wrap to create a humid environment.
4. Place in a Sunny Location: Place the pot in a warm, sunny location.
5. Wait for Germination: Mint seeds typically germinate in 10-14 days. Once the seedlings emerge, remove the plastic wrap.
6. Thin the Seedlings: Once the seedlings are a few inches tall, thin them out so that they are spaced about 2-3 inches apart.
Caring for Your Indoor Mint
Once your mint plants are established, it’s important to provide them with the right care to keep them thriving.
* Watering: Water your mint regularly, keeping the soil consistently moist but not waterlogged. Check the soil moisture by sticking your finger into the soil. If the top inch feels dry, it’s time to water.
* Sunlight: Mint needs at least 4-6 hours of sunlight per day. If you don’t have a sunny windowsill, you can supplement with a grow light.
* Fertilizing: Feed your mint with a balanced liquid fertilizer every 2-4 weeks during the growing season (spring and summer).
* Pruning: Pruning is essential for keeping your mint plant bushy and productive. Pinch off the top leaves regularly to encourage branching. You can also harvest larger stems as needed.
* Pest Control: Keep an eye out for pests like aphids and spider mites. If you spot any pests, you can treat them with insecticidal soap or neem oil.
* Repotting: Mint grows quickly, so you may need to repot it into a larger container every year or two.
Harvesting Your Mint
The best part about growing your own mint is being able to harvest it whenever you need it!
* Harvesting: You can start harvesting mint leaves as soon as the plant is a few inches tall. Simply pinch off the leaves or cut the stems with scissors.
* Drying: If you want to preserve your mint, you can dry it. To dry mint, tie the stems together and hang them upside down in a cool, dry place. Once the leaves are completely dry, you can crumble them and store them in an airtight container.
Troubleshooting Common Problems
Even with the best care, you might encounter a few problems while growing mint indoors. Here are some common issues and how to address them:
* Yellowing Leaves: This could be a sign of overwatering, underwatering, or nutrient deficiency. Check the soil moisture and adjust your watering accordingly. If the soil is dry, water more frequently. If the soil is soggy, water less frequently. You can also try fertilizing your mint with a balanced liquid fertilizer.
* Leggy Growth: This is usually caused by insufficient sunlight. Move your mint plant to a sunnier location or supplement with a grow light.
* Pests: As mentioned earlier, aphids and spider mites are common pests of mint. Treat them with insecticidal soap or neem oil.
* Powdery Mildew: This is a fungal disease that can affect mint plants. It appears as a white powdery coating on the leaves. To prevent powdery mildew, make sure your mint plant has good air circulation and avoid overwatering. If you see signs of powdery mildew, remove the affected leaves and treat the plant with a fungicide.
Tips and Tricks for Success
Here are a few extra tips to help you grow thriving mint indoors:
* Rotate Your Plant: Rotate your mint plant regularly to ensure that all sides receive equal sunlight.
* Provide Good Air Circulation: Mint needs good air circulation to prevent fungal diseases.
* Don’t Overwater: Overwatering is one of the most common mistakes people make when growing mint indoors. Make sure the soil is well-draining and avoid letting the plant sit in standing water.
* Pinch Off Flowers: If you want to encourage leaf production, pinch off any flowers that appear.
* Enjoy Your Mint! Use your fresh mint in teas, cocktails, salads, sauces, and desserts.
Growing mint indoors is a rewarding experience that allows you to enjoy fresh, fragrant herbs all year round. With a little care and attention, you can have a thriving mint plant that will provide you with a constant supply of delicious leaves. Happy gardening!

Conclusion
So, there you have it! Growing mint indoors isn’t just a possibility; it’s a delightful and rewarding experience that brings a touch of freshness right into your home. We’ve walked through the simple steps, from selecting the right container and soil to providing adequate light and water. But why is this DIY trick a must-try?
Firstly, imagine the convenience of having fresh mint readily available whenever you need it. No more last-minute trips to the grocery store for a sprig or two. Whether you’re whipping up a refreshing mojito, adding a vibrant garnish to your summer salad, or brewing a soothing cup of mint tea, your homegrown mint will always be at your fingertips.
Secondly, growing your own mint is incredibly cost-effective. A single purchase of a mint plant or even a few cuttings can provide you with a continuous supply for months, even years, to come. Think of all the money you’ll save compared to buying pre-packaged mint from the store!
Thirdly, and perhaps most importantly, growing mint indoors is a therapeutic and fulfilling activity. Nurturing a plant and watching it thrive is incredibly satisfying. It’s a small way to connect with nature, even in the heart of the city. Plus, the aroma of fresh mint wafting through your home is simply divine.
But don’t stop there! Experiment with different varieties of mint. Peppermint, spearmint, chocolate mint – the possibilities are endless. Each variety offers a unique flavor profile that can elevate your culinary creations. You can also try different containers, from classic terracotta pots to repurposed mason jars. Get creative and personalize your mint garden to reflect your own style.
Consider using a self-watering planter to simplify the watering process, especially if you tend to forget. Alternatively, explore hydroponic systems for an even more efficient and space-saving way to grow mint indoors. You can even propagate your mint by taking cuttings and starting new plants, effectively multiplying your mint supply for free.
We wholeheartedly encourage you to give this DIY trick a try. It’s easy, affordable, and incredibly rewarding. And once you’ve experienced the joy of growing your own mint indoors, we’d love to hear about it! Share your experiences, tips, and photos with us in the comments below. Let’s create a community of indoor mint growers and inspire others to bring a little bit of green into their lives. Let us know what you think about this method of growing mint indoors. Happy growing!
Frequently Asked Questions (FAQ)
What is the best type of mint to grow indoors?
While you can grow almost any type of mint indoors, some varieties tend to thrive better than others. Spearmint and peppermint are generally considered to be the easiest and most resilient options for indoor cultivation. They adapt well to indoor conditions and produce a strong, aromatic flavor. Chocolate mint is another popular choice, offering a unique and delicious twist. Experiment with different varieties to find your personal favorite! Just be aware that mint is invasive, so keep it contained in its own pot.
How much sunlight does indoor mint need?
Mint thrives in bright, indirect sunlight. Aim for at least 6 hours of sunlight per day. If you don’t have a sunny windowsill, you can supplement with a grow light. Place the light a few inches above the plant and leave it on for 12-14 hours a day. Insufficient light can lead to leggy growth and a weaker flavor. Rotate your mint plant regularly to ensure that all sides receive adequate light.
What kind of soil should I use for growing mint indoors?
Mint prefers well-draining soil that is rich in organic matter. A good potting mix specifically formulated for herbs is ideal. You can also create your own mix by combining equal parts potting soil, perlite, and compost. Perlite helps improve drainage, while compost provides essential nutrients. Avoid using garden soil, as it can be too heavy and may contain pests or diseases.
How often should I water my indoor mint plant?
Water your mint plant when the top inch of soil feels dry to the touch. Avoid overwatering, as this can lead to root rot. Ensure that your pot has drainage holes to allow excess water to escape. During the warmer months, you may need to water more frequently. In the winter, when growth slows down, you can reduce watering. Check the soil moisture regularly and adjust your watering schedule accordingly.
How do I harvest mint leaves?
Harvest mint leaves by pinching or cutting them off the stem. The best time to harvest is in the morning, after the dew has dried. Regular harvesting encourages the plant to produce more leaves. Avoid removing more than one-third of the plant at a time, as this can stress the plant. You can use the fresh mint leaves immediately or dry them for later use.
How do I dry mint leaves?
There are several ways to dry mint leaves. One method is to tie a bunch of stems together and hang them upside down in a cool, dry, and well-ventilated place. Another method is to spread the leaves out on a baking sheet and dry them in a low oven (170°F or 77°C) for a few hours. You can also use a dehydrator to dry the leaves. Once the leaves are completely dry, store them in an airtight container in a cool, dark place.
Why are the leaves on my mint plant turning yellow?
Yellowing leaves can be a sign of several problems, including overwatering, underwatering, nutrient deficiency, or pest infestation. Check the soil moisture to ensure that you are not overwatering or underwatering. If the soil is consistently wet, allow it to dry out before watering again. If the soil is dry, water thoroughly. You can also fertilize your mint plant with a balanced liquid fertilizer to provide essential nutrients. Inspect the leaves for pests, such as aphids or spider mites, and treat accordingly.
How do I propagate mint from cuttings?
Propagating mint from cuttings is a simple and effective way to create new plants. Take a cutting that is about 4-6 inches long from a healthy stem. Remove the lower leaves, leaving only a few leaves at the top. Place the cutting in a glass of water, ensuring that the lower nodes (where the leaves were removed) are submerged. Place the glass in a bright, indirect light location. Change the water every few days. After a few weeks, roots will begin to form. Once the roots are about an inch long, you can transplant the cutting into a pot filled with potting mix.
My mint plant is attracting pests. What should I do?
Mint plants can be susceptible to pests such as aphids, spider mites, and whiteflies. Regularly inspect your plant for signs of infestation. If you find pests, you can try washing them off with a strong stream of water. You can also use insecticidal soap or neem oil to control pests. Be sure to follow the instructions on the product label carefully.
Can I grow mint indoors year-round?
Yes, you can grow mint indoors year-round with proper care. Provide adequate light, water, and nutrients, and your mint plant will thrive even during the winter months. You may need to adjust your watering schedule and provide supplemental light during the shorter days of winter. With a little attention, you can enjoy fresh mint all year long.


Leave a Comment