
Planting Celery in Backyard: Ever dreamt of snipping fresh, crisp celery stalks right from your own garden for that perfect afternoon snack or a vibrant addition to your soup? I know I have! For centuries, celery has been a staple in cuisines worldwide, dating back to ancient Greece where it was initially used for medicinal purposes and even as victory wreaths. Now, you can bring this versatile vegetable closer to home with a few simple DIY tricks.
But why bother with the effort of growing your own celery? Well, store-bought celery often lacks the intense flavor and satisfying crunch of homegrown varieties. Plus, let’s be honest, who knows how long it’s been sitting on the shelf? With these easy-to-follow DIY tips, you can bypass the grocery store and enjoy the freshest, most flavorful celery imaginable. I’m going to show you how easy it is to start planting celery in backyard, even if you’re a complete beginner. Get ready to transform your backyard into a thriving celery patch!
Growing Celery From Kitchen Scraps: A Beginner’s Guide
Hey there, fellow gardening enthusiasts! Ever thought about turning your kitchen scraps into a thriving garden? Well, today, I’m going to walk you through a super cool and surprisingly easy project: growing celery from the base you’d normally toss in the compost. It’s a fantastic way to reduce waste, save money, and enjoy fresh, homegrown celery. Let’s get started!
What You’ll Need
Before we dive in, let’s gather our supplies. This is a pretty low-cost project, which is always a win in my book!
* Celery Base: The star of the show! Choose a fresh-looking celery stalk from the grocery store. Make sure the base (the part where the stalks are connected) is firm and healthy, without any signs of rot or excessive browning.
* Shallow Dish or Bowl: Something to hold water and support the celery base. A pie plate, a small plastic container, or even a saucer will work perfectly.
* Water: Tap water is fine.
* Potting Soil: A good quality potting mix is essential for healthy growth. Avoid using garden soil directly, as it can be too dense and may contain pests or diseases.
* Pot with Drainage Holes: Choose a pot that’s at least 6 inches in diameter and has drainage holes at the bottom. This will prevent waterlogging, which can be detrimental to your celery.
* Spray Bottle (Optional): For misting the celery leaves.
* Gardening Gloves (Optional): To keep your hands clean.
* Trowel or Small Shovel: For transplanting the celery.
* Sunny Location: Celery needs plenty of sunlight to thrive.
Step-by-Step Instructions: From Kitchen Scrap to Garden Treat
Okay, let’s get our hands dirty! Here’s a detailed breakdown of the process:
Phase 1: Rooting the Celery Base
This is where the magic begins! We’re going to coax those roots out of the celery base.
1. Prepare the Celery Base: Carefully cut off the celery stalks about 1-2 inches from the base. You can use these stalks for cooking or snacking – no waste here! The key is to leave the base intact.
2. Place in Water: Fill your shallow dish or bowl with about an inch of water. Place the celery base, cut-side up, in the water. Make sure the bottom of the base is submerged, but the top part remains dry.
3. Find a Sunny Spot: Place the dish with the celery base in a bright, sunny location. A windowsill that receives several hours of direct sunlight is ideal.
4. Change the Water Regularly: This is crucial to prevent the water from becoming stagnant and promoting rot. Change the water every 1-2 days.
5. Observe and Wait: Within a few days (usually 5-7), you should start to see small roots emerging from the bottom of the celery base. Be patient! It might take a little longer depending on the temperature and the freshness of the celery.
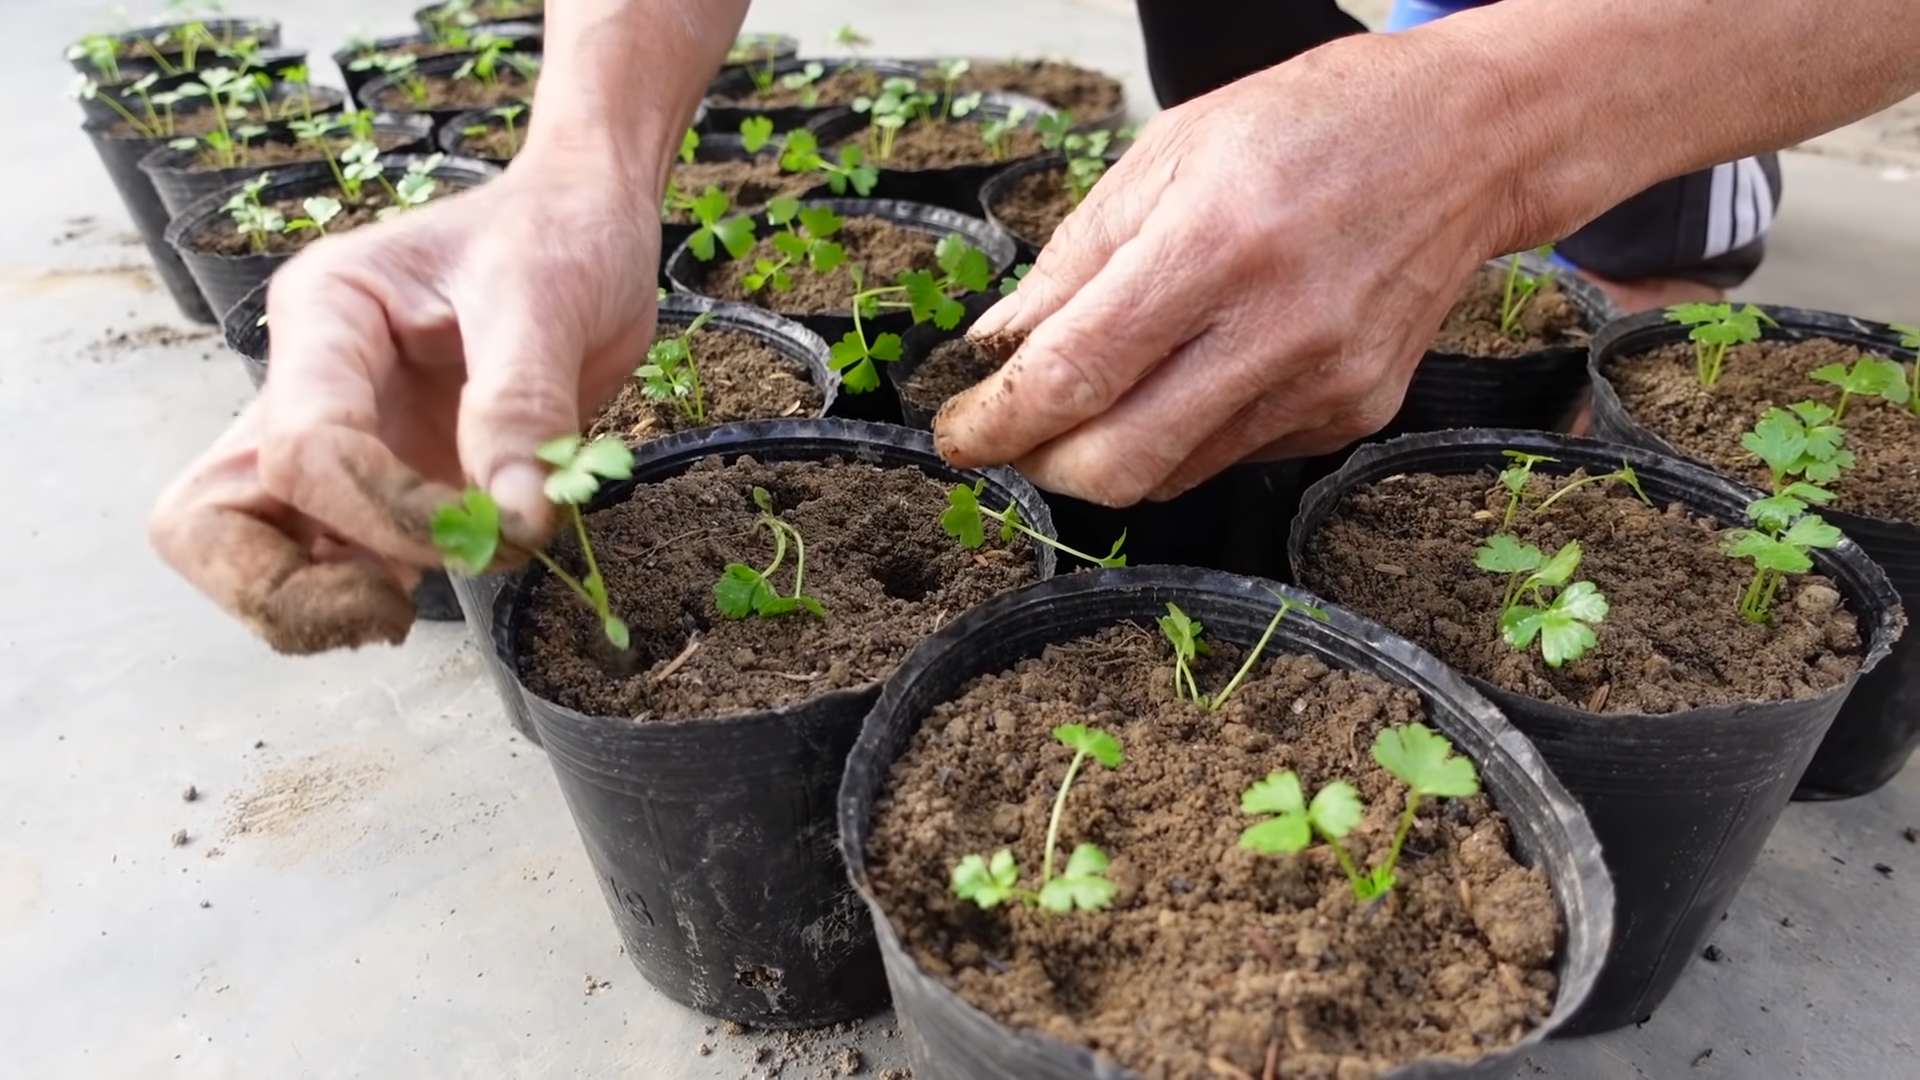
Phase 2: Planting the Rooted Celery
Once you have a good set of roots, it’s time to move your celery to a pot with soil.
6. Prepare the Pot: Fill your pot with potting soil, leaving about an inch of space at the top. Gently press down on the soil to remove any air pockets.
7. Create a Hole: Use your trowel or fingers to create a hole in the center of the pot, large enough to accommodate the celery base and its roots.
8. Transplant the Celery: Carefully remove the celery base from the water. Gently separate the roots if they are tangled. Place the celery base in the hole, making sure the top of the base is level with the soil surface.
9. Fill and Pat: Fill the hole around the celery base with potting soil. Gently pat the soil down to secure the plant in place.
10. Water Thoroughly: Water the newly planted celery thoroughly until water drains out of the drainage holes. This will help settle the soil and provide the roots with moisture.
Phase 3: Caring for Your Celery Plant
Now that your celery is planted, it’s time to provide it with the care it needs to thrive.
11. Sunlight: Celery needs at least 6 hours of sunlight per day. Place your pot in a sunny location, such as a windowsill or a patio.
12. Watering: Keep the soil consistently moist, but not waterlogged. Water when the top inch of soil feels dry to the touch. Avoid overwatering, as this can lead to root rot.
13. Fertilizing (Optional): To encourage healthy growth, you can fertilize your celery plant every 2-3 weeks with a balanced liquid fertilizer. Follow the instructions on the fertilizer packaging.
14. Misting (Optional): Celery enjoys humidity. You can mist the leaves with water every few days, especially during dry weather.
15. Pest Control: Keep an eye out for pests such as aphids or slugs. If you notice any pests, you can remove them by hand or use an organic insecticide.
Troubleshooting Tips
Even with the best intentions, things don’t always go as planned. Here are a few common issues you might encounter and how to address them:
* Celery Base Rotting: If the celery base starts to rot, it’s likely due to stagnant water. Make sure to change the water regularly and avoid overwatering.
* Slow Root Growth: If the roots are growing slowly, try moving the celery base to a warmer location. You can also add a small amount of rooting hormone to the water.
* Yellowing Leaves: Yellowing leaves can be a sign of overwatering or underwatering. Adjust your watering schedule accordingly. It could also indicate a nutrient deficiency, so consider fertilizing.
* Leggy Growth: If your celery plant is growing tall and spindly, it’s likely not getting enough sunlight. Move it to a brighter location.
Harvesting Your Celery
Okay, so you’ve nurtured your celery plant, and now it’s time to reap the rewards!
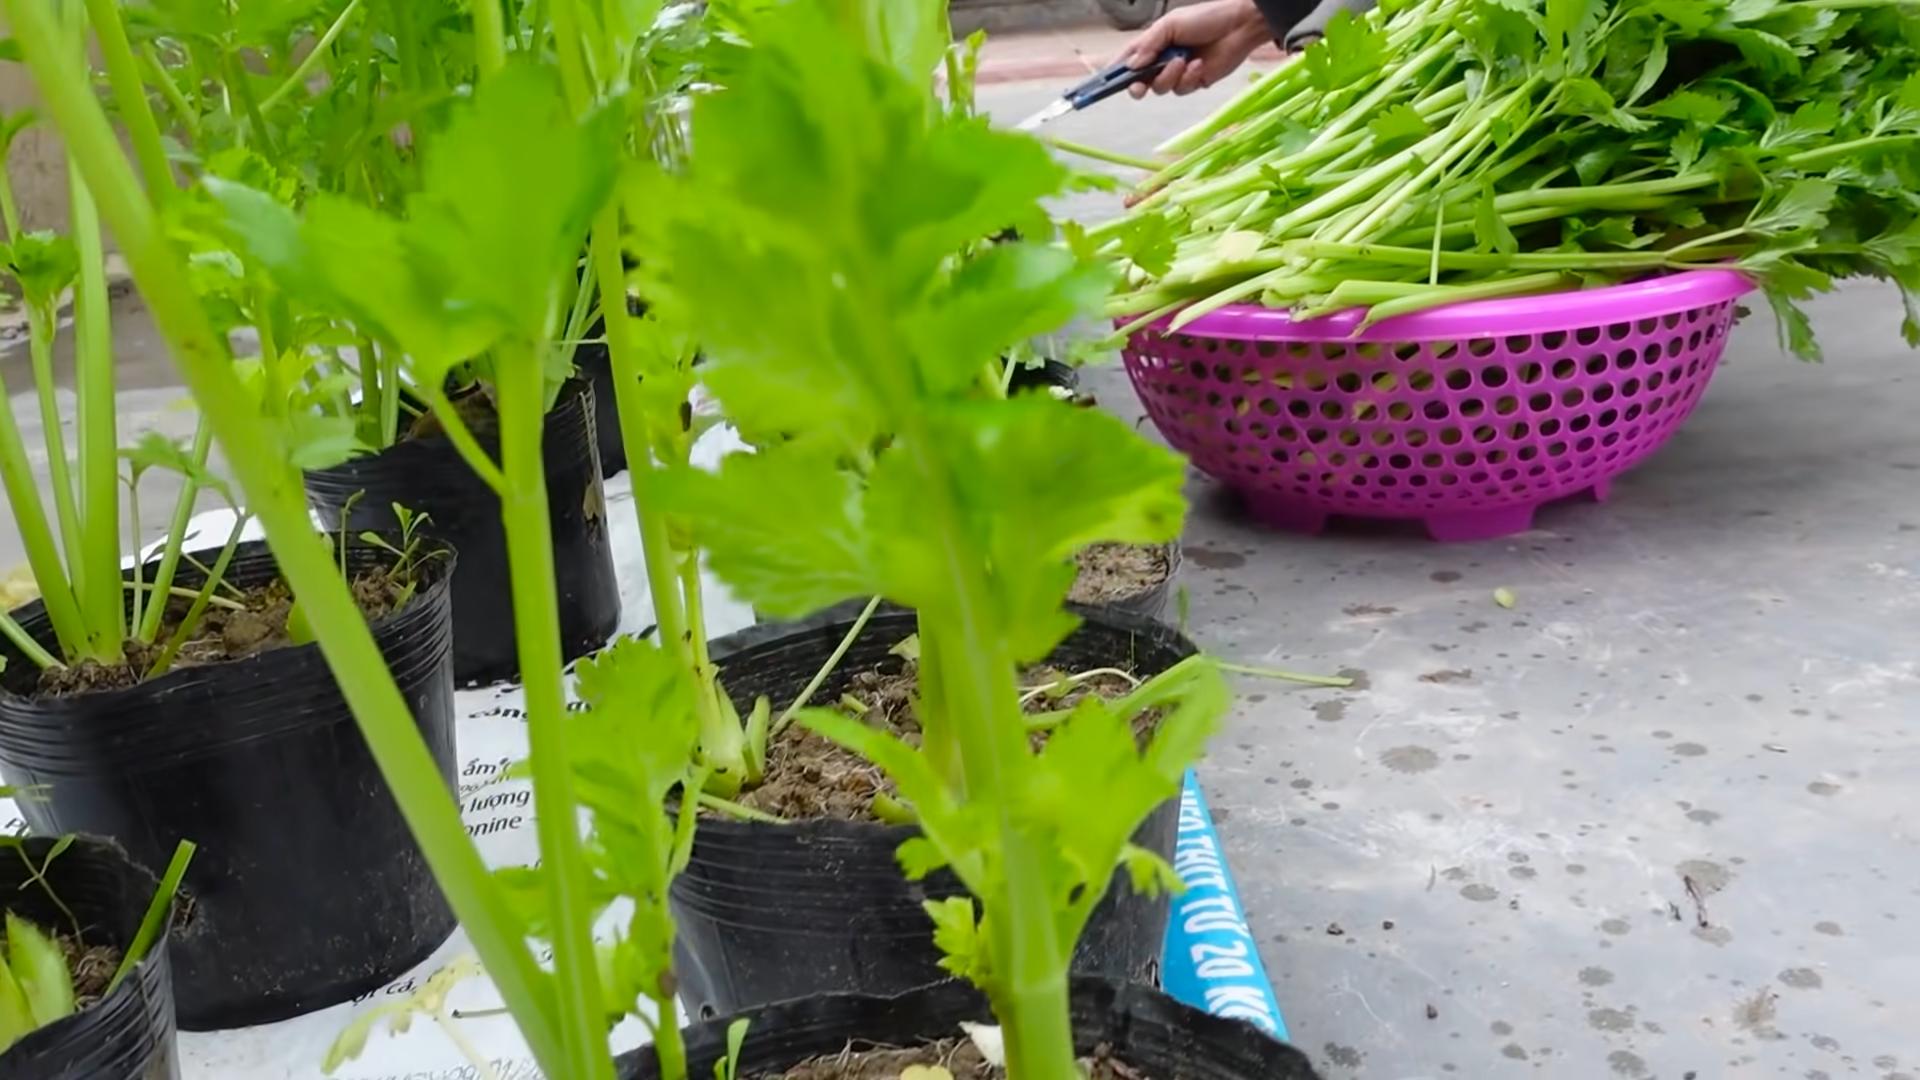
* When to Harvest: You can start harvesting celery stalks when they are about 6-8 inches long.
* How to Harvest: Use a sharp knife to cut the outer stalks near the base of the plant. Leave the inner stalks to continue growing.
* Enjoy Your Harvest: Wash the celery stalks thoroughly and enjoy them in salads, soups, or as a healthy snack.
Extra Tips for Success
Here are a few extra tips to help you succeed in growing celery from kitchen scraps:
* Start with a Healthy Celery Base: The fresher and healthier the celery base, the better your chances of success.
* Be Patient: Growing celery from kitchen scraps takes time and patience. Don’t get discouraged if you don’t see results immediately.
* Experiment: Try different varieties of celery to see which ones grow best in your area.
* Have Fun: Gardening should be enjoyable! Relax, experiment, and enjoy the process of watching your celery grow.
Why Grow Celery From Scraps?
You might be wondering, “Why bother growing celery from scraps when I can just buy it at the store?” Well, there are several compelling reasons:
* Reduce Waste: It’s a great way to reduce food waste and give new life to something you would normally throw away.
* Save Money: Growing your own celery can save you money on groceries.
* Fresh, Homegrown Produce: There’s nothing quite like the taste of fresh, homegrown celery.
* Educational: It’s a fun and educational project for kids and adults alike.
* Sustainable Gardening: It promotes sustainable gardening practices by reusing resources.
Final Thoughts
Growing celery from kitchen scraps is a rewarding and sustainable way to enjoy fresh, homegrown produce. With a little patience and care, you can turn your kitchen waste into a thriving garden. So, go ahead and give it a try! You might be surprised at how easy and fun it is. Happy gardening!
Conclusion
So, there you have it! Planting celery in your backyard isn’t just a whimsical gardening project; it’s a gateway to fresher, more flavorful meals, a reduced grocery bill, and the immense satisfaction of nurturing your own food. We’ve walked you through the simple steps, from selecting the right celery head to harvesting your crisp, homegrown stalks.
But why is this DIY trick a must-try? Beyond the obvious benefits of fresh produce, consider the environmental impact. By growing your own celery, you’re reducing your reliance on commercially grown produce that often travels long distances, contributing to carbon emissions. You’re also minimizing your exposure to potentially harmful pesticides and herbicides, ensuring that what you’re putting on your table is as natural and healthy as possible.
Furthermore, the taste difference is undeniable. Store-bought celery, while convenient, often lacks the vibrant flavor and crisp texture of freshly harvested celery. When you grow your own, you can pick it at its peak ripeness, ensuring that every bite is bursting with flavor. Imagine adding that freshly picked celery to your soups, salads, or even enjoying it as a healthy snack with your favorite dip.
Now, let’s talk about variations and suggestions. While we’ve focused on growing celery from the base of a store-bought head, you can also start from seeds. This method requires more patience and attention, but it allows you to choose from a wider variety of celery types, including heirloom varieties with unique flavors and colors. Experiment with different soil types and fertilizers to see what works best in your backyard. Consider companion planting. Celery thrives alongside plants like onions, garlic, and tomatoes, which can help deter pests and improve soil health.
Don’t be afraid to get creative with your celery harvest. Use the leaves to make a flavorful celery salt, or add them to your homemade vegetable broth for an extra boost of flavor. The possibilities are endless!
Ultimately, planting celery in your backyard is an incredibly rewarding experience. It’s a chance to connect with nature, learn new skills, and enjoy the fruits (or rather, vegetables) of your labor. So, grab a celery head, follow our simple steps, and get ready to experience the joy of homegrown celery.
We wholeheartedly encourage you to try this DIY trick. It’s easier than you think, and the rewards are well worth the effort. Once you’ve harvested your first batch of homegrown celery, we’d love to hear about your experience. Share your photos, tips, and tricks in the comments below. Let’s build a community of backyard celery growers and inspire others to embrace the joys of homegrown food! Let us know what challenges you faced, what worked well, and any creative ways you’ve found to use your homegrown celery. Your insights will help others succeed and make this DIY project even more accessible to everyone.
Frequently Asked Questions (FAQ)
What kind of celery should I buy to regrow?
Look for celery heads that are firm, crisp, and have a healthy-looking base. Avoid celery that is wilted, discolored, or has signs of rot. Organic celery is a great option if you want to avoid pesticides. The fresher the celery, the better the chances of successful regrowth.
How long does it take to grow celery from a base?
It typically takes around 75-90 days from planting the base to harvesting mature celery stalks. However, you’ll start to see new growth within a week or two of planting the base in water. After transferring it to soil, you’ll notice more significant growth over the next few weeks. Be patient, and remember that growing conditions can affect the growth rate.
What kind of soil is best for growing celery?
Celery prefers rich, well-draining soil that is high in organic matter. Amend your soil with compost or well-rotted manure before planting to improve its fertility and drainage. A slightly acidic soil pH of around 6.0 to 6.8 is ideal. You can test your soil pH with a simple soil testing kit available at most garden centers.
How much sunlight does celery need?
Celery needs at least 6 hours of sunlight per day to thrive. Choose a sunny spot in your backyard that receives plenty of direct sunlight. If you live in a hot climate, some afternoon shade can be beneficial to prevent the celery from bolting (going to seed prematurely).
How often should I water celery?
Celery needs consistent moisture to grow properly. Water deeply and regularly, especially during hot, dry weather. Aim to keep the soil consistently moist but not waterlogged. Check the soil moisture regularly by sticking your finger into the soil. If the top inch feels dry, it’s time to water.
What are some common pests and diseases that affect celery?
Celery can be susceptible to pests like aphids, celery leaf miners, and carrot weevils. Diseases like early blight and late blight can also affect celery. Regularly inspect your plants for signs of pests or diseases. Use organic pest control methods like insecticidal soap or neem oil to control pests. Ensure good air circulation around your plants to prevent fungal diseases.
Can I grow celery in a container?
Yes, you can grow celery in a container, but you’ll need a large container that is at least 12 inches deep and wide to accommodate the celery’s root system. Use a well-draining potting mix and water regularly. Container-grown celery may require more frequent fertilization than celery grown in the ground.
How do I harvest celery?
You can harvest celery stalks as needed once they reach a desired size. Simply cut the outer stalks near the base of the plant with a sharp knife. The inner stalks will continue to grow. You can also harvest the entire plant at once by cutting it off at the base.
Can I eat the celery leaves?
Yes, celery leaves are edible and have a strong celery flavor. You can use them in soups, salads, or as a garnish. Celery leaves are also a great addition to homemade vegetable broth.
My celery is bolting (going to seed). What should I do?
Bolting can be caused by stress, such as hot weather or inconsistent watering. Once celery bolts, the stalks become bitter and less palatable. You can try to prevent bolting by providing consistent moisture, shading the plants during hot weather, and harvesting the celery before it gets too mature. If your celery has already bolted, you can still harvest the seeds for future planting.
How can I store my harvested celery?
Store harvested celery in the refrigerator. Wrap the celery stalks in a damp paper towel and place them in a plastic bag or container. This will help keep them crisp and fresh for up to two weeks. You can also freeze celery for longer storage. Chop the celery into small pieces and blanch it in boiling water for a few minutes before freezing.
Is homegrown celery more nutritious than store-bought celery?
While the nutritional content can vary depending on growing conditions, homegrown celery is often more nutritious than store-bought celery because it is harvested at its peak ripeness and hasn’t been stored for long periods. It also tends to have fewer pesticide residues.
What are some creative ways to use my homegrown celery?
Beyond the usual soups and salads, try using your homegrown celery to make celery juice, celery root puree, or even candied celery. You can also use the celery leaves to make a flavorful celery salt or add them to your homemade vegetable broth. Get creative and experiment with different recipes to discover new ways to enjoy your homegrown celery.
What if my celery base rots instead of growing roots?
This can happen if the water is not changed frequently enough or if the celery base is already damaged. Make sure to change the water every day or two. Also, ensure the celery base is not submerged too deeply in the water; only the very bottom should be touching the water. If you see signs of rot, discard the base and try again with a fresh celery head.

Leave a Comment