
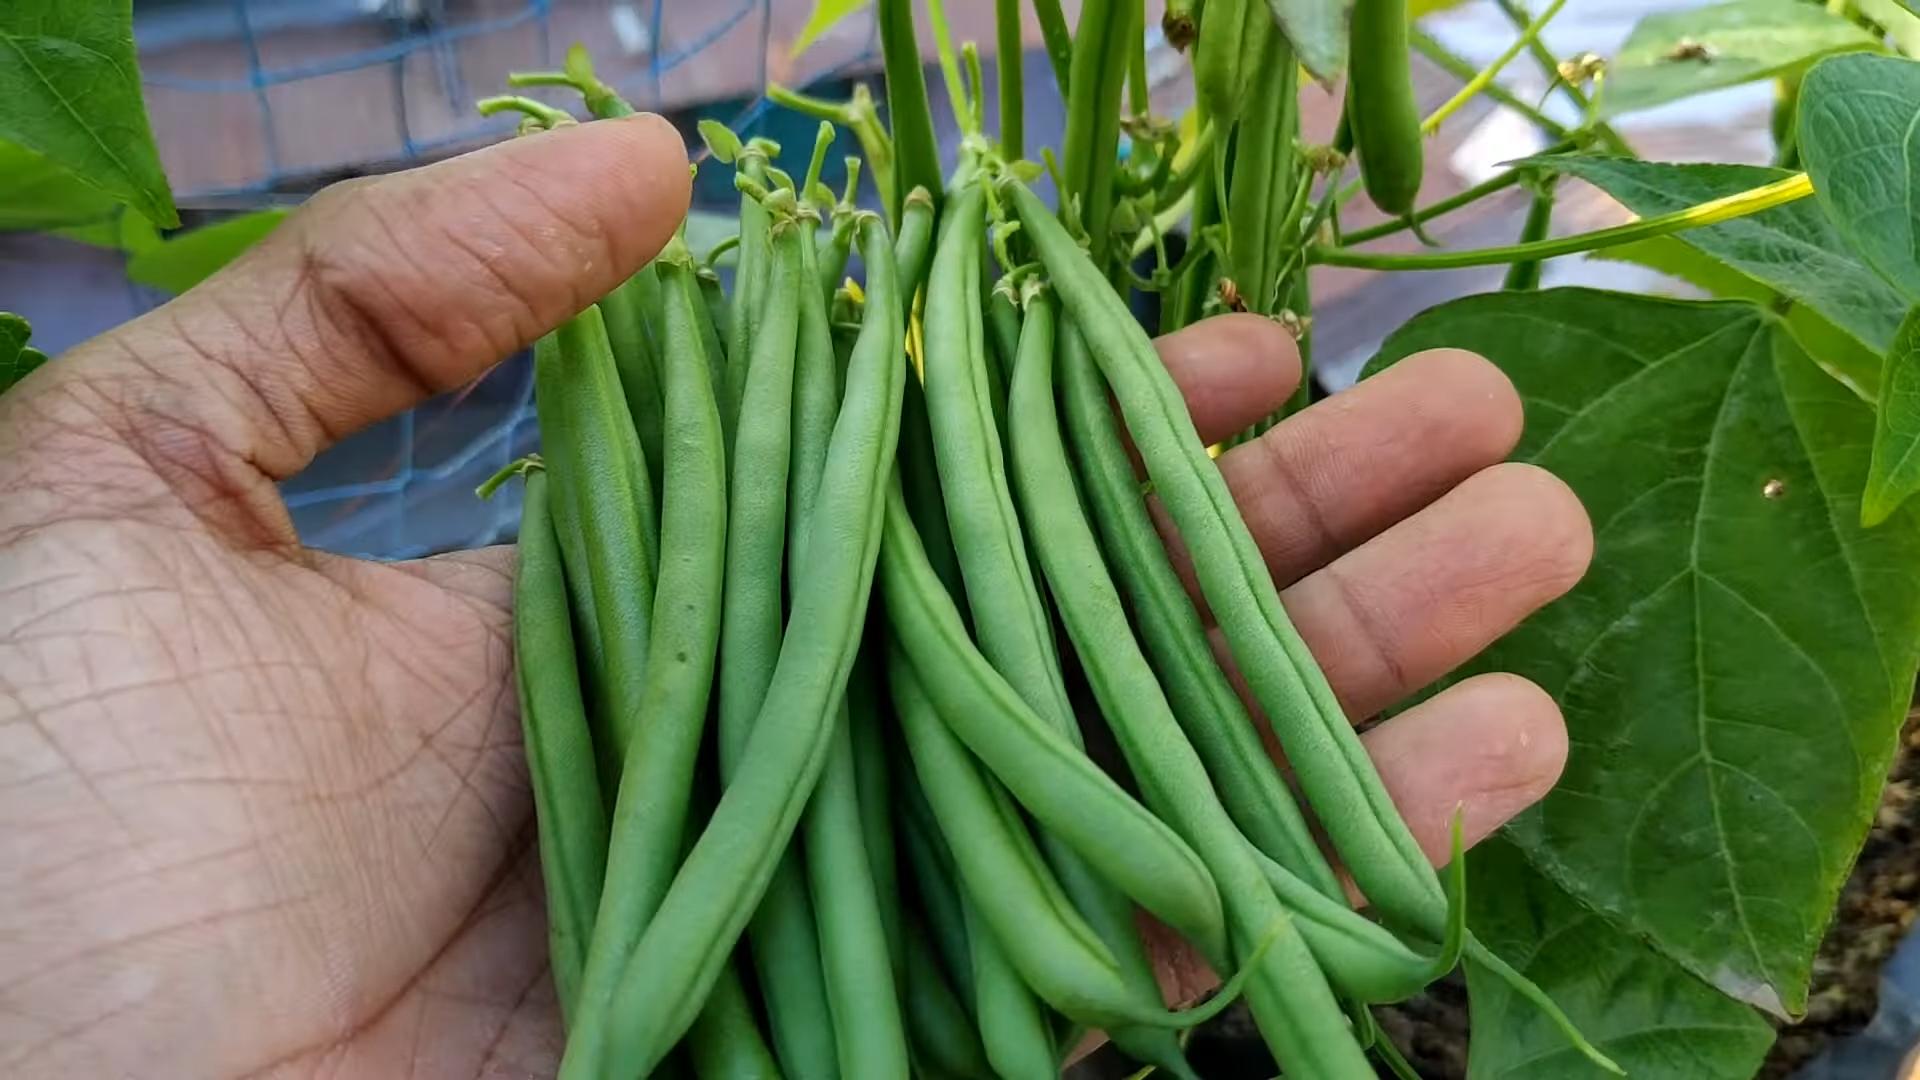
Grow French Beans at Home and unlock the joy of harvesting your own fresh, crisp beans right from your backyard! Imagine stepping outside and picking the perfect ingredients for a delicious salad or side dish, knowing exactly where your food comes from and how it was grown. For centuries, cultivating beans has been a staple in gardens around the world, providing essential nutrients and a connection to the earth. From ancient civilizations to modern-day homesteaders, the satisfaction of nurturing a bean plant from seed to harvest is a timeless tradition.
But let’s be honest, sometimes gardening can feel a little daunting, right? That’s where these simple DIY tricks and hacks come in! I’m here to share my favorite tips and techniques to help you successfully grow French Beans at Home, even if you’re a complete beginner. We’ll cover everything from choosing the right variety and preparing your soil to preventing pests and maximizing your yield. So, ditch the store-bought beans and get ready to experience the unparalleled flavor and satisfaction of homegrown goodness. Let’s get our hands dirty and start growing!
Growing Your Own Spuds: A Beginner’s Guide to Planting Potatoes at Home
Okay, so you want to grow your own potatoes? Awesome! It’s surprisingly easy and incredibly rewarding. There’s nothing quite like digging up your own homegrown potatoes and knowing exactly where they came from. This guide will walk you through everything you need to know, from choosing the right potatoes to harvesting your bounty. Let’s get started!
Choosing Your Seed Potatoes
First things first, you can’t just plant any old potato from the grocery store. Those are often treated to prevent sprouting. You need what are called “seed potatoes.” These are potatoes specifically grown for planting.
* What are Seed Potatoes? Seed potatoes are simply potatoes that are grown to be planted and produce more potatoes. They are certified disease-free and are ready to sprout.
* Where to Get Them: You can find seed potatoes at your local garden center, online retailers specializing in gardening supplies, or even some farmers’ markets.
* Choosing the Right Variety: Consider your climate and what you want to use the potatoes for. Some varieties are better for boiling, others for baking, and some are all-purpose. Popular choices include Yukon Gold (all-purpose), Russet (baking), and Red Pontiac (boiling).
* Size Matters (Sort Of): You don’t need huge seed potatoes. In fact, smaller ones are often better. If you have larger seed potatoes, you can cut them into pieces, ensuring each piece has at least one or two “eyes” (those little buds that will sprout).
Preparing Your Seed Potatoes: Chitting (Optional but Recommended)
“Chitting” is a fancy word for pre-sprouting your potatoes. It’s not absolutely necessary, but it gives your potatoes a head start and can lead to an earlier harvest.
* What is Chitting? Chitting involves encouraging your seed potatoes to sprout before planting them in the ground.
* How to Chit:
* Place your seed potatoes in a cool, bright, and frost-free location. Egg cartons or trays work well for this.
* Allow the potatoes to sit for a few weeks, until they develop short, green sprouts (about 1/2 to 1 inch long).
* Turn the potatoes occasionally to ensure even sprouting.
* Why Chit? Chitting helps the potatoes establish themselves faster once planted, leading to a quicker and potentially larger harvest.
Preparing Your Planting Site
Potatoes need well-drained soil and plenty of sunlight. Choose a location that gets at least six hours of direct sunlight per day.
* Soil Preparation:
* Potatoes prefer slightly acidic soil (pH 6.0-6.5). You can test your soil with a soil testing kit from your local garden center.
* Amend the soil with plenty of organic matter, such as compost or well-rotted manure. This will improve drainage and provide nutrients.
* Remove any rocks, weeds, or debris from the planting area.
* Loosen the soil to a depth of at least 12 inches. This will allow the potato roots to grow easily.
* Choosing a Planting Method: You can plant potatoes in the ground, in raised beds, or even in containers. Raised beds and containers offer better drainage, which is crucial for potato growth.
Planting Your Potatoes: Getting Them in the Ground
Now for the fun part! Planting your potatoes is relatively straightforward.
1. Timing is Key: Plant your potatoes in the spring, after the last frost. The soil temperature should be at least 45°F (7°C). I usually wait until the soil has warmed up a bit more, around 50-55°F, just to be safe.
2. Cutting Seed Potatoes (If Necessary): If you’re using larger seed potatoes, cut them into pieces, ensuring each piece has at least one or two “eyes.” Allow the cut surfaces to dry for a day or two before planting. This helps prevent rot.
3. Digging the Trenches: Dig trenches that are about 6-8 inches deep and 2-3 feet apart.
4. Planting the Potatoes: Place the seed potato pieces (or whole small seed potatoes) in the trenches, with the eyes facing up. Space them about 12 inches apart.
5. Covering the Potatoes: Cover the potatoes with soil, filling the trenches.
6. Watering: Water the soil thoroughly after planting.
Hilling Your Potatoes: The Secret to a Bountiful Harvest
“Hilling” is the process of gradually covering the potato plants with soil as they grow. This encourages the plants to produce more potatoes along the stems.
* What is Hilling? Hilling involves mounding soil around the base of the potato plants as they grow.
* When to Hill: Start hilling when the potato plants are about 6-8 inches tall.
* How to Hill:
* Use a hoe or shovel to pull soil from the sides of the trench towards the base of the plants.
* Cover the stems with soil, leaving only the top few leaves exposed.
* Repeat this process every few weeks as the plants grow, until you have created a mound of soil around the base of the plants that is about 12 inches high.
* Why Hill? Hilling encourages the plants to produce more potatoes along the buried stems. Potatoes form on underground stems (stolons), so the more stem that is buried, the more potatoes you’ll get. It also helps protect the developing potatoes from sunlight, which can cause them to turn green and produce solanine, a toxic compound.
Caring for Your Potato Plants: Watering, Fertilizing, and Pest Control
Like any plant, potatoes need proper care to thrive.
* Watering: Water your potato plants regularly, especially during dry periods. Keep the soil consistently moist, but not waterlogged.
* Fertilizing: Potatoes are heavy feeders, so they benefit from regular fertilization. Use a balanced fertilizer (e.g., 10-10-10) or a fertilizer specifically formulated for potatoes. Follow the instructions on the fertilizer package. I like to side-dress my potatoes with compost tea every few weeks as well.
* Pest Control: Watch out for common potato pests, such as potato beetles, aphids, and flea beetles. Hand-picking pests, using insecticidal soap, or applying diatomaceous earth can help control infestations.
* Weed Control: Keep the area around your potato plants free of weeds. Weeds compete with the potatoes for nutrients and water. Mulching with straw or hay can help suppress weeds.
Harvesting Your Potatoes: The Moment of Truth
The anticipation is building! Harvesting your potatoes is the most exciting part of the process.
* When to Harvest:
* New Potatoes: You can harvest “new potatoes” (small, tender potatoes) about 2-3 weeks after the plants flower. Gently dig around the base of the plants and harvest a few potatoes, leaving the rest to continue growing.
* Mature Potatoes: For mature potatoes, wait until the plants have flowered and the foliage starts to die back. This usually takes about 80-100 days from planting.
* How to Harvest:
* Use a garden fork or shovel to carefully dig up the potatoes. Be careful not to damage the potatoes.
* Loosen the soil around the plants and gently lift them out of the ground.
* Pick up the potatoes and brush off any excess soil.
* Curing and Storing:
* Curing: Cure your potatoes by allowing them to dry in a cool, dark, and well-ventilated place for about a week. This will help them develop a thicker skin and prevent rot.
* Storing: Store your cured potatoes in a cool, dark, and dry place, such as a root cellar or basement. The ideal storage temperature is between 40-50°F (4-10°C). Avoid storing potatoes near apples or onions, as they can cause the potatoes to sprout prematurely.
Troubleshooting: Common Potato Problems and Solutions
Even with the best care, you might encounter some problems along the way. Here are a few common issues and how to address them:
* Green Potatoes: Potatoes that are exposed to sunlight will turn green and produce solanine, a toxic compound. Avoid eating green potatoes. To prevent greening, make sure to hill your potatoes properly and store them in a dark place.
* Potato Scab: Potato scab is a common fungal disease that causes rough, corky lesions on the surface of the potatoes. It’s more common in alkaline soils. To prevent potato scab, amend your soil with organic matter and avoid over-liming.
* Late Blight: Late blight is a devastating fungal disease that can quickly destroy potato plants. It’s more common in cool, wet weather. To prevent late blight, choose disease
Conclusion
So, there you have it – a comprehensive guide to growing French beans at home! This isn’t just about saving a few dollars at the grocery store; it’s about connecting with nature, understanding where your food comes from, and enjoying the unparalleled flavor of freshly picked, homegrown produce. The satisfaction of nurturing a tiny seed into a thriving plant that yields delicious, crisp French beans is truly rewarding.
Why is this DIY trick a must-try? Because it’s accessible to everyone, regardless of gardening experience or space constraints. Whether you have a sprawling backyard or a sunny balcony, you can successfully cultivate these versatile legumes. Plus, growing your own French beans allows you to control the entire process, ensuring they are free from harmful pesticides and chemicals. You know exactly what you’re putting on your plate, and that peace of mind is priceless.
Beyond the basic method outlined, there are numerous ways to personalize your French bean growing experience. Consider exploring different varieties. Bush beans are ideal for smaller spaces and produce a concentrated harvest, while pole beans require trellising but offer a longer, more continuous yield. Experiment with companion planting. Marigolds can deter bean beetles, while nasturtiums attract aphids away from your precious beans. You can also try succession planting, sowing new seeds every few weeks to ensure a continuous supply of fresh beans throughout the growing season.
For those looking to get even more creative, consider growing your French beans in raised beds or containers. Raised beds offer improved drainage and soil quality, while containers allow you to move your plants around to optimize sunlight exposure. You can even create a vertical garden using repurposed pallets or hanging baskets, adding a touch of visual appeal to your growing space.
Don’t be afraid to experiment with different fertilizers and soil amendments. Compost, aged manure, and bone meal can all contribute to healthier, more productive plants. Just be sure to follow the instructions carefully and avoid over-fertilizing, which can damage your beans.
Ultimately, the key to successful French bean cultivation is observation and adaptation. Pay close attention to your plants, noting any signs of pests, diseases, or nutrient deficiencies. Adjust your watering and fertilizing schedule as needed, and don’t hesitate to seek advice from experienced gardeners or online resources.
We wholeheartedly encourage you to embark on this rewarding gardening journey. Growing French beans at home is not only a fun and educational experience but also a sustainable way to enjoy fresh, healthy food. So, grab some seeds, prepare your soil, and get ready to witness the magic of nature unfold before your eyes.
Once you’ve harvested your first crop of homegrown French beans, we’d love to hear about your experience! Share your tips, tricks, and photos in the comments below. Let’s create a community of passionate gardeners and inspire others to discover the joys of growing their own food. Happy gardening!
Frequently Asked Questions (FAQ)
What is the best time of year to plant French beans?
French beans are warm-season crops, so the best time to plant them is after the last frost in spring, when the soil has warmed up to at least 60°F (15°C). In most regions, this is typically between May and July. You can extend your growing season by starting seeds indoors a few weeks before the last frost or by using row covers to protect young plants from cold weather. If you live in a warmer climate, you may be able to plant French beans in early spring or even late summer for a fall harvest.
How much sunlight do French beans need?
French beans require at least 6-8 hours of direct sunlight per day to thrive. Choose a planting location that receives plenty of sunlight throughout the day. If you’re growing beans in containers, you can move them around to ensure they get adequate sunlight. Insufficient sunlight can lead to leggy plants with poor yields.
What type of soil is best for growing French beans?
French beans prefer well-drained, fertile soil with a pH between 6.0 and 7.0. Amend your soil with compost or aged manure before planting to improve drainage and fertility. Avoid heavy clay soils, which can become waterlogged and inhibit root growth. If you have clay soil, consider growing your beans in raised beds or containers filled with a well-draining potting mix.
How often should I water my French beans?
Water your French beans regularly, especially during hot, dry weather. Aim to keep the soil consistently moist but not waterlogged. Water deeply at the base of the plants, avoiding wetting the foliage, which can increase the risk of fungal diseases. A good rule of thumb is to water when the top inch of soil feels dry to the touch. Mulching around your plants can help retain moisture and suppress weeds.
What are some common pests and diseases that affect French beans?
French beans can be susceptible to various pests and diseases, including bean beetles, aphids, spider mites, powdery mildew, and bean rust. Regularly inspect your plants for signs of infestation or disease. Handpick pests or use insecticidal soap to control infestations. Ensure good air circulation around your plants to prevent fungal diseases. Rotate your crops each year to reduce the risk of soilborne diseases. Consider using disease-resistant varieties of French beans.
How do I know when my French beans are ready to harvest?
French beans are typically ready to harvest about 50-60 days after planting. Harvest them when the pods are firm, crisp, and fully developed but before the beans inside become too large and tough. Snap the pods off the plant carefully to avoid damaging the stems. Regular harvesting encourages continued production.
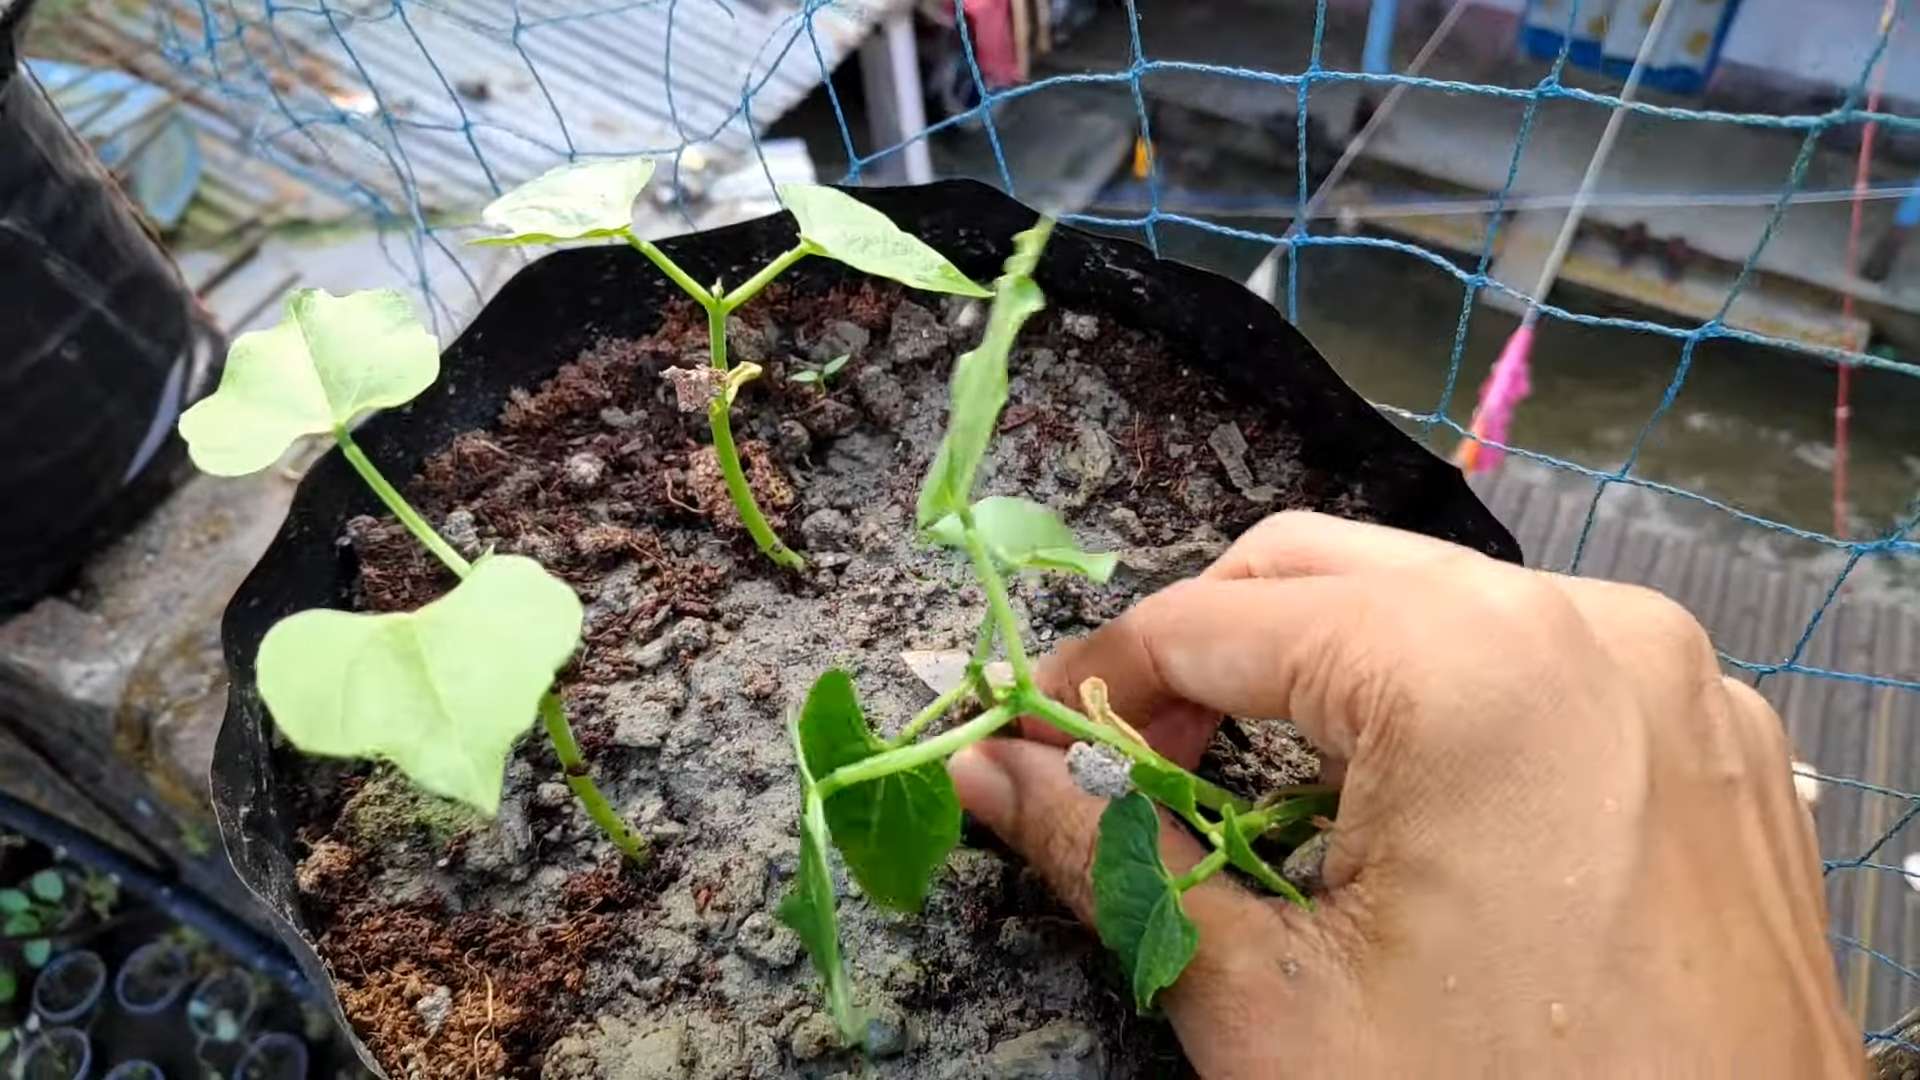
Can I grow French beans in containers?
Yes, French beans can be successfully grown in containers. Choose a container that is at least 12 inches deep and wide to accommodate the root system. Use a well-draining potting mix and ensure the container has drainage holes. Bush bean varieties are generally better suited for container growing than pole beans. Provide support for pole beans if you’re growing them in containers.
How do I save seeds from my French beans?
To save seeds from your French beans, allow some of the pods to mature fully on the plant. The pods will turn brown and dry out. Once the pods are completely dry, shell the beans and allow them to air dry for a few more days. Store the dried beans in an airtight container in a cool, dark, and dry place. Label the container with the variety and date.
What are some good companion plants for French beans?
Good companion plants for French beans include marigolds, nasturtiums, rosemary, thyme, and carrots. Marigolds deter bean beetles, while nasturtiums attract aphids away from the beans. Rosemary and thyme repel bean flies. Carrots help to loosen the soil and improve drainage. Avoid planting French beans near onions or garlic, as they can inhibit bean growth.
Are there different varieties of French beans I can grow?
Yes, there are many different varieties of French beans available, including bush beans, pole beans, and filet beans. Bush beans are compact and don’t require trellising, while pole beans are vining and need support. Filet beans are slender and tender. Some popular varieties include Blue Lake, Kentucky Wonder, and Roma. Experiment with different varieties to find your favorites.
Leave a Comment