
Red Cabbage Home Gardening: Ever dreamt of adding a vibrant splash of color and nutrition to your backyard oasis? I know I have! Forget those boring green salads; imagine harvesting your own gorgeous, deep purple red cabbage, bursting with flavor and antioxidants. This isn’t just about growing vegetables; it’s about creating a living work of art right outside your door.
Cabbage, in general, has a rich history, dating back to ancient times, with variations cultivated across Europe and Asia. Red cabbage, specifically, has been prized not only for its culinary uses but also for its natural dyes. Think of the stunning medieval tapestries colored with plant-based pigments – red cabbage likely played a role! But beyond its historical significance, growing your own red cabbage offers a unique connection to the earth and a satisfying sense of accomplishment.
Why do you need these DIY tricks and hacks for red cabbage home gardening? Well, let’s face it, gardening can sometimes feel overwhelming. From choosing the right soil to battling pesky pests, it’s easy to get discouraged. But fear not! I’m here to share simple, effective, and budget-friendly tips that will transform you from a gardening novice into a red cabbage-growing guru. These hacks will help you maximize your yield, minimize your effort, and enjoy the freshest, most flavorful red cabbage imaginable. Get ready to unleash your inner gardener and transform your backyard into a vibrant, edible masterpiece!
Growing Red Cabbage at Home: A Complete DIY Guide
Hey there, fellow gardening enthusiasts! I’m so excited to share my experience with growing red cabbage at home. It’s surprisingly easy, rewarding, and adds a beautiful pop of color to your garden and your plate. This guide will walk you through every step, from seed to harvest, ensuring you have a thriving red cabbage patch.
Choosing the Right Variety and Location
Before we get our hands dirty, let’s talk about variety and location. Not all red cabbages are created equal, and choosing the right spot is crucial for success.
* Variety Selection: Look for varieties that are well-suited to your climate and growing season. Some popular choices include ‘Red Acre,’ ‘Ruby Ball,’ and ‘Red Drumhead.’ ‘Red Acre’ is known for its early maturity, while ‘Ruby Ball’ produces compact heads, perfect for smaller gardens. ‘Red Drumhead’ is a reliable, larger variety. I personally love ‘Ruby Ball’ because it fits perfectly in my raised beds.
* Sunlight: Red cabbages need at least 6 hours of direct sunlight per day. More is always better! A sunny spot will ensure healthy growth and vibrant color.
* Soil: Well-drained, fertile soil is essential. Cabbages are heavy feeders, so the soil should be rich in organic matter. A slightly acidic pH (around 6.0 to 6.8) is ideal.
* Space: Red cabbages need space to grow. Allow at least 18-24 inches between plants and 24-36 inches between rows. This spacing allows for good air circulation, which helps prevent disease.
Starting Your Red Cabbage Seeds
You can either start your seeds indoors or directly sow them in the garden. I prefer starting them indoors because it gives them a head start and protects them from pests and harsh weather.
Starting Seeds Indoors:
1. Gather Your Supplies: You’ll need seed starting trays or small pots, seed starting mix, red cabbage seeds, a spray bottle, and a grow light (optional but highly recommended).
2. Prepare the Seed Starting Mix: Moisten the seed starting mix with water. It should be damp but not soggy.
3. Sow the Seeds: Fill the trays or pots with the moistened mix. Sow the seeds about ¼ inch deep, placing 2-3 seeds per cell or pot.
4. Cover and Water: Gently cover the seeds with more seed starting mix and lightly water with a spray bottle.
5. Provide Warmth and Light: Place the trays or pots in a warm location (around 70-75°F) and under a grow light or in a sunny window. If using a grow light, keep it a few inches above the seedlings.
6. Keep the Soil Moist: Water regularly to keep the soil consistently moist but not waterlogged.
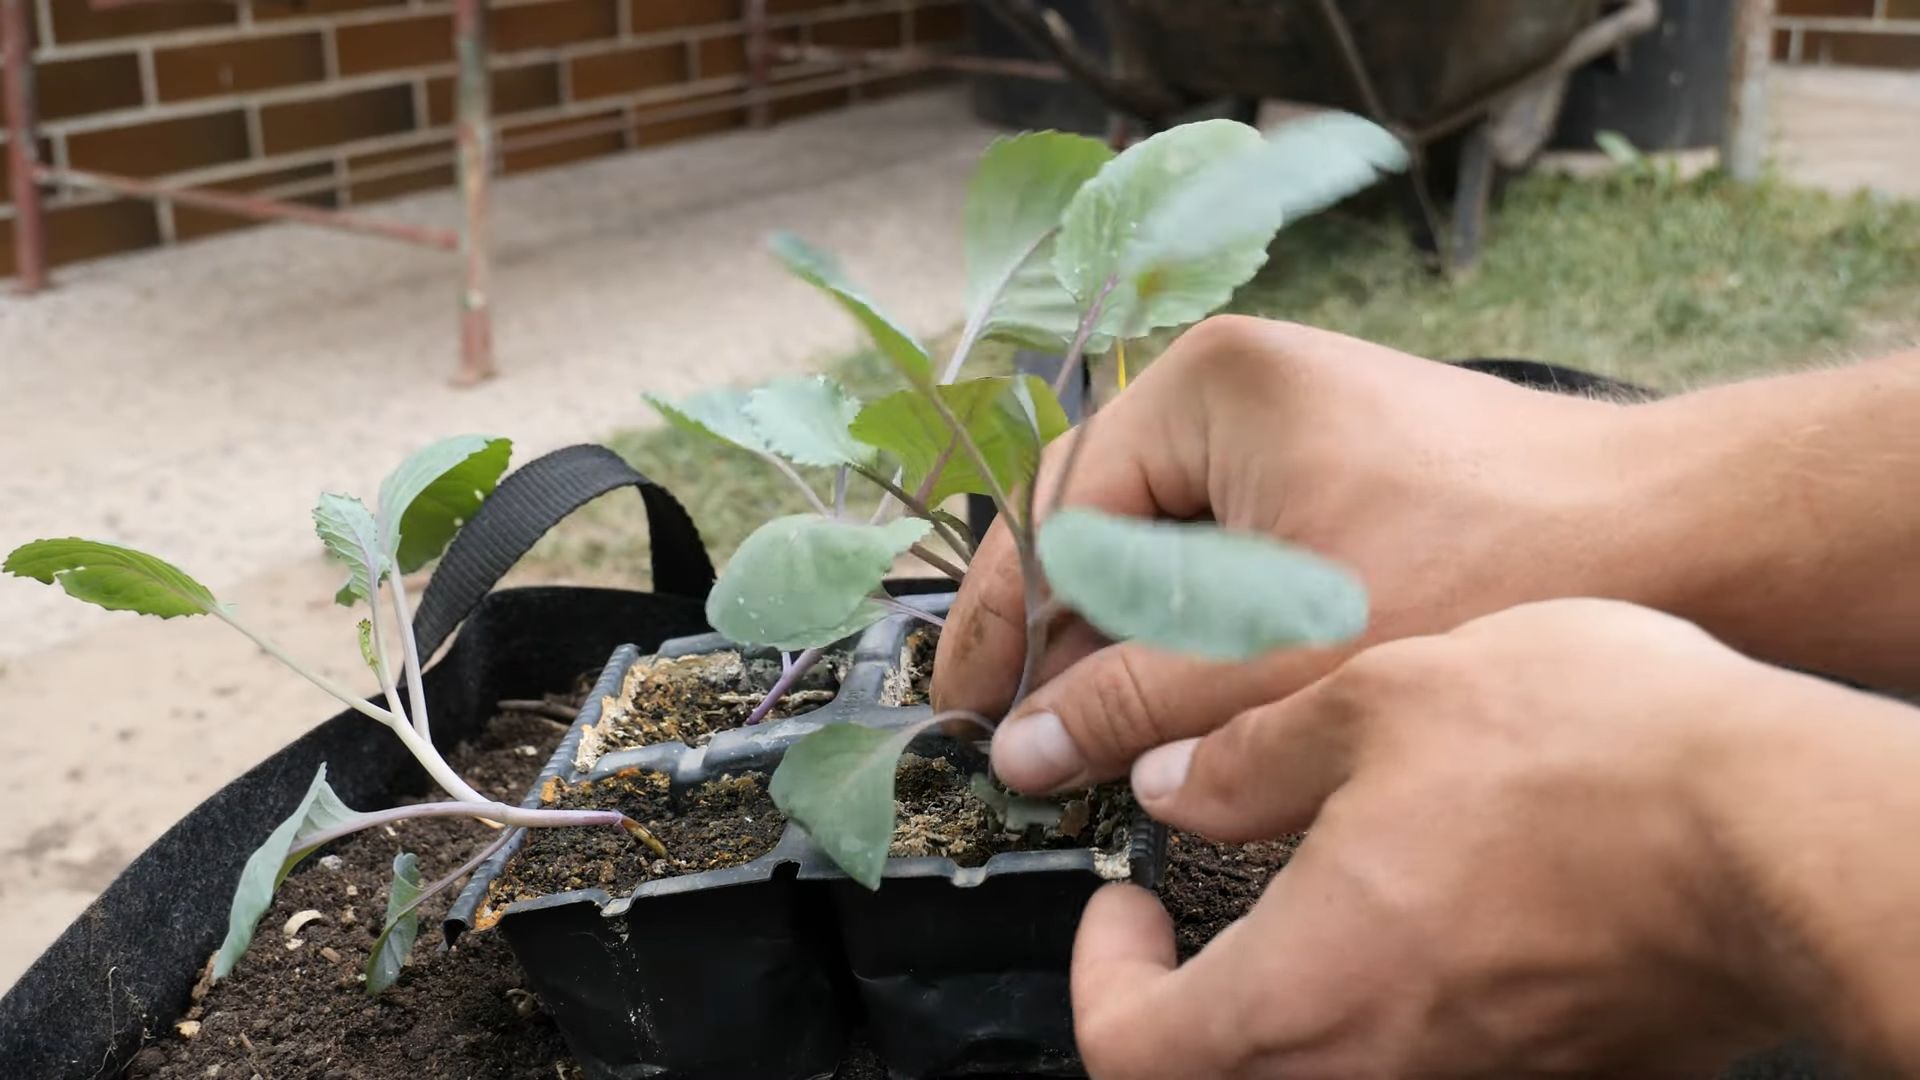
7. Thin the Seedlings: Once the seedlings have their first true leaves (the second set of leaves), thin them to one plant per cell or pot. Choose the strongest seedling and snip off the others at the soil line.
8. Harden Off the Seedlings: About a week before transplanting, gradually acclimate the seedlings to outdoor conditions. Start by placing them outside for a few hours each day, increasing the time each day. This process, called hardening off, helps them adjust to the sun, wind, and temperature changes.
Direct Sowing Seeds:
1. Prepare the Soil: Amend the soil with compost or well-rotted manure to improve fertility and drainage.
2. Sow the Seeds: Sow the seeds about ½ inch deep, spacing them about 2-3 inches apart in rows.
3. Water Gently: Water the area gently to avoid washing away the seeds.
4. Keep the Soil Moist: Keep the soil consistently moist until the seedlings emerge.
5. Thin the Seedlings: Once the seedlings have a few true leaves, thin them to the desired spacing (18-24 inches apart).
Transplanting Your Red Cabbage Seedlings
Once your seedlings are about 4-6 inches tall and the danger of frost has passed, it’s time to transplant them into the garden.
1. Prepare the Planting Site: Choose a sunny location with well-drained soil. Amend the soil with compost or well-rotted manure.
2. Dig Holes: Dig holes that are slightly larger than the root balls of the seedlings, spacing them 18-24 inches apart.
3. Transplant the Seedlings: Gently remove the seedlings from their trays or pots and place them in the holes. Make sure the top of the root ball is level with the surrounding soil.
4. Fill the Holes: Fill the holes with soil and gently firm the soil around the seedlings.
5. Water Thoroughly: Water the seedlings thoroughly after transplanting.
6. Mulch: Apply a layer of mulch around the plants to help retain moisture, suppress weeds, and regulate soil temperature. I like to use straw or shredded leaves.
Caring for Your Red Cabbage Plants
Red cabbages need consistent care to thrive. Here’s what you need to do:
* Watering: Water regularly, especially during dry periods. Cabbages need about 1-1.5 inches of water per week. Water deeply and avoid getting the leaves wet, as this can promote disease.
* Fertilizing: Fertilize every 2-3 weeks with a balanced fertilizer or a fertilizer high in nitrogen. I use a liquid seaweed fertilizer, which is gentle and effective.
* Weeding: Keep the area around the plants free of weeds. Weeds compete with the cabbages for nutrients and water.
* Pest Control: Cabbages are susceptible to several pests, including cabbage worms, aphids, and flea beetles. Inspect your plants regularly and take action if you see any pests.
* Cabbage Worms: These green caterpillars can quickly devour your cabbage leaves. Handpick them off the plants or use Bacillus thuringiensis (Bt), a natural insecticide that is safe for humans and pets.
* Aphids: These tiny insects suck the sap from the leaves, causing them to curl and yellow. Spray them off with a strong stream of water or use insecticidal soap.
* Flea Beetles: These small beetles chew tiny holes in the leaves. Cover the plants with row covers to prevent them from reaching the plants.
* Disease Prevention: Cabbages can be affected by several diseases, including black rot and clubroot.
* Black Rot: This bacterial disease causes yellowing and browning of the leaves. Prevent it by planting disease-resistant varieties, practicing crop rotation, and avoiding overhead watering.
* Clubroot: This fungal disease causes swollen and distorted roots. Prevent it by raising the soil pH to 7.0 or higher with lime and practicing crop rotation.
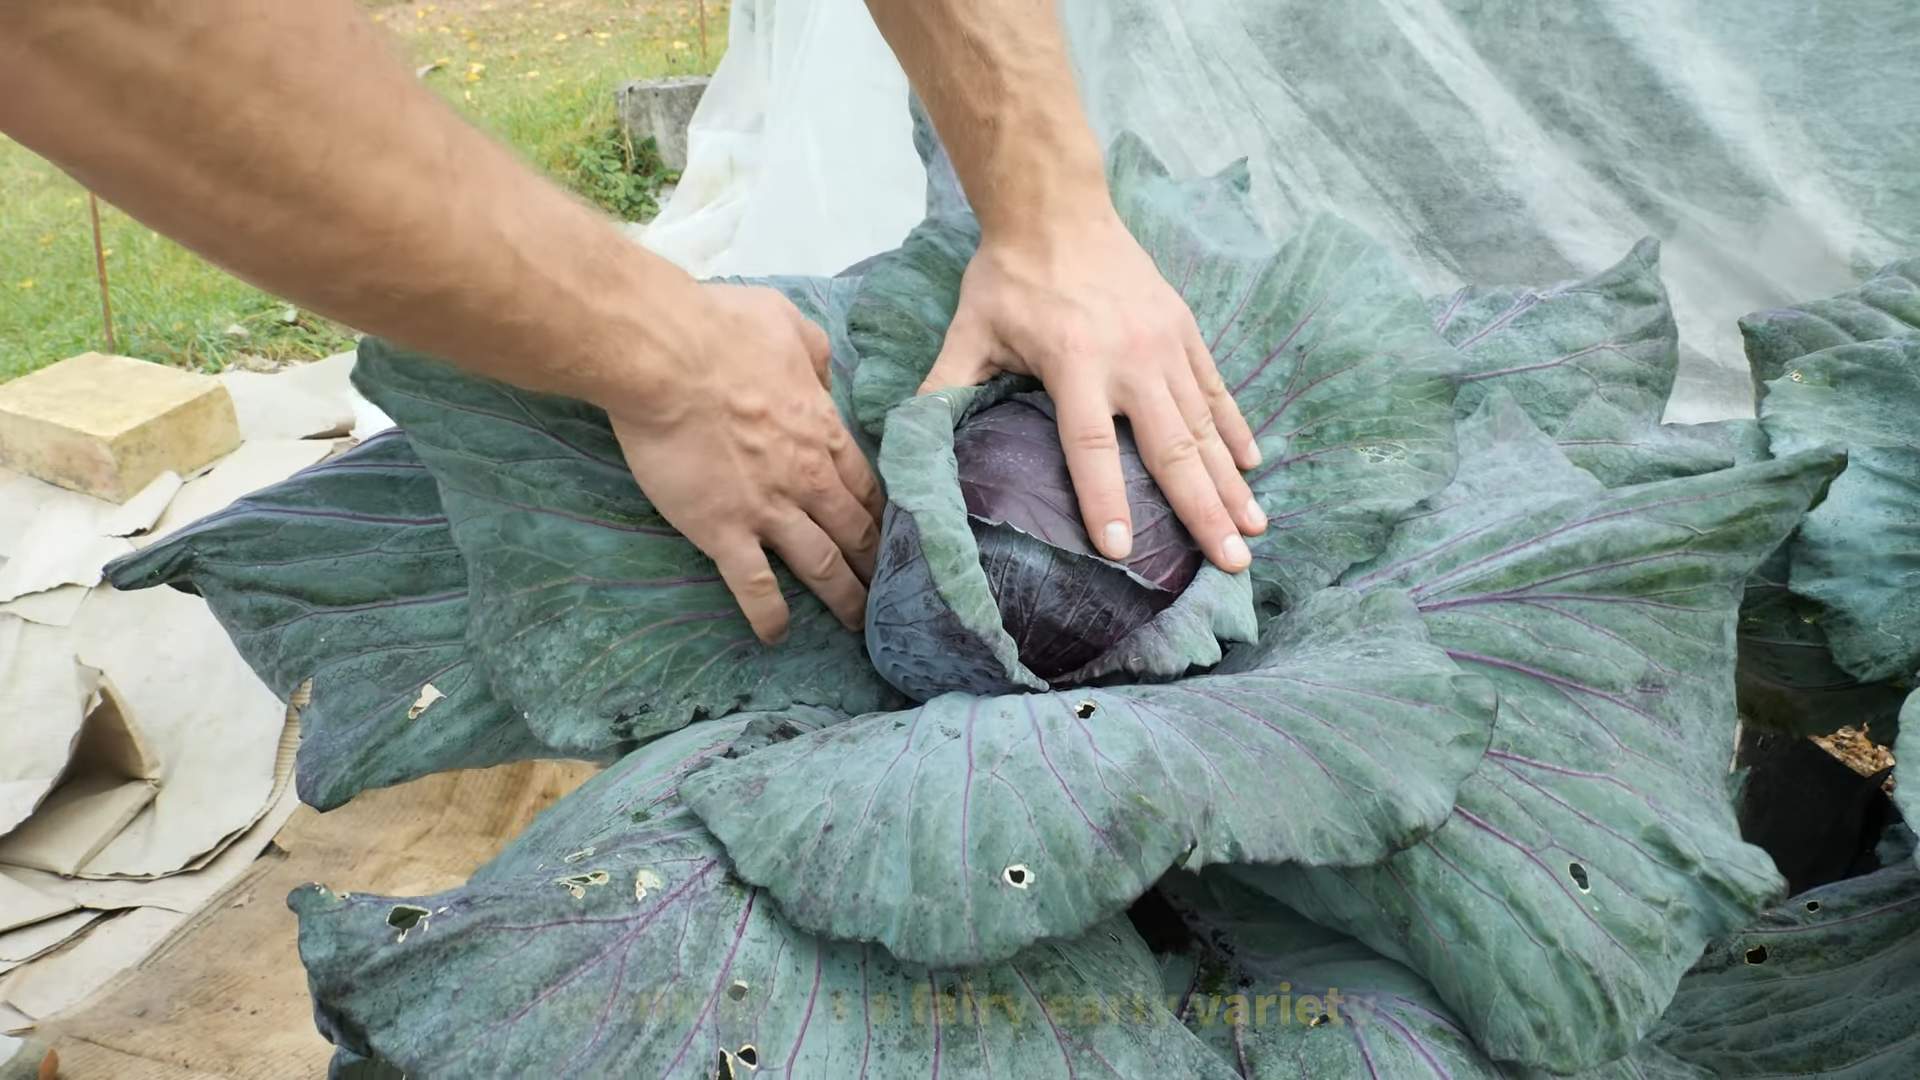
Harvesting Your Red Cabbage
Red cabbages are typically ready to harvest in 70-100 days from transplanting, depending on the variety.
1. Check for Firmness: The cabbage head should be firm and solid to the touch.
2. Cut the Head: Use a sharp knife to cut the head from the stem, leaving a few outer leaves attached.
3. Store Properly: Store the harvested cabbage in a cool, dry place. It can last for several weeks in the refrigerator.
Troubleshooting Common Problems
Even with the best care, you might encounter some problems while growing red cabbage. Here are some common issues and how to address them:
* Heads Not Forming: This can be caused by insufficient sunlight, poor soil, or lack of water. Make sure your plants are getting enough sun, amend the soil with compost, and water regularly.
* Splitting Heads: This can happen when the cabbage head grows too quickly after a period of drought. Water regularly and consistently to prevent splitting.
* Pest Infestations: As mentioned earlier, cabbages are susceptible to several pests. Inspect your plants regularly and take action if you see any pests.
* Disease Problems: Prevent diseases by planting disease-resistant varieties, practicing crop rotation, and avoiding overhead watering.
Enjoying Your Homegrown Red Cabbage
Now that you’ve harvested your beautiful red cabbage, it’s time to enjoy it! Red cabbage is a versatile vegetable that can be used in a variety of dishes.
* Salads: Shredded red cabbage adds a vibrant color and crunchy texture to salads.
* Slaws: Red cabbage is a key ingredient in many slaws.
* Pickles: Pickled red cabbage is a delicious and tangy condiment.
* Stews and Soups: Red cabbage can be added to stews and soups for extra flavor and nutrients.
* Roasted: Roasted red cabbage is a simple and delicious side dish.
Conclusion
So, there you have it! Growing your own red cabbage at home isn’t just a rewarding experience; it’s a gateway to fresher, more flavorful meals and a deeper connection with the food you eat. We’ve walked through the process, from selecting the right seeds to nurturing your plants and finally, harvesting your vibrant, homegrown red cabbage.
Why is this DIY trick a must-try? Because it empowers you to control the quality of your produce. You know exactly what goes into your garden – no harmful pesticides, no mystery chemicals, just good old-fashioned care and attention. The taste difference between store-bought and homegrown red cabbage is remarkable. The homegrown variety boasts a sweeter, more nuanced flavor that elevates any dish. Plus, the satisfaction of serving a meal featuring ingredients you cultivated yourself is simply unparalleled.
But the journey doesn’t end here! Feel free to experiment with different varieties of red cabbage. Some are more compact, perfect for smaller gardens or containers, while others boast deeper, more intense colors. Consider companion planting to deter pests naturally. Marigolds, for example, are excellent at keeping away unwanted insects. You can also try succession planting, sowing seeds every few weeks to ensure a continuous harvest throughout the growing season.
Don’t be afraid to get your hands dirty and embrace the learning process. Gardening is all about experimentation and adapting to your local climate and soil conditions. If you live in a particularly hot climate, consider providing some afternoon shade for your red cabbage plants to prevent them from bolting (going to seed prematurely). If you’re in a colder region, start your seeds indoors a few weeks before the last expected frost.
We’ve covered the basics, but the real magic happens when you put these tips into practice. Imagine the vibrant red hues of your homemade coleslaw, the satisfying crunch of your pickled red cabbage, or the hearty warmth of a red cabbage and apple stew, all made with ingredients you nurtured from seed to table.
Growing your own red cabbage is more than just a gardening project; it’s an investment in your health, your well-being, and your culinary creativity.
So, grab your seeds, prepare your soil, and embark on this exciting adventure. We’re confident that you’ll be amazed by the results. And most importantly, we want to hear about your experiences! Share your photos, tips, and stories in the comments below. Let’s build a community of passionate home gardeners who are dedicated to growing their own delicious and nutritious red cabbage. What are you waiting for? Let’s get growing!
FAQ
Frequently Asked Questions About Growing Red Cabbage
1. What is the best time of year to plant red cabbage?
The ideal time to plant red cabbage depends on your climate. In regions with mild winters, you can plant seeds directly in the ground in late summer or early fall for a winter harvest. In colder climates, it’s best to start seeds indoors 6-8 weeks before the last expected frost and transplant them outdoors in the spring after the danger of frost has passed. A general rule of thumb is to aim for a planting time that allows the cabbage to mature in cool weather, as high temperatures can cause bolting.
2. How much sunlight does red cabbage need?
Red cabbage thrives in full sun, meaning at least 6 hours of direct sunlight per day. While it can tolerate some partial shade, especially in hotter climates, insufficient sunlight can lead to smaller heads and leggy growth. Ensure your planting location receives ample sunlight throughout the day.
3. What kind of soil is best for growing red cabbage?
Red cabbage prefers well-drained, fertile soil that is rich in organic matter. The ideal soil pH is between 6.0 and 7.0. Before planting, amend your soil with compost or well-rotted manure to improve its fertility and drainage. You can also add a slow-release fertilizer to provide essential nutrients throughout the growing season.
4. How often should I water my red cabbage plants?
Red cabbage needs consistent moisture to thrive. Water deeply and regularly, especially during dry periods. Aim to keep the soil consistently moist but not waterlogged. Mulching around the plants can help retain moisture and suppress weeds. Check the soil moisture regularly by sticking your finger about an inch deep into the soil. If it feels dry, it’s time to water.
5. What are some common pests and diseases that affect red cabbage?
Common pests that can affect red cabbage include cabbage worms, aphids, flea beetles, and cabbage root maggots. Diseases include clubroot, black rot, and downy mildew. To prevent pest and disease problems, practice crop rotation, keep your garden clean and free of debris, and use row covers to protect your plants from insects. If you encounter pests or diseases, consider using organic pest control methods such as insecticidal soap or neem oil.
6. How do I know when my red cabbage is ready to harvest?
Red cabbage is typically ready to harvest when the head is firm and solid. The size of the head will vary depending on the variety, but a good indicator is when the head feels heavy for its size. Gently squeeze the head; if it feels firm and doesn’t give easily, it’s likely ready to harvest. Use a sharp knife to cut the head from the stem, leaving a few outer leaves intact.
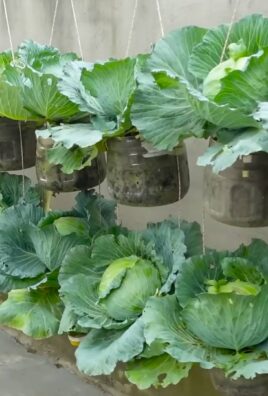
7. Can I grow red cabbage in containers?
Yes, you can successfully grow red cabbage in containers, especially if you choose a compact variety. Select a large container (at least 12 inches in diameter) with drainage holes. Use a high-quality potting mix and provide regular watering and fertilization. Container-grown red cabbage may require more frequent watering than those grown in the ground.
8. How do I store harvested red cabbage?
To store harvested red cabbage, remove any loose outer leaves and wrap the head tightly in plastic wrap. Store it in the refrigerator crisper drawer. Properly stored red cabbage can last for several weeks.
9. Why is my red cabbage not forming a head?
Several factors can contribute to red cabbage not forming a head, including insufficient sunlight, poor soil fertility, inadequate watering, and pest infestations. Ensure your plants receive at least 6 hours of direct sunlight per day, amend your soil with compost or fertilizer, water regularly, and protect your plants from pests.
10. Can I save seeds from my red cabbage?
Saving seeds from red cabbage is possible, but it requires allowing the plant to overwinter and produce flowers in its second year. This process is more complex than saving seeds from annual vegetables. Red cabbage is also cross-pollinated, so you need to isolate it from other brassicas to ensure true-to-type seeds. For beginners, it’s generally easier to purchase seeds from a reputable source.
Leave a Comment