
Regrow green onions from scraps? Absolutely! Have you ever tossed those little green onion ends into the trash, feeling a twinge of guilt? I know I have! But what if I told you that those seemingly useless scraps hold the secret to an endless supply of fresh, flavorful green onions right in your own kitchen?
The practice of propagating plants from scraps isn’t new. In fact, resourceful gardeners have been employing similar techniques for generations, stretching their grocery budgets and connecting with nature in a deeply satisfying way. Think of it as a modern take on the victory gardens of the past, bringing self-sufficiency and a touch of green into our busy lives.
In today’s world, where grocery prices are constantly on the rise and we’re all looking for ways to reduce waste, learning how to regrow green onions from scraps is more relevant than ever. Imagine the convenience of snipping fresh green onions whenever you need them, adding a burst of flavor to your soups, salads, and stir-fries. No more last-minute trips to the store or watching those sad, wilted green onions languish in your crisper drawer. This simple DIY trick is not only budget-friendly and eco-conscious, but it’s also incredibly rewarding. Let’s dive in and discover how easy it is to transform those kitchen scraps into a thriving green onion bounty!
Regrowing Green Onions From Scraps: A Gardener’s Delight!
Hey there, fellow plant enthusiasts! Ever find yourself tossing those green onion ends after chopping them up for a recipe? Well, stop right there! I’m going to show you how to easily regrow green onions from those very scraps, giving you a never-ending supply of fresh, flavorful goodness right in your kitchen. It’s super simple, incredibly rewarding, and a fantastic way to reduce food waste. Let’s get started!
What You’ll Need
Before we dive in, let’s gather our supplies. This is a pretty low-key project, so you probably already have most of these things lying around:
* Green Onion Scraps: The stars of the show! You’ll need the bottom 1-2 inches of your green onions, including the roots (or what’s left of them).
* A Glass or Jar: Something to hold the green onion scraps while they sprout. A small drinking glass, a mason jar, or even a recycled yogurt container will work perfectly.
* Water: Tap water is just fine.
* A Sunny Spot: Green onions love sunlight, so find a bright windowsill or countertop.
* Potting Soil (Optional): If you want to transplant your green onions to a pot for longer-term growth, you’ll need some potting soil.
* A Small Pot (Optional): For transplanting, choose a pot that’s at least 4-6 inches in diameter.
* Scissors or a Knife: For harvesting your regrown green onions.
The Water Propagation Method: Sprouting Your Green Onions
This is the easiest and most common method for regrowing green onions. It’s perfect for beginners and requires minimal effort.
1. Prepare Your Green Onion Scraps: Take your green onion scraps and gently remove any loose or slimy outer layers. This will help prevent rot. Don’t worry about being too meticulous; just get rid of anything that looks like it’s starting to decompose.
2. Place Scraps in Water: Fill your glass or jar with enough water to cover the roots of the green onion scraps, but not so much that the green part is submerged. You want the roots to be sitting comfortably in the water.
3. Find a Sunny Spot: Place your glass or jar on a sunny windowsill or countertop. Green onions thrive in sunlight, so the more light they get, the faster they’ll grow. South-facing windows are ideal, but any bright spot will do.
4. Change the Water Regularly: This is crucial! Change the water every 1-2 days to prevent bacteria growth and keep the water fresh. Stagnant water can lead to rot and hinder growth. I usually just dump out the old water and refill the glass with fresh tap water.
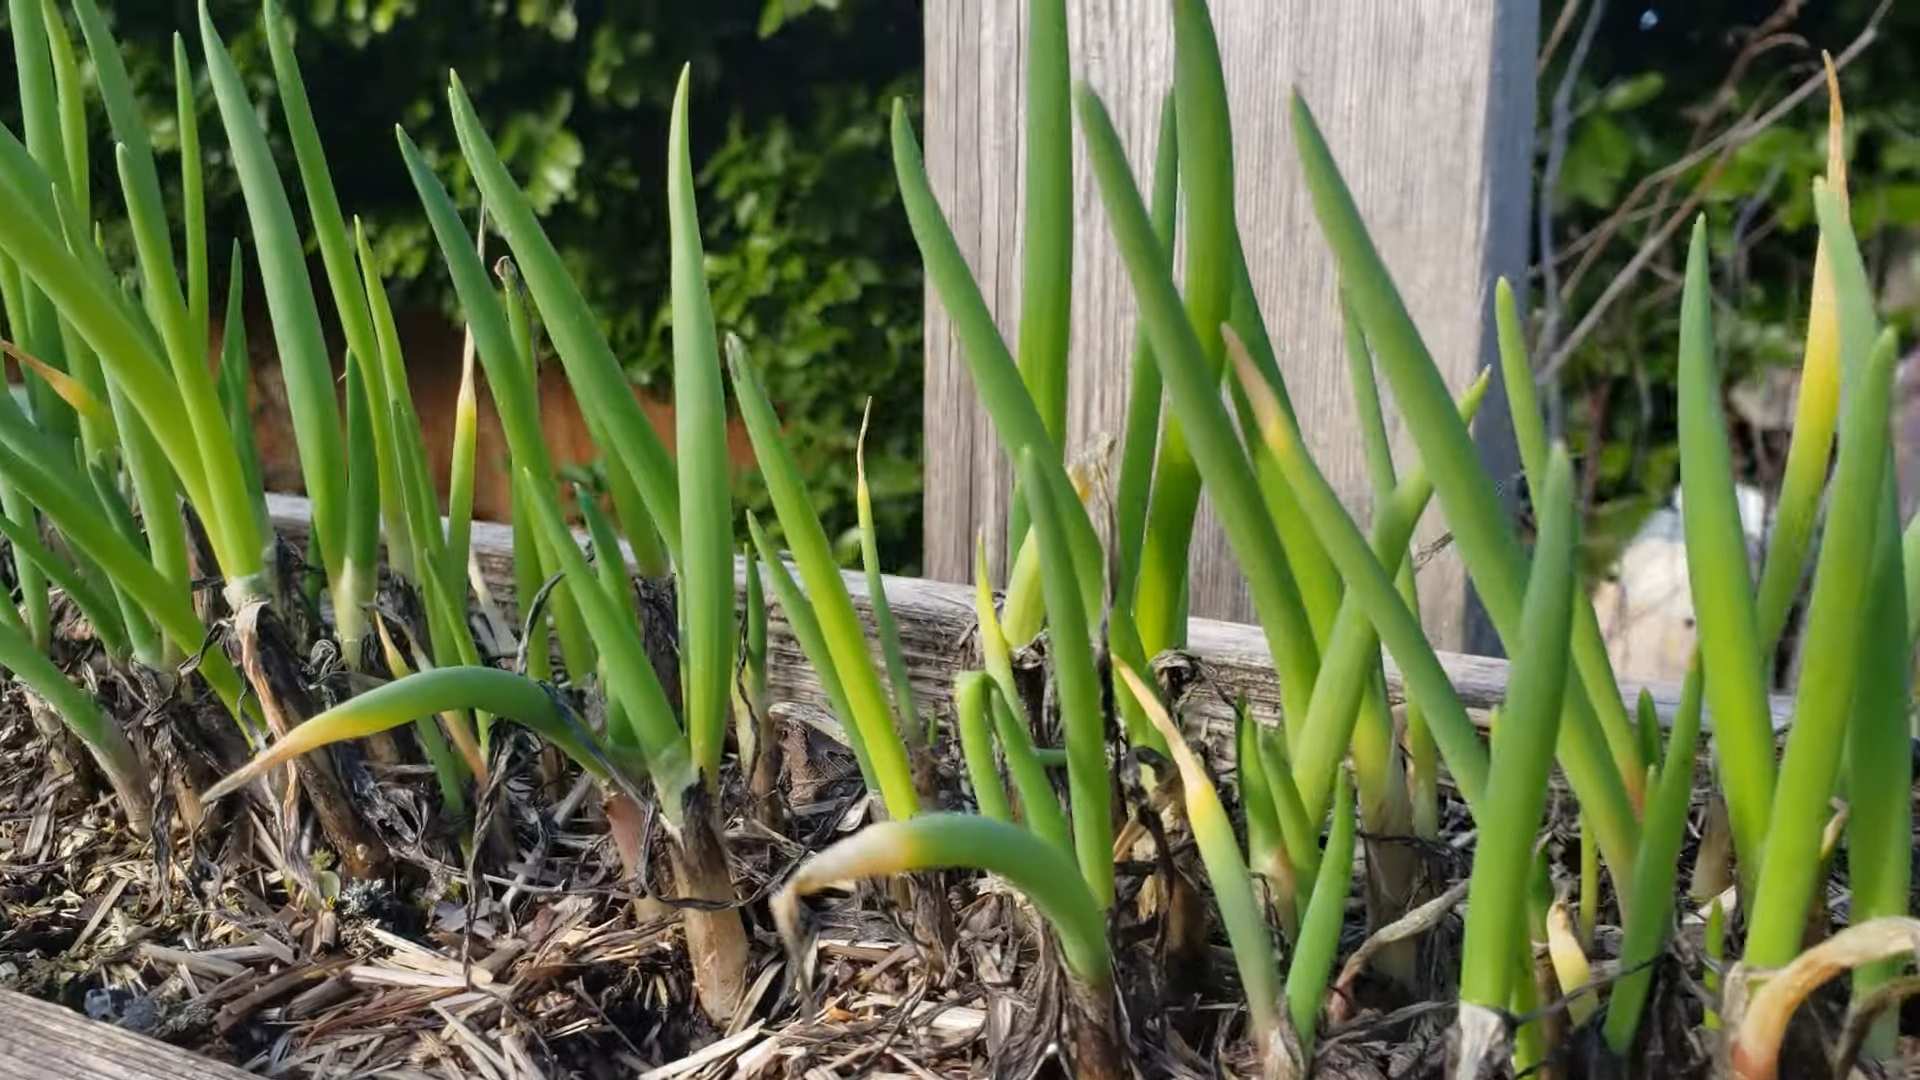
5. Observe and Wait: Now comes the fun part – watching your green onions grow! You should start to see new green shoots emerging from the center of the scraps within a few days. The roots will also start to grow longer and stronger.
6. Harvest Your Green Onions: Once the green shoots have grown to a decent length (usually a few inches), you can start harvesting them. Simply use scissors or a knife to cut off the amount you need, leaving about an inch or two of green growth at the base. The green onions will continue to grow back, providing you with a continuous supply.
Transplanting to Soil: For Long-Term Growth
While you can continue to grow your green onions in water indefinitely, transplanting them to soil will provide them with more nutrients and allow them to grow larger and stronger. This is what I prefer to do for a more sustainable harvest.
1. Prepare Your Pot: Fill your pot with good-quality potting soil, leaving about an inch of space at the top.
2. Carefully Remove Green Onions from Water: Gently remove the green onion scraps from the water, being careful not to damage the roots.
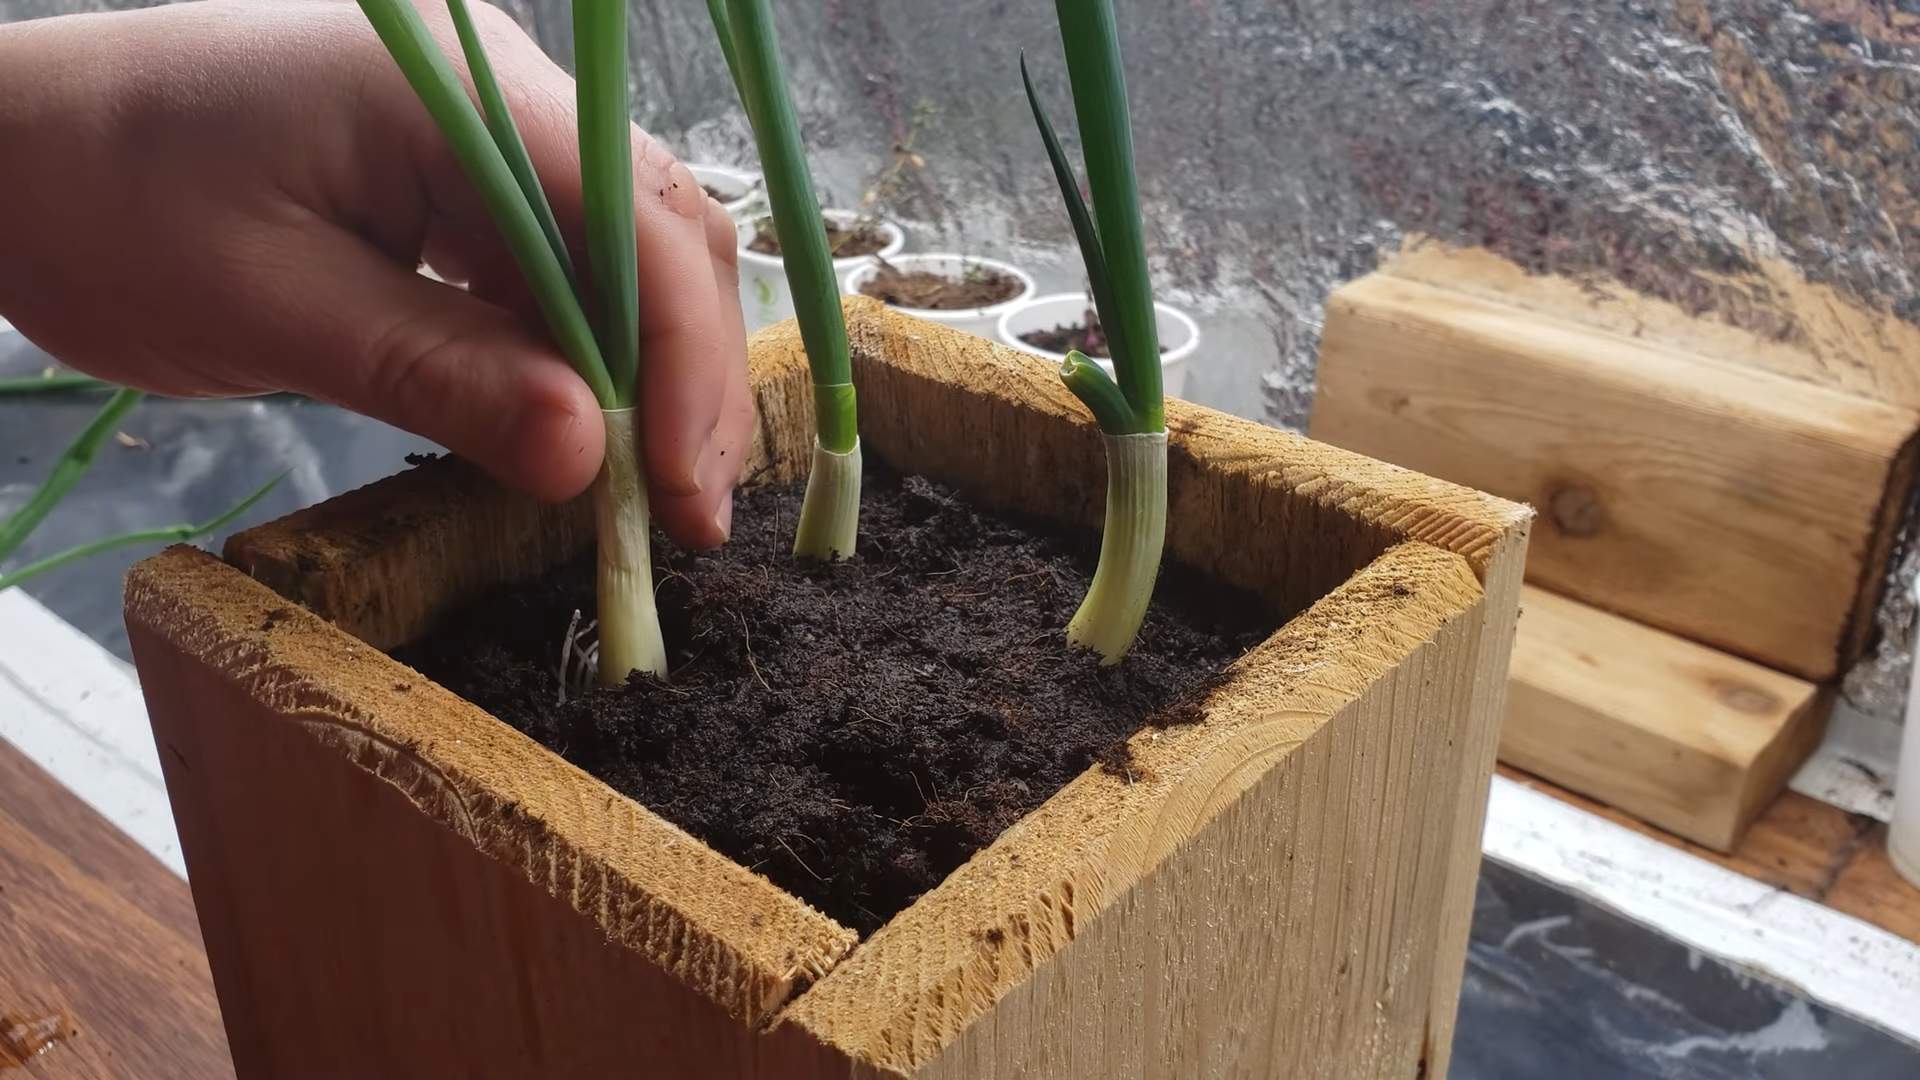
3. Plant the Green Onions: Make a small hole in the soil for each green onion scrap. Plant the scraps so that the roots are completely covered with soil, and the base of the green shoots is just above the soil line.
4. Water Thoroughly: Water the soil thoroughly after planting, making sure to moisten the entire root zone.
5. Place in a Sunny Spot: Just like with water propagation, your transplanted green onions need plenty of sunlight. Place the pot on a sunny windowsill or countertop.
6. Water Regularly: Keep the soil consistently moist, but not soggy. Water when the top inch of soil feels dry to the touch. Overwatering can lead to root rot, so be careful not to overdo it.
7. Fertilize (Optional): To encourage even more growth, you can fertilize your green onions every few weeks with a diluted liquid fertilizer. Follow the instructions on the fertilizer package.
8. Harvest Your Green Onions: You can harvest your green onions in the same way as with water propagation – simply cut off the amount you need, leaving about an inch or two of green growth at the base.
Troubleshooting Tips
Even with the simplest projects, sometimes things don’t go exactly as planned. Here are a few common issues you might encounter and how to fix them:
* Rotting Scraps: If your green onion scraps start to rot, it’s usually due to stagnant water or bacteria growth. Make sure you’re changing the water regularly (every 1-2 days) and removing any slimy outer layers from the scraps. If the rot is severe, it’s best to start with fresh scraps.
* Slow Growth: Slow growth can be caused by a lack of sunlight or nutrients. Make sure your green onions are getting plenty of light and consider fertilizing them if you’ve transplanted them to soil.
* Yellowing Leaves: Yellowing leaves can be a sign of overwatering or underwatering. Check the soil moisture and adjust your watering accordingly. If you’re growing your green onions in water, make sure you’re changing the water regularly.
* Pests: While green onions are relatively pest-resistant, they can sometimes be affected by aphids or other small insects. If you notice any pests, try spraying them with a mixture of water and dish soap.
Extra Tips for Success
* Experiment with Different Varieties: There are many different varieties of green onions, each with its own unique flavor and growth characteristics. Try regrowing different varieties to see which ones you like best.
* Use Filtered Water: While tap water is generally fine, using filtered water can help prevent mineral buildup and promote healthier growth.
* Rotate Your Crops: If you’re growing your green onions in soil, consider rotating them with other crops to prevent nutrient depletion and pest buildup.
* Don’t Overharvest: While it’s tempting to harvest all of your green onions at once, it’s best to leave some green growth at the base so they can continue to regrow.
* Enjoy the Process! Regrowing green onions is a fun and rewarding experience. Don’t be afraid to experiment and learn as you go.
So there you have it! With a little bit of water, sunlight, and patience, you can easily regrow green onions from scraps and enjoy a continuous supply of fresh, flavorful greens. Happy gardening!
Conclusion
So, there you have it! Regrowing green onions from scraps isn’t just a clever kitchen hack; it’s a game-changer for anyone who loves fresh flavor and hates food waste. Think about it: no more last-minute grocery runs for a sprinkle of green onion on your tacos, no more watching those sad, forgotten bunches wilt away in the crisper drawer. This simple DIY trick transforms kitchen scraps into a continuous supply of fresh, flavorful green onions, ready to elevate your meals at a moment’s notice.
But the benefits extend beyond convenience. You’re actively reducing food waste, contributing to a more sustainable lifestyle, and saving money in the process. Plus, there’s something incredibly satisfying about nurturing new life from something you would have otherwise thrown away. It’s a small act with a surprisingly big impact.
Ready to take your green onion game to the next level? Consider experimenting with different varieties. While standard green onions are readily available, you might be able to regrow scallions or even try your hand at other members of the allium family, like leeks (though leeks require a bit more patience). You can also play around with different growing mediums. While water works perfectly well for initial regrowth, transferring your green onions to soil will allow them to develop stronger roots and potentially produce even more flavorful stalks.
Another fun variation is to use different containers. While a simple glass or jar is perfectly functional, you could repurpose old mugs, teacups, or even create a dedicated green onion growing station with a stylish planter. Get creative and make it your own!
The key to success with this **regrow green onions** method is consistency. Remember to change the water every few days to prevent bacterial growth and ensure your green onions have access to fresh nutrients. And don’t be afraid to experiment! See what works best for your environment and growing conditions.
We’re confident that once you try this simple DIY trick, you’ll be hooked. It’s easy, rewarding, and incredibly practical. So, the next time you’re chopping green onions, don’t toss those roots! Give them a new lease on life and enjoy a continuous supply of fresh flavor.
We’d love to hear about your experiences! Share your photos, tips, and tricks in the comments below. Let’s build a community of green onion growers and inspire others to embrace this simple, sustainable practice. What are you waiting for? Get growing!
Frequently Asked Questions (FAQ)
How long does it take to regrow green onions from scraps?
Generally, you’ll start to see noticeable regrowth within a few days. Within a week, you should have a significant amount of new green onion to harvest. The speed of regrowth can depend on factors like the temperature, sunlight, and the initial health of the green onion scraps. Warmer temperatures and plenty of sunlight will encourage faster growth.
What part of the green onion do I need to regrow it?
You need the white part of the green onion, including the roots. Cut off the green tops, leaving about 2 inches of the white base with the roots attached. This is the part that will sprout new growth. Make sure the roots are still intact and healthy-looking for the best chance of success.
Can I regrow green onions in soil instead of water?
Yes, absolutely! While water is great for initial regrowth, transferring your green onions to soil will provide them with more nutrients and allow them to develop stronger roots. Once you see significant regrowth in water (about an inch or two), you can plant the green onion scraps in a pot filled with well-draining potting mix. Bury the white part of the onion, leaving the green shoots exposed. Water regularly, keeping the soil moist but not soggy.
How often should I change the water when regrowing green onions in water?
It’s recommended to change the water every 1-2 days. This helps prevent bacterial growth and ensures that the green onions have access to fresh, oxygenated water. Stagnant water can lead to rot and hinder growth.
How much sunlight do regrowing green onions need?
Green onions thrive in bright, indirect sunlight. Place your green onion scraps in a location that receives at least 6 hours of sunlight per day. A windowsill is often a good option. If you don’t have access to enough natural light, you can supplement with a grow light.
Can I regrow green onions indefinitely?
While you can regrow green onions multiple times from the same scraps, the regrowth may become less vigorous over time. After several harvests, the green onions may start to produce thinner stalks or grow more slowly. At this point, it’s best to start with fresh scraps for optimal results.
What if my green onion scraps start to rot?
Rotting is usually caused by stagnant water or bacterial growth. If you notice any signs of rot, such as a slimy texture or foul odor, discard the affected scraps and start with fresh ones. Make sure to change the water frequently and avoid overcrowding the container.
Can I use tap water to regrow green onions?
Tap water is generally fine to use, but if your tap water is heavily chlorinated, it’s best to let it sit out for 24 hours before using it to allow the chlorine to dissipate. Alternatively, you can use filtered water.
How do I harvest the regrown green onions?
You can harvest the regrown green onions by simply snipping off the green stalks with scissors. Cut them to the desired length, leaving about an inch or two of the green stalk attached to the white base. This will allow the green onions to continue to regrow.
Can I fertilize my regrowing green onions?
While not essential, fertilizing can help boost growth, especially if you’re growing your green onions in soil. Use a diluted liquid fertilizer, such as a balanced 10-10-10 fertilizer, every few weeks. Follow the instructions on the fertilizer packaging for proper dilution rates.
Are there any pests or diseases that affect regrowing green onions?
Regrowing green onions are generally pest and disease-resistant, but they can occasionally be affected by issues like aphids or fungal diseases. If you notice any pests, you can try washing the green onions with soapy water. For fungal diseases, ensure good air circulation and avoid overwatering.
Can I regrow other types of onions besides green onions?
While this method is most commonly used for green onions, you can also try regrowing scallions and other members of the allium family, like leeks. However, leeks may require more patience and may not regrow as quickly as green onions.
Is it better to regrow green onions in water or soil?
Both methods have their advantages. Water is great for initial regrowth and allows you to easily monitor root development. Soil provides more nutrients and allows for stronger root growth and potentially more flavorful stalks. Ultimately, the best method depends on your preferences and growing conditions. You can start in water and then transfer to soil for the best of both world
So, there you have it! Regrowing green onions from scraps isn’t just a clever kitchen hack; it’s a game-changer for anyone who loves fresh flavor and hates food waste. Think about it: no more last-minute grocery runs for a sprinkle of green onion on your tacos, no more watching those sad, forgotten bunches wilt away in the crisper drawer. This simple DIY trick transforms kitchen scraps into a continuous supply of fresh, flavorful green onions, ready to elevate your meals at a moment’s notice.
But the benefits extend beyond convenience. You’re actively reducing food waste, contributing to a more sustainable lifestyle, and saving money in the process. Plus, there’s something incredibly satisfying about nurturing new life from something you would have otherwise thrown away. It’s a small act with a surprisingly big impact.
Ready to take your green onion game to the next level? Consider experimenting with different varieties. While standard green onions are readily available, you might be able to regrow scallions or even try your hand at other members of the allium family, like leeks (though leeks require a bit more patience). You can also play around with different growing mediums. While water works perfectly well for initial regrowth, transferring your green onions to soil will allow them to develop stronger roots and potentially produce even more flavorful stalks.
Another fun variation is to use different containers. While a simple glass or jar is perfectly functional, you could repurpose old mugs, teacups, or even create a dedicated green onion growing station with a stylish planter. Get creative and make it your own!
The key to success with this **regrow green onions** method is consistency. Remember to change the water every few days to prevent bacterial growth and ensure your green onions have access to fresh nutrients. And don’t be afraid to experiment! See what works best for your environment and growing conditions.
We’re confident that once you try this simple DIY trick, you’ll be hooked. It’s easy, rewarding, and incredibly practical. So, the next time you’re chopping green onions, don’t toss those roots! Give them a new lease on life and enjoy a continuous supply of fresh flavor.
We’d love to hear about your experiences! Share your photos, tips, and tricks in the comments below. Let’s build a community of green onion growers and inspire others to embrace this simple, sustainable practice. What are you waiting for? Get growing!
Frequently Asked Questions (FAQ)
How long does it take to regrow green onions from scraps?
Generally, you’ll start to see noticeable regrowth within a few days. Within a week, you should have a significant amount of new green onion to harvest. The speed of regrowth can depend on factors like the temperature, sunlight, and the initial health of the green onion scraps. Warmer temperatures and plenty of sunlight will encourage faster growth.
What part of the green onion do I need to regrow it?
You need the white part of the green onion, including the roots. Cut off the green tops, leaving about 2 inches of the white base with the roots attached. This is the part that will sprout new growth. Make sure the roots are still intact and healthy-looking for the best chance of success.
Can I regrow green onions in soil instead of water?
Yes, absolutely! While water is great for initial regrowth, transferring your green onions to soil will provide them with more nutrients and allow them to develop stronger roots. Once you see significant regrowth in water (about an inch or two), you can plant the green onion scraps in a pot filled with well-draining potting mix. Bury the white part of the onion, leaving the green shoots exposed. Water regularly, keeping the soil moist but not soggy.
How often should I change the water when regrowing green onions in water?
It’s recommended to change the water every 1-2 days. This helps prevent bacterial growth and ensures that the green onions have access to fresh, oxygenated water. Stagnant water can lead to rot and hinder growth.
How much sunlight do regrowing green onions need?
Green onions thrive in bright, indirect sunlight. Place your green onion scraps in a location that receives at least 6 hours of sunlight per day. A windowsill is often a good option. If you don’t have access to enough natural light, you can supplement with a grow light.
Can I regrow green onions indefinitely?
While you can regrow green onions multiple times from the same scraps, the regrowth may become less vigorous over time. After several harvests, the green onions may start to produce thinner stalks or grow more slowly. At this point, it’s best to start with fresh scraps for optimal results.
What if my green onion scraps start to rot?
Rotting is usually caused by stagnant water or bacterial growth. If you notice any signs of rot, such as a slimy texture or foul odor, discard the affected scraps and start with fresh ones. Make sure to change the water frequently and avoid overcrowding the container.
Can I use tap water to regrow green onions?
Tap water is generally fine to use, but if your tap water is heavily chlorinated, it’s best to let it sit out for 24 hours before using it to allow the chlorine to dissipate. Alternatively, you can use filtered water.
How do I harvest the regrown green onions?
You can harvest the regrown green onions by simply snipping off the green stalks with scissors. Cut them to the desired length, leaving about an inch or two of the green stalk attached to the white base. This will allow the green onions to continue to regrow.
Can I fertilize my regrowing green onions?
While not essential, fertilizing can help boost growth, especially if you’re growing your green onions in soil. Use a diluted liquid fertilizer, such as a balanced 10-10-10 fertilizer, every few weeks. Follow the instructions on the fertilizer packaging for proper dilution rates.
Are there any pests or diseases that affect regrowing green onions?
Regrowing green onions are generally pest and disease-resistant, but they can occasionally be affected by issues like aphids or fungal diseases. If you notice any pests, you can try washing the green onions with soapy water. For fungal diseases, ensure good air circulation and avoid overwatering.
Can I regrow other types of onions besides green onions?
While this method is most commonly used for green onions, you can also try regrowing scallions and other members of the allium family, like leeks. However, leeks may require more patience and may not regrow as quickly as green onions.
Is it better to regrow green onions in water or soil?
Both methods have their advantages. Water is great for initial regrowth and allows you to easily monitor root development. Soil provides more nutrients and allows for stronger root growth and potentially more flavorful stalks. Ultimately, the best method depends on your preferences and growing conditions. You can start in water and then transfer to soil for the best of both worlds.

Leave a Comment