
Rooftop Corn Growing No Bed – sounds impossible, right? I thought so too, until I stumbled upon a game-changing technique that lets you harvest sweet, juicy corn right from your own rooftop, without the hassle of traditional garden beds! Forget lugging heavy soil and battling weeds in a sprawling backyard; this DIY guide unlocks the secrets to urban farming at its finest.
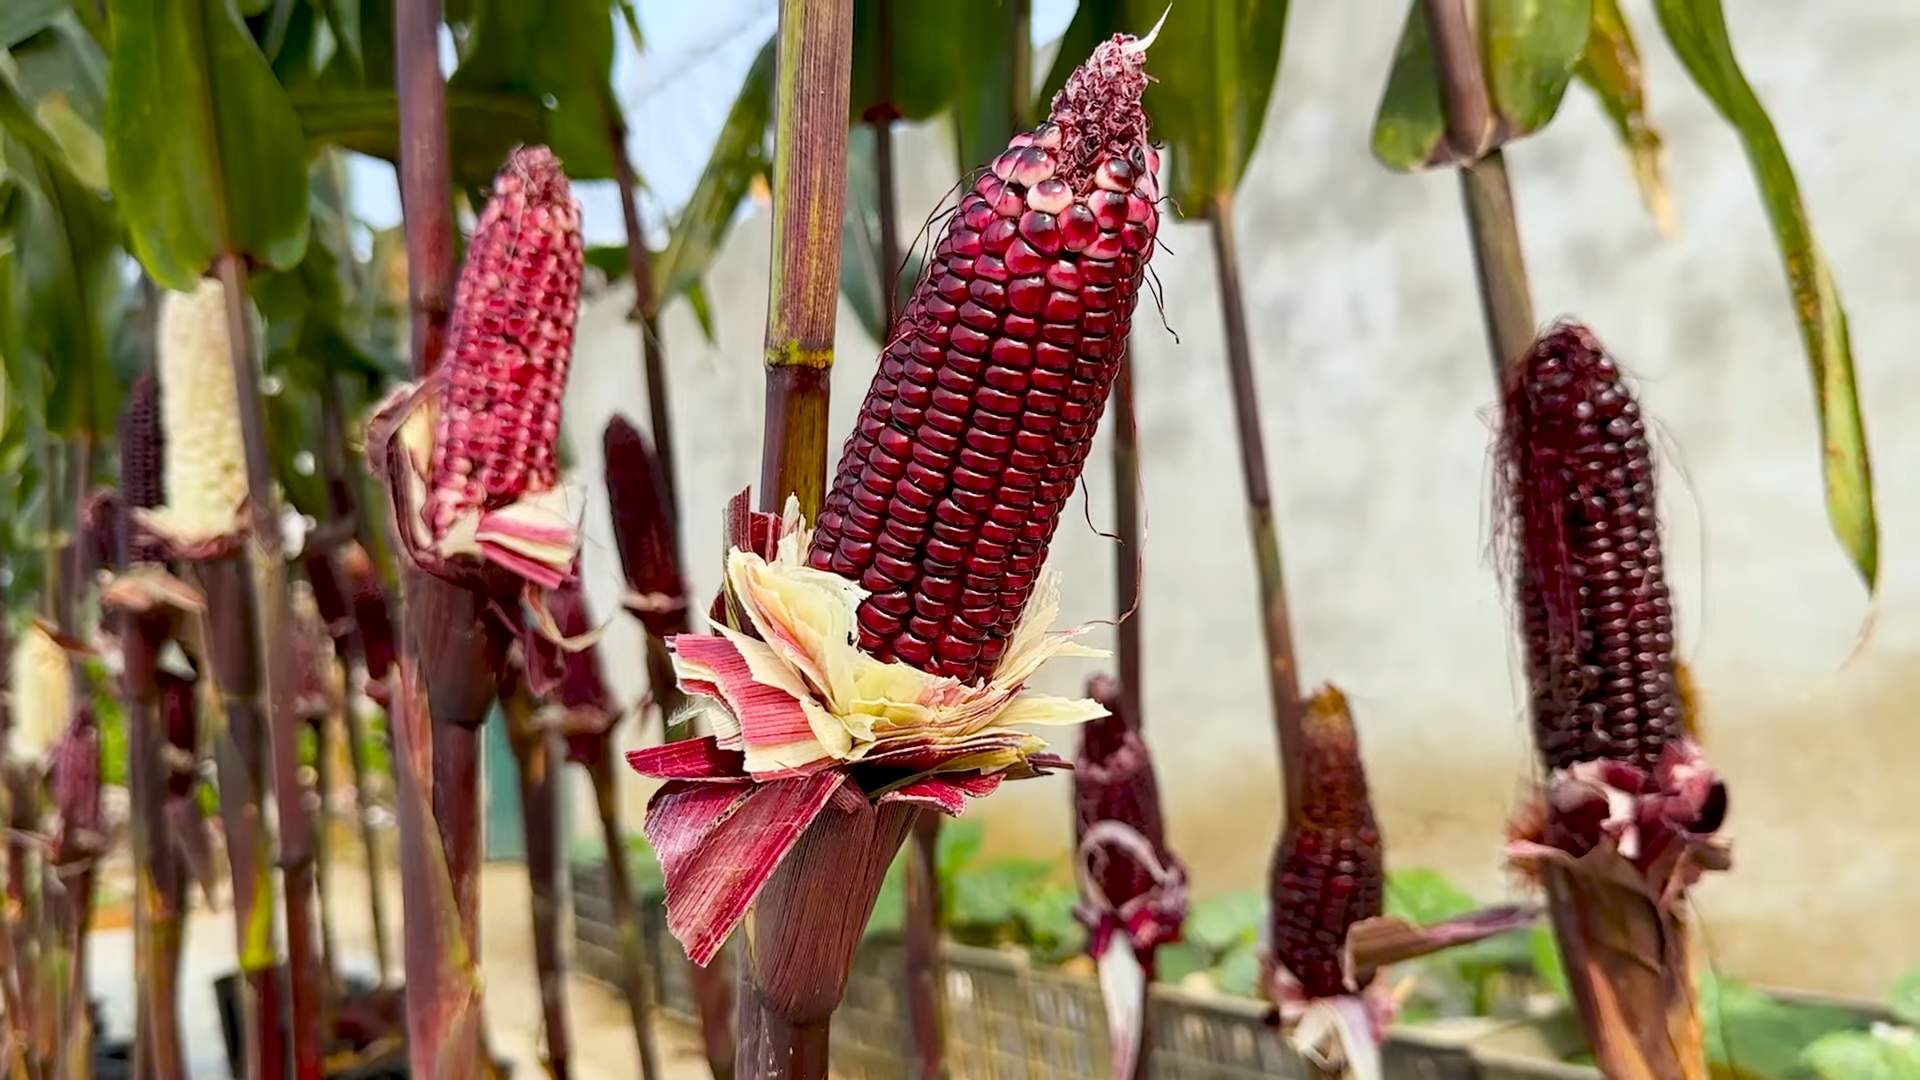
Corn, a staple crop with roots stretching back thousands of years to Mesoamerica, has always been synonymous with fertile fields and abundant harvests. From ancient civilizations relying on corn for sustenance to modern-day barbecues, this golden grain holds a special place in our hearts (and stomachs!). But what if I told you that you could bring this agricultural heritage to your own urban oasis?
In today’s world, space is a luxury, and access to fresh, homegrown produce can be challenging. That’s where this rooftop corn growing no bed method comes in. It’s perfect for apartment dwellers, city dwellers with limited outdoor space, or anyone looking for a fun and rewarding gardening project. Imagine the satisfaction of biting into a cob of corn you nurtured from seed to table, all while enjoying the panoramic views from your rooftop garden. This DIY guide will walk you through every step, from choosing the right corn variety to providing the necessary support and nutrients. Get ready to transform your rooftop into a thriving cornfield and impress your friends and neighbors with your green thumb!
DIY Rooftop Corn Growing: No Bed Required!
Hey there, fellow gardening enthusiasts! Ever dreamed of having fresh, homegrown corn but lack the sprawling backyard space? Well, I’m here to tell you that you can absolutely grow corn, even on a rooftop, without the hassle of building a traditional raised bed. This method is all about maximizing space and using containers to create a thriving corn patch in the sky. Let’s get started!
Choosing the Right Corn Variety
Before we dive into the nitty-gritty, it’s crucial to select the right corn variety. Not all corn is created equal, especially when it comes to container gardening.
* Consider Size: Opt for shorter, more compact varieties. I’ve had great success with ‘On Deck’ and ‘Trinity’ sweet corn. These are bred to be smaller and mature faster, making them perfect for containers.
* Days to Maturity: Look for varieties with a shorter “days to maturity” – ideally under 75 days. This ensures you’ll get a harvest before the growing season ends.
* Disease Resistance: Choose varieties known for their resistance to common corn diseases. This will save you a lot of headaches down the line.
* Sweetness: Think about your taste preferences! There are super-sweet, sugary enhanced, and standard sweet corn varieties. Pick one that suits your palate.
Gathering Your Supplies
Now, let’s assemble everything you’ll need for this rooftop corn-growing adventure.
* Large Containers: This is key! You’ll need containers that are at least 12 inches in diameter and 12 inches deep. I prefer using 15-20 gallon containers for optimal growth. Plastic or fabric pots work well.
* High-Quality Potting Mix: Don’t skimp on the potting mix! Use a well-draining mix specifically formulated for containers. Avoid using garden soil, as it can compact and hinder drainage. I like to mix compost into my potting mix for added nutrients.
* Corn Seeds: Of course! Make sure you have fresh, viable corn seeds of your chosen variety.
* Slow-Release Fertilizer: Corn is a heavy feeder, so a slow-release fertilizer is essential. Choose one with a balanced NPK ratio (nitrogen, phosphorus, potassium).
* Watering Can or Hose: You’ll need a reliable way to water your corn plants regularly.
* Mulch: Mulch helps retain moisture, suppress weeds, and regulate soil temperature. Straw, wood chips, or shredded leaves are all good options.
* Stakes or Trellis (Optional): Depending on the variety you choose, you might need to provide support for your corn stalks, especially if they get tall and top-heavy.
* Bird Netting (Optional): Birds love corn seeds and young seedlings, so bird netting can be a lifesaver.
Planting Your Corn
Okay, let’s get our hands dirty! Planting corn in containers is a straightforward process.
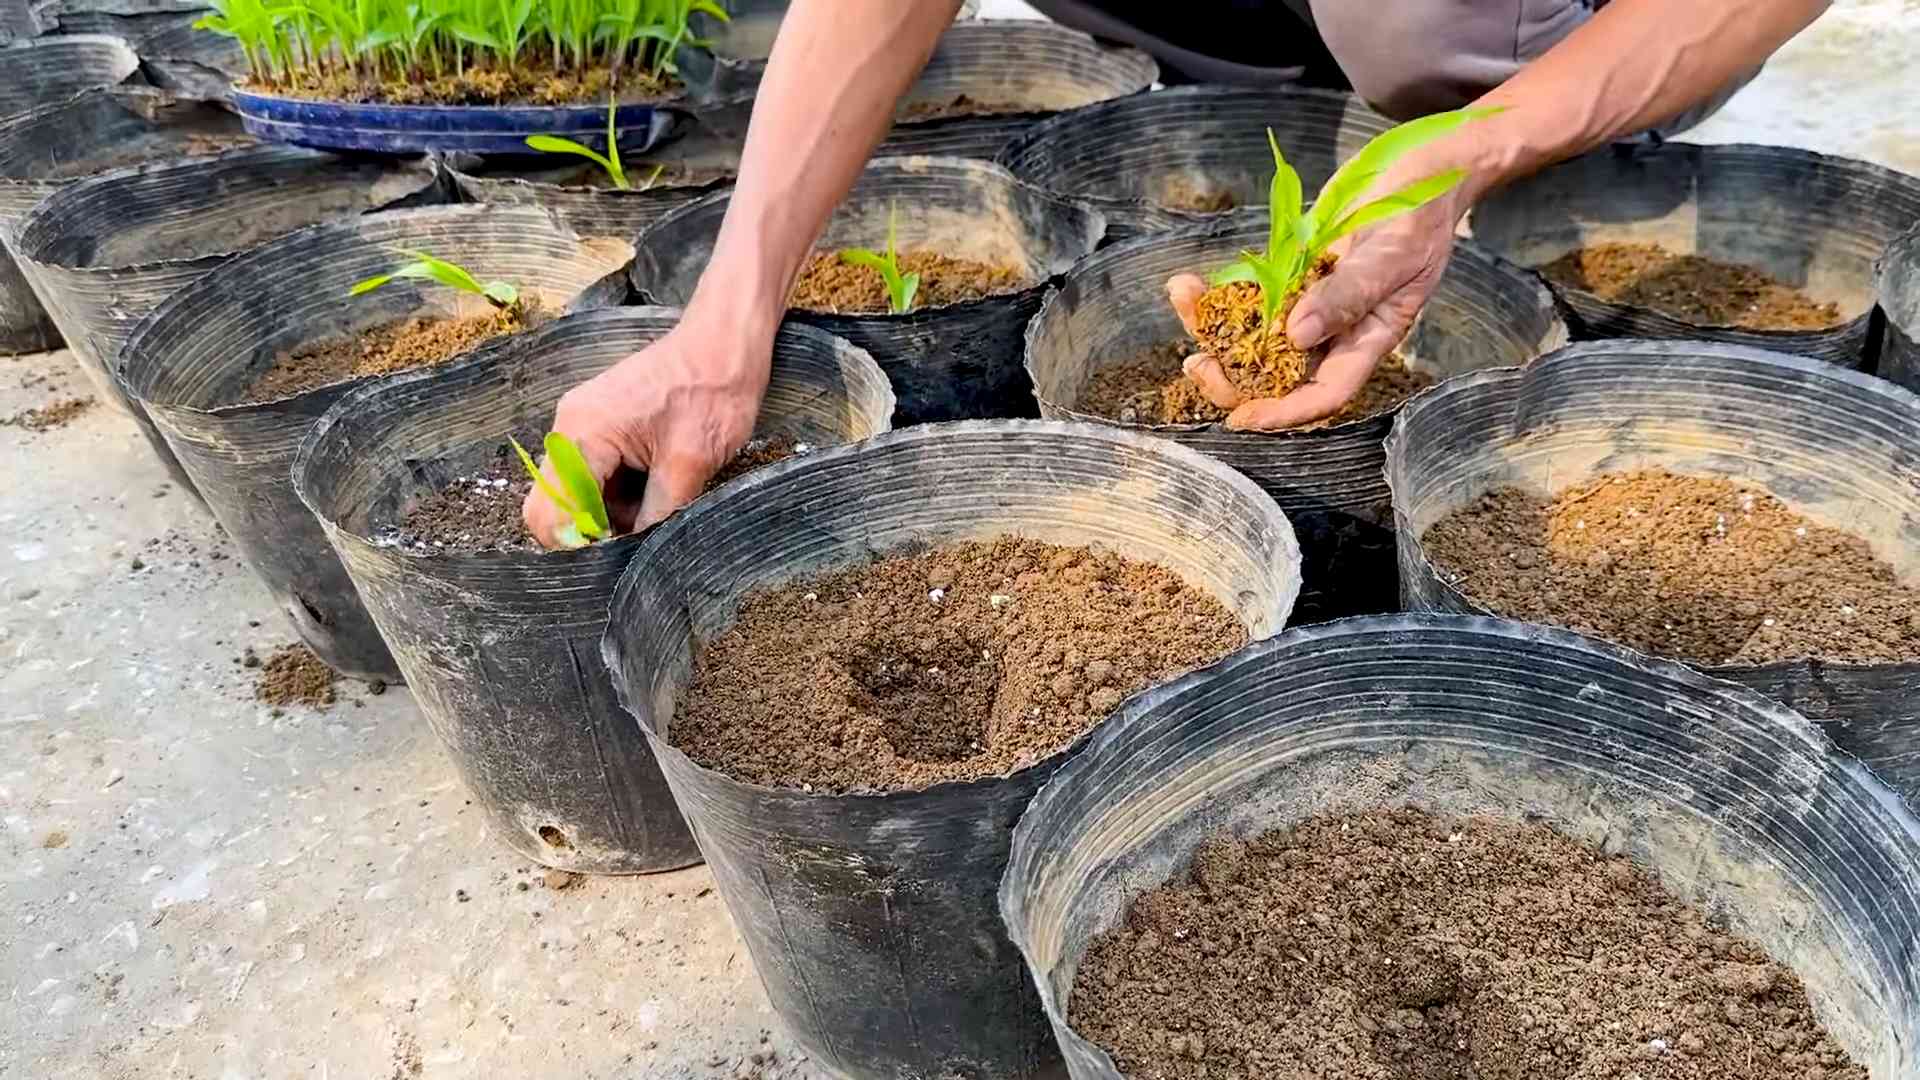
1. Fill the Containers: Fill your containers with the high-quality potting mix, leaving about 2 inches of space at the top.
2. Sow the Seeds: Plant the corn seeds about 1-2 inches deep and 4-6 inches apart. I usually plant 4-5 seeds per container and thin them out later if needed.
3. Water Thoroughly: After planting, water the containers thoroughly until water drains out of the bottom. This helps settle the soil and ensures good seed-to-soil contact.
4. Apply Slow-Release Fertilizer: Sprinkle the slow-release fertilizer according to the package instructions. Gently mix it into the top inch of the soil.
5. Mulch the Soil: Add a layer of mulch around the base of the corn plants to help retain moisture and suppress weeds.
6. Protect from Birds: If you’re concerned about birds, cover the containers with bird netting until the seedlings emerge.
Caring for Your Rooftop Corn
Now that your corn is planted, it’s time to provide the care it needs to thrive.
1. Watering: Corn needs consistent moisture, especially during hot weather. Water deeply whenever the top inch of soil feels dry to the touch. Avoid overwatering, as this can lead to root rot.
2. Fertilizing: Corn is a heavy feeder, so you’ll need to supplement the slow-release fertilizer with regular feedings. I like to use a liquid fertilizer every 2-3 weeks, following the package instructions.
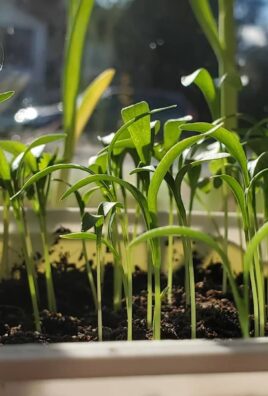
3. Thinning: Once the seedlings are a few inches tall, thin them out to the strongest 2-3 plants per container. This will give the remaining plants enough space to grow and develop.
4. Pollination: Corn is wind-pollinated, so you’ll need to help the process along, especially if your rooftop is sheltered from the wind. Gently shake the corn stalks every day when the tassels (the male flowers at the top of the plant) are shedding pollen. You can also hand-pollinate by collecting pollen from the tassels and dusting it onto the silks (the female flowers that emerge from the developing ears of corn).
5. Pest and Disease Control: Keep an eye out for common corn pests like corn earworms and aphids. Treat infestations promptly with insecticidal soap or neem oil. Prevent fungal diseases by ensuring good air circulation and avoiding overhead watering.
6. Support: As your corn plants grow taller, they may need support to prevent them from falling over. Use stakes or a trellis to provide support, especially if you live in a windy area.
Harvesting Your Corn
The moment you’ve been waiting for! Harvesting your homegrown corn is incredibly rewarding.
1. Check for Ripeness: Corn is typically ready to harvest about 20-25 days after the silks emerge. The silks will turn brown and dry, and the ears will feel plump and full.
2. Test the Kernels: To check for ripeness, peel back a small portion of the husk and puncture a kernel with your fingernail. If the liquid that comes out is milky, the corn is ready to harvest. If it’s clear, the corn needs more time to mature.
3. Harvest Carefully: To harvest, grasp the ear of corn firmly and twist it downward. The ear should snap off easily from the stalk.
4. Enjoy Fresh: Freshly harvested corn is the sweetest and most flavorful. Cook it as soon as possible for the best taste.
Troubleshooting Common Problems
Even with the best care, you might encounter some challenges along the way. Here are some common problems and how to address them:
* Poor Pollination: If your corn ears are poorly filled with kernels, it’s likely due to poor pollination. Make sure to hand-pollinate regularly, especially during hot, dry weather.
* Stunted Growth: Stunted growth can be caused by a variety of factors, including nutrient deficiencies, pests, and diseases. Check the soil pH and nutrient levels, and treat any pest or disease problems promptly.
* Yellowing Leaves: Yellowing leaves can indicate a nitrogen deficiency. Apply a nitrogen-rich fertilizer to correct the deficiency.
* Root Rot: Root rot is caused by overwatering and poor drainage. Make sure your containers have drainage holes and avoid overwatering.
Maximizing Your Rooftop Corn Harvest
Want to take your rooftop corn growing to the next level? Here are some tips for maximizing your harvest:
* Succession Planting: Plant corn seeds every 2-3 weeks to extend your harvest season.
* Companion Planting: Plant corn alongside other beneficial plants, such as beans and squash. This is known as the “Three Sisters” planting method. Beans provide nitrogen to the soil, while squash helps suppress weeds and retain moisture.
* Choose the Right Location: Corn needs at least 6-8 hours of sunlight per day. Choose a sunny spot on your rooftop for your containers.
* Rotate Your Crops: Avoid planting corn in the same containers year after year. Rotate your crops to prevent soilborne diseases and nutrient depletion.
* Use Rainwater: Collect rainwater to water your corn plants. Rainwater is naturally soft and free of chemicals, making it ideal for gardening.
Dealing with Wind on a Rooftop
Rooftops can be windy places, and wind can be tough on corn plants. Here’s how I combat the wind:
* Choose Sturdy Containers: Opt for heavier containers that won’t easily blow over in the wind.
* Provide Support: Use sturdy stakes or a trellis to support your corn stalks and prevent them from breaking in the wind.
* Create a Windbreak: If possible, create a windbreak using shrubs, fences, or other structures.
* Water More Frequently: Wind can dry out the soil quickly, so water your corn plants more frequently during windy conditions.
Enjoying Your Homegrown Corn
There’s nothing quite like the taste of fresh, homegrown corn. Here are some
Conclusion
So, there you have it! Transforming your rooftop into a thriving cornfield, even without traditional garden beds, is not only possible but surprisingly rewarding. This DIY rooftop corn growing method opens up a world of possibilities for urban gardeners, apartment dwellers, and anyone looking to maximize their space and enjoy the unparalleled taste of homegrown corn.
Why is this a must-try? Because it’s more than just growing corn; it’s about reclaiming your space, connecting with nature in an urban environment, and experiencing the satisfaction of harvesting your own food. Imagine stepping onto your rooftop and picking fresh, juicy corn on the cob, knowing you nurtured it from seed to table. The flavor difference between store-bought and homegrown is undeniable, and the pride you’ll feel is immeasurable.
Beyond the sheer joy of fresh corn, this method is incredibly adaptable. You can experiment with different varieties of corn, from classic sweet corn to colorful heirloom varieties. Consider adding companion plants like beans or squash to your containers to create a mini-ecosystem that benefits all three. You can also adjust the size and number of containers to fit your specific rooftop space and yield goals. Think about adding trellises for support, especially if you’re growing taller varieties or live in a windy area.
Don’t be afraid to get creative with your container design. Repurposed barrels, large plastic tubs, or even sturdy woven bags can all work well. Just ensure they have adequate drainage. You can also explore different soil mixes to find what works best for your climate and corn variety. Some gardeners swear by a mix of compost, peat moss, and perlite, while others prefer a more soil-based blend.
We understand that venturing into rooftop gardening can seem daunting, but we encourage you to take the leap. The rewards are well worth the effort. Start small, experiment, and learn as you go. Even if you only harvest a few ears of corn in your first season, you’ll gain valuable experience and knowledge that will help you improve your yields in the future.
We are confident that this DIY rooftop corn growing technique will transform your urban space into a productive and beautiful garden. The key is to start with good quality seeds, provide adequate sunlight and water, and monitor your plants regularly for pests or diseases. With a little care and attention, you’ll be enjoying fresh, homegrown corn in no time.
So, grab your seeds, gather your containers, and get ready to embark on a rooftop corn-growing adventure. We can’t wait to hear about your experiences! Share your photos, tips, and challenges in the comments below. Let’s build a community of rooftop corn growers and inspire others to transform their urban spaces into thriving gardens. Happy growing!
Frequently Asked Questions (FAQ)
What kind of containers are best for rooftop corn growing?
The best containers for rooftop corn growing are large, sturdy, and provide adequate drainage. Aim for containers that are at least 12-18 inches in diameter and depth to accommodate the corn’s root system. Repurposed barrels, large plastic tubs, and even sturdy woven bags can work well. Ensure the containers are made of a material that can withstand the elements and won’t degrade quickly in sunlight. Dark-colored containers can absorb more heat, which can be beneficial in cooler climates but may overheat the soil in hotter regions. Consider using lighter-colored containers or painting dark containers white to reflect sunlight. Drainage is crucial to prevent waterlogging, which can lead to root rot. Make sure your containers have drainage holes at the bottom, and consider adding a layer of gravel or rocks at the bottom to improve drainage.
How much sunlight does rooftop corn need?
Corn requires at least 6-8 hours of direct sunlight per day to thrive. Choose a rooftop location that receives ample sunlight throughout the growing season. If your rooftop is partially shaded, try to position your containers to maximize sun exposure. You can also use reflective surfaces, such as white walls or aluminum foil, to bounce sunlight onto your plants. Monitor your corn plants closely for signs of insufficient sunlight, such as leggy growth or pale leaves. If necessary, consider supplementing with artificial grow lights, especially during periods of cloudy weather.
What kind of soil should I use for rooftop corn growing?
A well-draining, nutrient-rich soil mix is essential for successful rooftop corn growing. A good starting point is a mix of equal parts compost, peat moss (or coconut coir), and perlite. Compost provides essential nutrients and improves soil structure. Peat moss or coconut coir helps retain moisture and provides aeration. Perlite improves drainage and prevents soil compaction. You can also add slow-release fertilizer to the soil mix to provide a steady supply of nutrients throughout the growing season. Avoid using heavy clay soil, as it can become waterlogged and suffocate the roots. Consider testing your soil pH to ensure it’s within the optimal range for corn (6.0-7.0). You can amend the soil with lime to raise the pH or sulfur to lower it.
How often should I water my rooftop corn?
Rooftop corn requires consistent watering, especially during hot and dry weather. Check the soil moisture regularly by sticking your finger into the soil. If the top inch of soil feels dry, it’s time to water. Water deeply and thoroughly, ensuring the water reaches the bottom of the container. Avoid overwatering, as this can lead to root rot. Water early in the morning to allow the foliage to dry before nightfall, which can help prevent fungal diseases. Consider using a drip irrigation system or soaker hoses to provide a slow and steady supply of water directly to the roots. Mulching around the base of the plants can help retain moisture and reduce evaporation.
How do I pollinate my rooftop corn?
Corn is wind-pollinated, so you may need to hand-pollinate your rooftop corn, especially if you’re growing it in a sheltered location with limited airflow. When the tassels (the male flowers at the top of the plant) begin to shed pollen, gently shake the plants to release the pollen. You can also collect the pollen in a container and use a small brush to apply it to the silks (the female flowers that emerge from the developing ears of corn). Repeat this process every day for several days to ensure adequate pollination. You’ll know pollination has been successful when the silks turn brown and dry.
What are some common pests and diseases that affect rooftop corn?
Common pests that can affect rooftop corn include aphids, corn earworms, and spider mites. Aphids can be controlled with insecticidal soap or a strong stream of water. Corn earworms can be handpicked or treated with Bacillus thuringiensis (Bt). Spider mites can be controlled with horticultural oil or miticides. Common diseases that can affect rooftop corn include rust, smut, and leaf blight. Preventative measures, such as providing good air circulation and avoiding overhead watering, can help reduce the risk of these diseases. If you notice signs of disease, treat promptly with appropriate fungicides.
Can I grow different varieties of corn on my rooftop?
Yes, you can grow different varieties of corn on your rooftop, but it’s important to choose varieties that are well-suited to container gardening and your local climate. Shorter, more compact varieties are generally better suited to container growing than taller, sprawling varieties. Consider growing sweet corn, popcorn, or ornamental corn. Be aware that different varieties of corn can cross-pollinate, so if you’re growing multiple varieties, you may need to isolate them to prevent cross-pollination. This can be done by planting them far apart or by staggering their planting times.
How do I harvest my rooftop corn?
Rooftop corn is typically ready to harvest about 60-90 days after planting, depending on the variety. The silks will turn brown and dry, and the ears will feel plump and full. To check for ripeness, peel back a portion of the husk and puncture a kernel with your fingernail. If the liquid is milky, the corn is ready to harvest. If the liquid is clear, it’s not quite ripe. If the liquid is doughy, it’s overripe. To harvest, grasp the ear firmly and twist it downward until it snaps off the stalk. Enjoy your fresh, homegrown corn!
Is rooftop corn growing safe for my roof?
Rooftop corn growing is generally safe for most roofs, but it’s important to take some precautions to ensure you don’t damage your roof. First, make sure your roof is structurally sound and can support the weight of the containers, soil, and plants. Consult with a structural engineer if you have any concerns. Distribute the weight evenly across the roof to avoid concentrating it in one area. Use waterproof containers to prevent water from seeping into the roof structure. Consider placing a layer of protective material, such as rubber roofing or landscape fabric, between the containers and the roof surface. Regularly inspect your roof for any signs of leaks or damage.
Leave a Comment