
Rosemary garden growing tips are what you need to unlock a world of fragrant possibilities right in your backyard! Have you ever dreamed of snipping fresh rosemary sprigs to elevate your culinary creations or crafting your own aromatic bath products? I know I have! For centuries, rosemary has been cherished not only for its culinary uses but also for its medicinal and symbolic significance, representing remembrance and love in various cultures.
But let’s be honest, sometimes growing rosemary can feel a bit tricky. That’s where these DIY tricks and hacks come in! I’m here to share my tried-and-true secrets to help you cultivate a thriving rosemary garden, even if you don’t have a green thumb. From choosing the perfect location to mastering the art of watering, these tips will empower you to nurture healthy, vibrant rosemary plants.
Why do you need these rosemary garden growing tips? Because fresh, homegrown rosemary is simply superior! The flavor is more intense, the aroma is more captivating, and the satisfaction of harvesting your own herbs is unmatched. Plus, growing your own rosemary is a sustainable and cost-effective way to enjoy this versatile herb year-round. So, let’s dive in and transform your garden into a rosemary paradise!
DIY Rosemary Propagation: From Cuttings to Thriving Plants
Hey there, fellow plant enthusiasts! Rosemary is one of my absolute favorite herbs. Not only does it smell amazing and add a fantastic flavor to countless dishes, but it’s also relatively easy to grow. However, buying rosemary plants can add up, especially if you want a whole hedge or a bunch for different areas of your garden. That’s where propagation comes in! I’m going to walk you through the simple steps of propagating rosemary from cuttings, so you can have an endless supply of this fragrant herb without breaking the bank.
What You’ll Need
Before we dive in, let’s gather our supplies. Having everything ready beforehand will make the process smooth and enjoyable.
* Healthy Rosemary Plant: This is your “mother” plant. Choose a mature, healthy rosemary plant that’s free from pests and diseases.
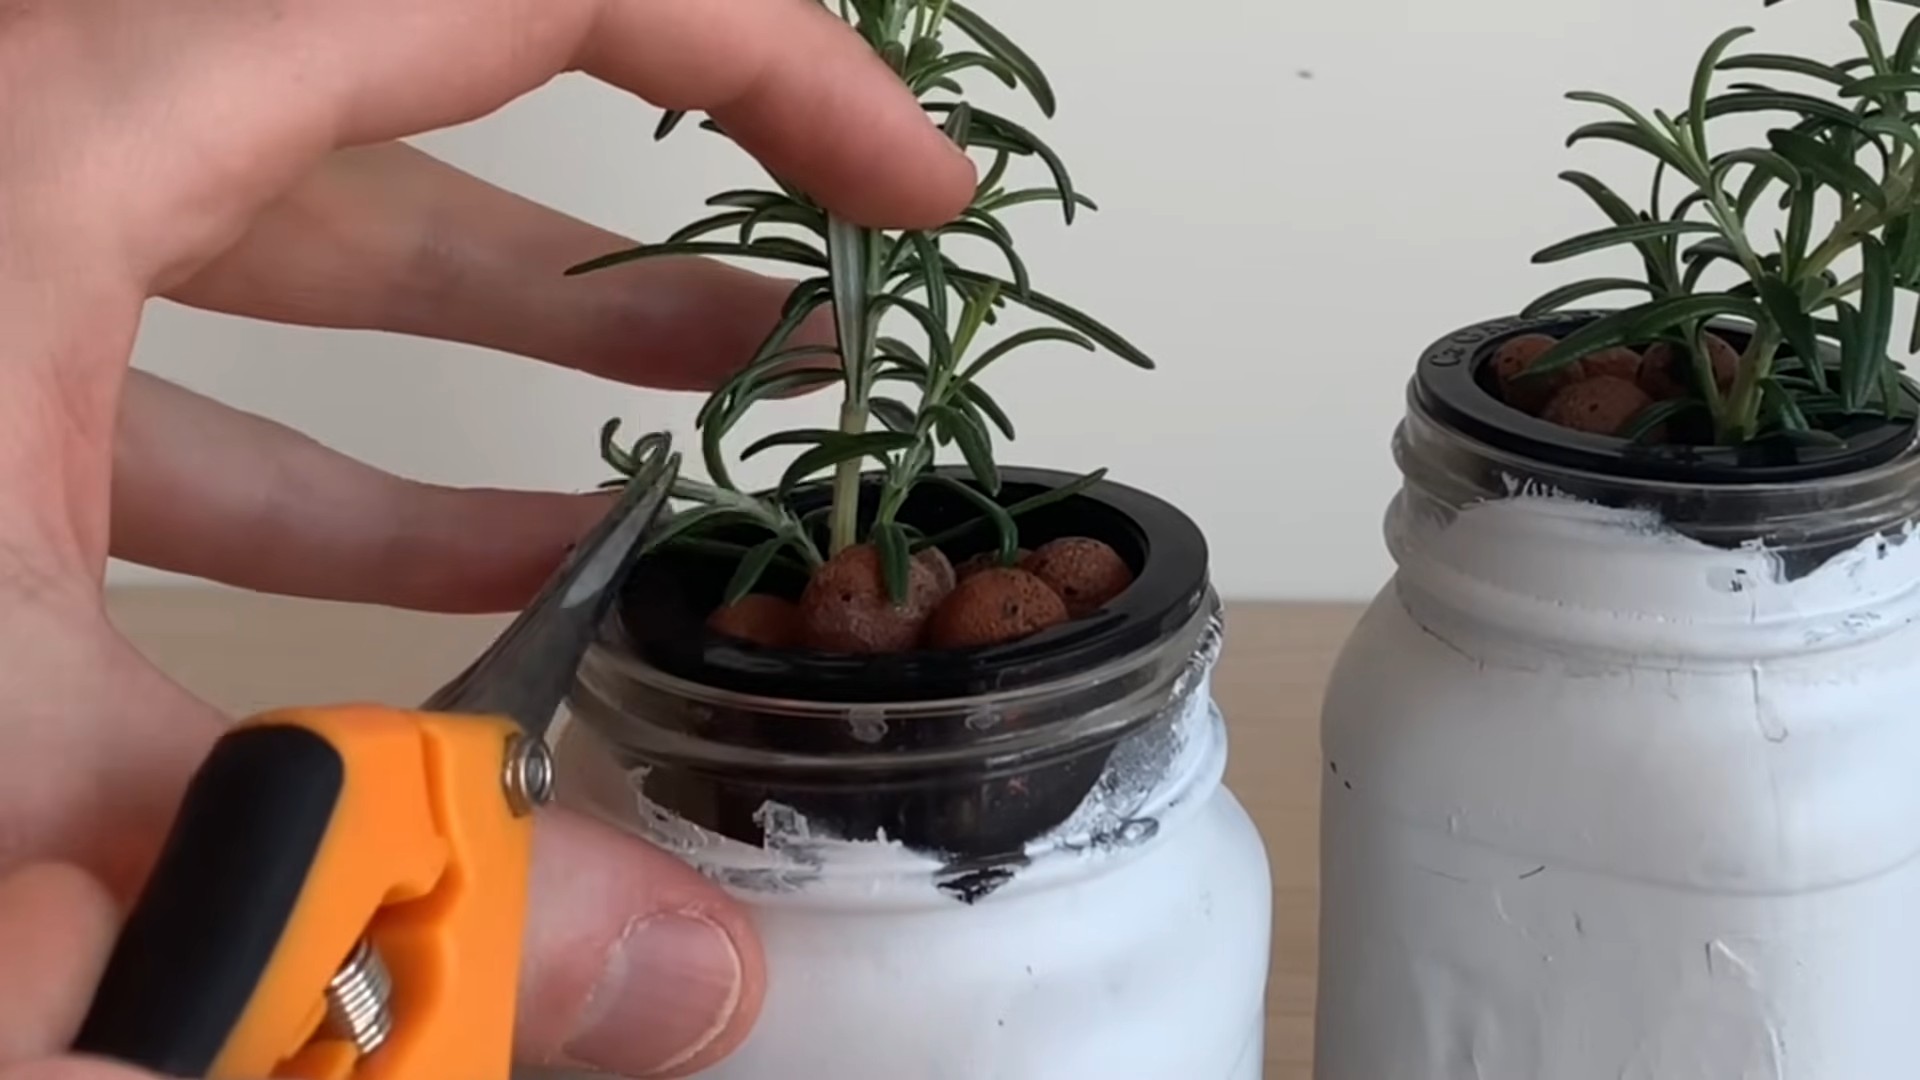
* Sharp, Clean Pruning Shears or Knife: Sterilize your cutting tools with rubbing alcohol to prevent the spread of diseases.
* Rooting Hormone (Optional): While not strictly necessary, rooting hormone can significantly increase your success rate, especially for beginners. I highly recommend it!
* Small Pots or Seed Trays: Choose pots with drainage holes to prevent waterlogging.
* Well-Draining Potting Mix: A mix of perlite, vermiculite, and peat moss or coco coir works well. You can also use a seed starting mix.
* Clear Plastic Bags or a Humidity Dome: These will help create a humid environment, which is crucial for successful rooting.
* Spray Bottle with Water: For misting the cuttings.
* Labels and a Pen: To keep track of your cuttings.
* A Warm, Bright Location: Indirect sunlight is best.
Taking Rosemary Cuttings
This is the most crucial step, so pay close attention! The quality of your cuttings will directly impact your success rate.
1. Choose the Right Stems: Look for healthy, new growth stems that are about 4-6 inches long. These stems should be flexible but not too soft. Avoid stems that are woody or flowering.
2. Make the Cut: Using your sterilized pruning shears or knife, make a clean cut just below a leaf node (the point where leaves grow from the stem). A clean cut is essential to prevent disease.
3. Remove Lower Leaves: Strip off the leaves from the bottom 1-2 inches of the stem. This is important because these submerged leaves will rot in the soil and can cause the cutting to fail.
4. Prepare the Cutting: If you’re using rooting hormone, dip the cut end of the stem into the powder or liquid. Tap off any excess. This will encourage root development.
Planting the Cuttings
Now that we have our cuttings prepared, it’s time to get them planted!
1. Fill the Pots: Fill your small pots or seed trays with the well-draining potting mix. Gently tap the pots to settle the soil.
2. Make a Hole: Use a pencil or your finger to create a small hole in the center of each pot. This will prevent the rooting hormone from being rubbed off as you insert the cutting.
3. Insert the Cutting: Carefully insert the cutting into the hole, making sure that the bottom 1-2 inches of the stem (where you removed the leaves) are buried in the soil.
4. Gently Firm the Soil: Gently press the soil around the base of the cutting to secure it in place.
5. Water Thoroughly: Water the cuttings gently but thoroughly, until the soil is moist but not soggy.
6. Create a Humid Environment: Place the pots inside clear plastic bags or under a humidity dome. This will help maintain high humidity levels, which are essential for root development. If using plastic bags, make sure the bag doesn’t directly touch the leaves. You can use skewers or small sticks to prop the bag up.
Caring for Your Cuttings
This is where patience comes in! It takes time for roots to develop, so don’t get discouraged if you don’t see results immediately.
1. Provide Indirect Sunlight: Place the cuttings in a warm, bright location that receives indirect sunlight. Avoid direct sunlight, as it can scorch the leaves.
2. Maintain Humidity: Keep the humidity high by keeping the cuttings covered. Open the bags or dome for a few minutes every day to allow for air circulation and prevent mold growth.
3. Mist Regularly: Mist the cuttings with water every day or two to keep the leaves moist.
4. Check for Root Development: After about 4-8 weeks, gently tug on the cuttings to check for root development. If you feel resistance, it means roots have formed! You can also gently remove a cutting from the pot to inspect the roots.
5. Gradually Acclimate: Once the cuttings have developed roots, gradually acclimate them to lower humidity levels by opening the bags or dome for longer periods each day. This will help them adjust to the drier air in your home or garden.
Transplanting Your Rosemary Plants
Once your rosemary plants have established roots and have been acclimated to lower humidity, it’s time to transplant them into larger pots or into your garden.
1. Choose the Right Location: Rosemary thrives in full sun and well-drained soil. Choose a location that receives at least 6-8 hours of sunlight per day.
2. Prepare the Soil: Amend the soil with compost or other organic matter to improve drainage and fertility.
3. Dig a Hole: Dig a hole that is slightly larger than the root ball of the rosemary plant.
4. Remove the Plant: Gently remove the rosemary plant from its pot, being careful not to damage the roots.
5. Loosen the Roots: Gently loosen the roots of the plant before placing it in the hole.
6. Plant the Rosemary: Place the rosemary plant in the hole and backfill with soil. Gently firm the soil around the base of the plant.
7. Water Thoroughly: Water the rosemary plant thoroughly after planting.
8. Mulch: Apply a layer of mulch around the base of the plant to help retain moisture and suppress weeds.
Troubleshooting
Even with the best care, sometimes things don’t go as planned. Here are a few common problems you might encounter and how to fix them:
* Cuttings Rotting: This is usually caused by overwatering or poor drainage. Make sure your potting mix is well-draining and avoid overwatering. Also, ensure good air circulation to prevent fungal growth.
* Cuttings Not Rooting: This could be due to several factors, including poor quality cuttings, low humidity, or lack of sunlight. Make sure you’re using healthy cuttings, maintaining high humidity, and providing adequate indirect sunlight. Try using rooting hormone to boost your chances.
* Yellowing Leaves: This can be a sign of overwatering or underwatering. Check the soil moisture and adjust your watering accordingly.
* Mold Growth: This is common in humid environments. Increase air circulation by opening the bags or dome more frequently. You can also use a fungicide if necessary.
Tips for Success
Here are a few extra tips to help you succeed with rosemary propagation:
* Take Multiple Cuttings: Not all cuttings will root, so take multiple cuttings to increase your chances of success.
* Be Patient: Rooting can take time, so be patient and don’t give up!
* Experiment: Try different rooting mediums and techniques to see what works best for you.
* Keep Records: Keep track of your cuttings and their progress. This will help you learn from your mistakes and improve your success rate in the future.
* Don’t Overwater: Rosemary hates wet feet. Ensure your pots have good drainage and allow the soil to dry out slightly between waterings.
* Provide Good Air Circulation: Rosemary thrives in well-ventilated areas. Avoid overcrowding your plants and ensure good air circulation to prevent fungal diseases.
Enjoy Your New Rosemary Plants!
With a little patience and care, you can easily propagate rosemary from cuttings and have an endless supply of this wonderful herb. I hope this guide has been helpful. Happy gardening!

Conclusion
So, there you have it! Mastering these rosemary garden growing tips isn’t just about cultivating a fragrant herb; it’s about unlocking a world of culinary possibilities, aromatherapy benefits, and the sheer joy of nurturing something beautiful and useful with your own hands. We’ve covered everything from selecting the right rosemary variety and preparing the perfect soil to ensuring adequate sunlight and providing the right amount of water. We’ve even delved into propagation techniques, pest control, and harvesting methods.
But why is this DIY approach a must-try? Because store-bought rosemary, while convenient, often lacks the intense flavor and aroma of homegrown varieties. Plus, knowing exactly where your herbs come from and how they were grown gives you peace of mind. You control the quality, ensuring it’s free from unwanted pesticides and chemicals. And let’s be honest, there’s a certain satisfaction that comes from using ingredients you’ve personally nurtured from tiny seedlings to thriving plants.
Beyond the Basics: Rosemary Variations and Creative Uses
Don’t be afraid to experiment! Rosemary comes in various forms, from upright varieties perfect for hedges to creeping types ideal for ground cover. Consider trying ‘Blue Boy’ for its compact size and intense flavor, or ‘Prostratus’ for its cascading habit, perfect for hanging baskets.
And the uses for your homegrown rosemary extend far beyond the kitchen. Infuse olive oil with rosemary for a flavorful dipping sauce or salad dressing. Add sprigs to your bath for a relaxing and aromatic soak. Create rosemary-infused vinegar for cleaning or use it to make homemade soaps and lotions. The possibilities are truly endless!
Your Rosemary Journey Starts Now!
We wholeheartedly encourage you to put these rosemary garden growing tips into practice. Start small, perhaps with a single pot on your windowsill, and gradually expand your rosemary empire as you gain confidence. Remember to observe your plants closely, paying attention to their needs and adjusting your care accordingly.
And most importantly, share your experiences! We’d love to hear about your successes, your challenges, and any unique tips or tricks you discover along the way. Post photos of your rosemary gardens on social media using #HomegrownRosemary and tag us so we can celebrate your achievements. Let’s create a community of rosemary enthusiasts, sharing our knowledge and inspiring each other to grow the best rosemary possible.
So, grab your gardening gloves, gather your supplies, and embark on your rosemary-growing adventure today! You won’t regret it. The rewards – fresh, flavorful rosemary at your fingertips – are well worth the effort. Happy gardening!
Frequently Asked Questions (FAQ)
Q: What is the best time of year to plant rosemary?
A: The best time to plant rosemary depends on your climate. In warmer climates (zones 8-11), you can plant rosemary year-round. However, in cooler climates, it’s best to plant rosemary in the spring after the last frost, allowing it ample time to establish itself before the winter months. If you’re starting from seeds indoors, begin 8-10 weeks before the last expected frost.
Q: What kind of soil does rosemary need?
A: Rosemary thrives in well-draining soil with a slightly alkaline pH (around 6.0 to 7.5). Heavy clay soils can be problematic as they retain too much moisture, leading to root rot. Amend clay soils with plenty of organic matter, such as compost or well-rotted manure, to improve drainage. Sandy soils, on the other hand, drain too quickly and may require more frequent watering. Adding organic matter to sandy soils will help retain moisture and nutrients. A good potting mix specifically formulated for herbs is also a great option for container-grown rosemary.
Q: How much sunlight does rosemary need?
A: Rosemary needs at least 6-8 hours of direct sunlight per day to thrive. Insufficient sunlight can lead to leggy growth and reduced flavor. If you’re growing rosemary indoors, place it near a south-facing window where it can receive ample sunlight. You may also need to supplement with grow lights, especially during the winter months.
Q: How often should I water my rosemary plant?
A: Rosemary is relatively drought-tolerant and prefers to be watered sparingly. Overwatering is a common mistake that can lead to root rot. Allow the soil to dry out completely between waterings. When you do water, water deeply, ensuring the entire root ball is moistened. Check the soil moisture regularly by sticking your finger into the soil. If the top inch or two feels dry, it’s time to water. Reduce watering frequency during the winter months when the plant’s growth slows down.
Q: How do I prune rosemary?
A: Pruning rosemary is essential for maintaining its shape, promoting bushier growth, and preventing it from becoming leggy. Prune rosemary in the spring after flowering. Remove any dead, damaged, or diseased branches. Trim back the remaining branches by about one-third, cutting just above a leaf node. Avoid cutting into the woody part of the plant, as it may not regrow. Regular harvesting of rosemary sprigs for culinary use also acts as a form of pruning.
Q: How do I propagate rosemary?
A: Rosemary can be easily propagated from stem cuttings. Take 4-6 inch cuttings from new growth in the spring or summer. Remove the lower leaves and dip the cut end in rooting hormone. Plant the cuttings in a well-draining potting mix and keep them moist until they root, which usually takes about 4-6 weeks. You can also propagate rosemary by layering, which involves bending a low-growing branch to the ground and covering it with soil. Once roots develop, you can sever the branch from the parent plant.
Q: What are some common pests and diseases that affect rosemary?
A: Rosemary is generally pest-resistant, but it can occasionally be affected by aphids, spider mites, and whiteflies. These pests can be controlled with insecticidal soap or neem oil. Root rot is a common disease that affects rosemary, especially in poorly draining soils. Prevent root rot by planting rosemary in well-draining soil and avoiding overwatering. Powdery mildew can also occur in humid conditions. Improve air circulation around the plant and treat with a fungicide if necessary.
Q: Can I grow rosemary indoors?
A: Yes, rosemary can be successfully grown indoors, provided it receives enough sunlight and is planted in well-draining soil. Choose a pot with drainage holes and use a potting mix specifically formulated for herbs. Place the pot near a south-facing window or supplement with grow lights. Water sparingly and allow the soil to dry out between waterings.
Q: How do I harvest rosemary?
A: You can harvest rosemary sprigs at any time of year. Simply snip off the sprigs with scissors or pruning shears. The flavor of rosemary is most intense just before flowering. To dry rosemary, hang the sprigs upside down in a cool, dry, and well-ventilated place. Once the leaves are dry, crumble them and store them in an airtight container.


Leave a Comment