
Sage Container Gardening: Unlock the secrets to growing this fragrant and flavorful herb right on your patio or balcony! Have you ever dreamed of snipping fresh sage leaves to add a burst of earthy goodness to your favorite dishes, but thought you didn’t have the space? Well, dream no more! This DIY guide is your passport to a thriving sage garden, no matter how small your outdoor area might be.
Sage, with its silvery-green leaves and distinctive aroma, has a rich history steeped in tradition. For centuries, it’s been revered not only for its culinary uses but also for its medicinal properties. Ancient Romans considered sage a sacred herb, believing it could grant immortality. Today, while we might not be seeking eternal life, we can certainly appreciate the vitality and flavor it brings to our lives.
But why should you embrace sage container gardening? In today’s fast-paced world, having access to fresh, homegrown herbs is a luxury many crave. Store-bought herbs can be expensive and often lack the vibrant flavor of freshly picked ones. Plus, growing your own sage is incredibly rewarding! This DIY guide will provide you with simple, step-by-step instructions and clever hacks to ensure your sage thrives in its container, bringing a touch of the Mediterranean to your doorstep. I’m excited to share my tips and tricks with you, so let’s get started!
DIY Sage Container Garden: A Beginner’s Guide
Hey there, fellow plant enthusiasts! I’m so excited to share my experience with creating a thriving sage container garden. Sage is not only a fantastic herb for cooking, adding a wonderful earthy flavor to dishes, but it’s also incredibly easy to grow in containers, even if you don’t have a huge garden space. Plus, the silvery-green foliage is just beautiful! This guide will walk you through every step, from choosing the right container to harvesting your fragrant sage leaves. Let’s get started!
Choosing the Right Container and Soil
Before we even think about planting, we need to set the stage for success. This means picking the perfect pot and soil mix.
* Container Size: Sage needs room to grow its roots. I recommend a pot that’s at least 12 inches in diameter and 12 inches deep. This gives the roots plenty of space to spread out and prevents the plant from becoming root-bound.
* Drainage is Key: This is super important! Sage hates soggy feet. Make sure your container has drainage holes at the bottom. If it doesn’t, you can drill some yourself.
* Material Matters: You can use terracotta, plastic, or even a repurposed bucket – whatever suits your style! Terracotta pots are porous, which helps with drainage, but they also dry out faster. Plastic pots retain moisture better but can sometimes lead to overwatering if you’re not careful.
* Soil Selection: Don’t just grab any old dirt from your backyard! Sage thrives in well-draining soil that’s slightly alkaline. I like to use a mix of potting soil, perlite, and compost. The potting soil provides nutrients, the perlite improves drainage, and the compost adds organic matter. A good ratio is 2 parts potting soil, 1 part perlite, and 1 part compost.
Planting Your Sage
Now for the fun part – getting your sage into its new home!
1. Gather Your Supplies: You’ll need your chosen container, your soil mix, a sage plant (either from a nursery or started from seed), a trowel, and some water.
2. Prepare the Container: If your container has large drainage holes, you might want to line the bottom with a layer of landscape fabric or some small rocks to prevent the soil from washing out.
3. Fill the Container: Add your soil mix to the container, leaving about an inch or two of space at the top.
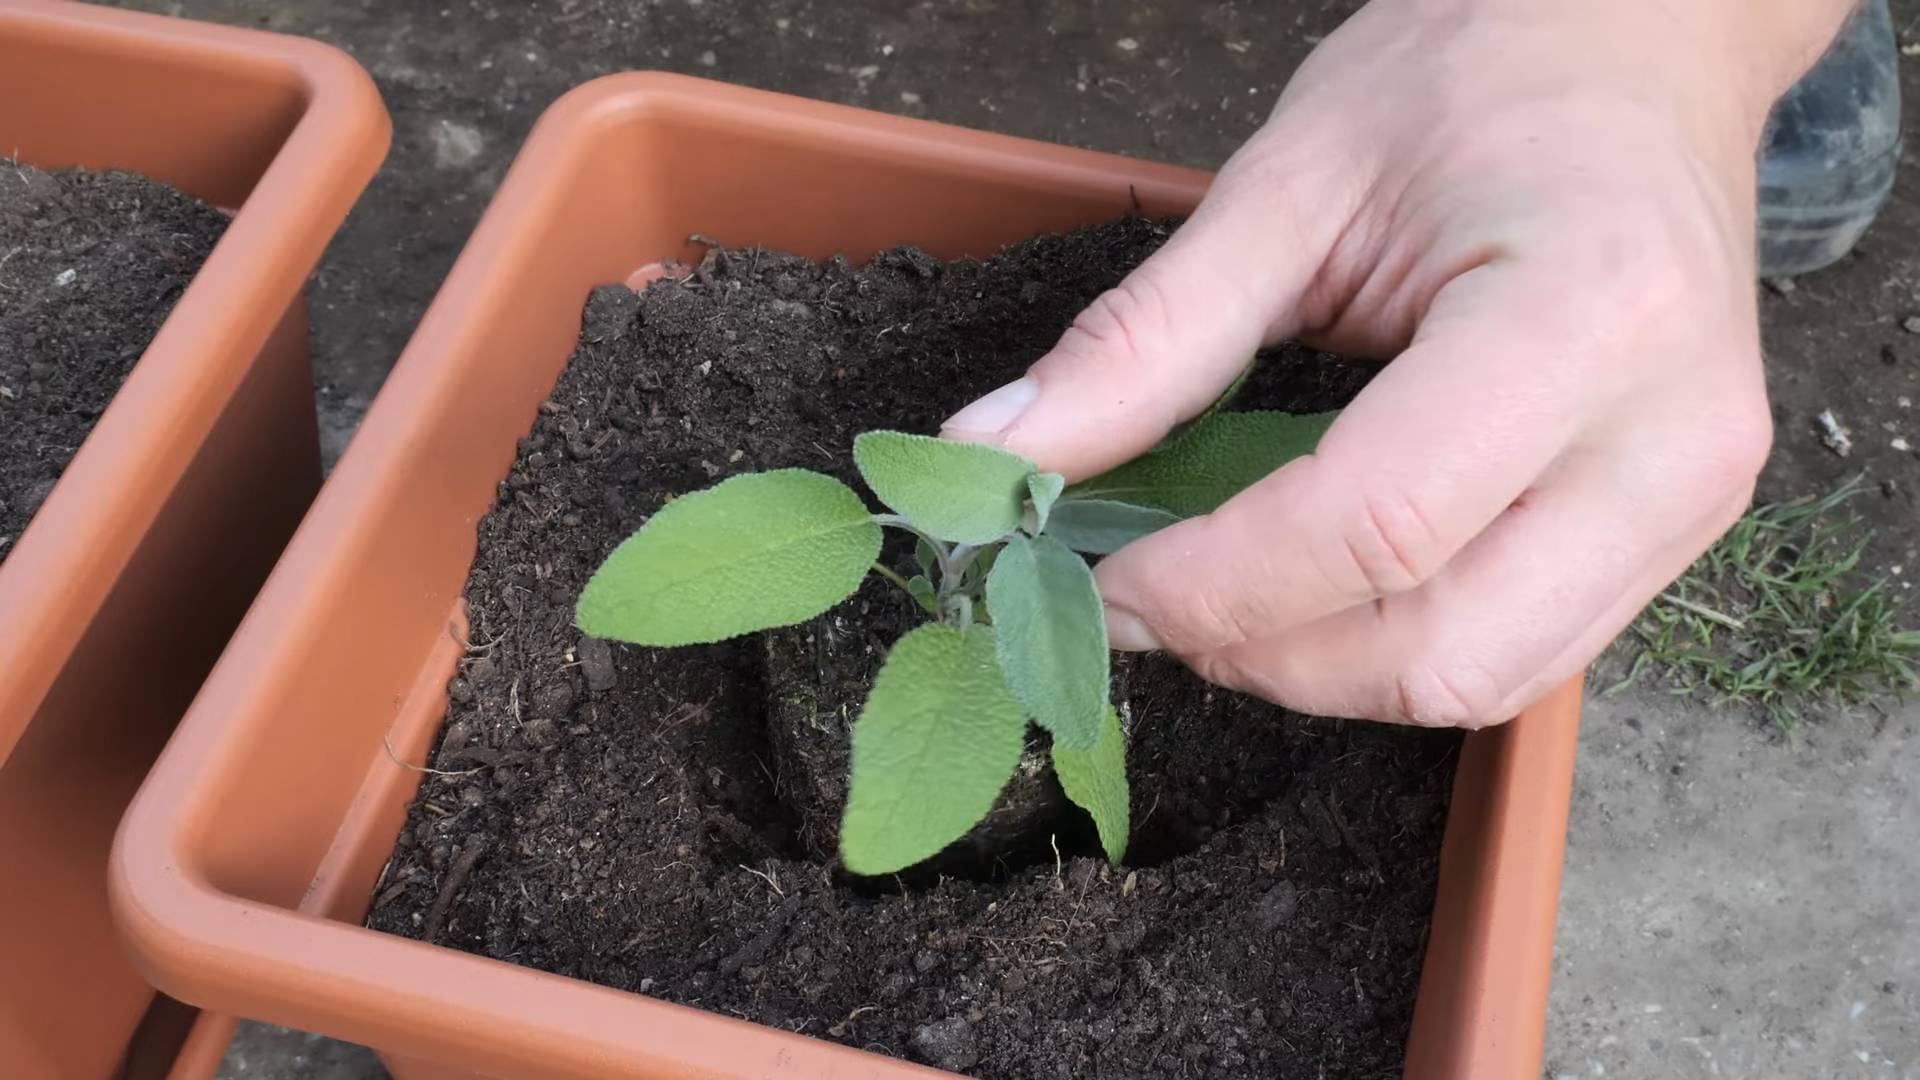
4. Remove the Sage Plant: Gently remove the sage plant from its nursery pot. If the roots are tightly packed, gently loosen them with your fingers. This will encourage them to spread out into the new soil.
5. Plant the Sage: Dig a hole in the center of the soil that’s large enough to accommodate the sage plant’s root ball. Place the plant in the hole, making sure the top of the root ball is level with the surrounding soil.
6. Backfill with Soil: Fill in the hole with the remaining soil mix, gently patting it down around the plant.
7. Water Thoroughly: Water the sage plant thoroughly until water drains out of the drainage holes. This helps settle the soil and ensures the roots are properly hydrated.
Caring for Your Sage Plant
Okay, your sage is planted! Now, let’s talk about how to keep it happy and healthy.
* Sunlight: Sage loves sunshine! Aim for at least 6-8 hours of direct sunlight per day. If you don’t have a sunny spot, you can supplement with a grow light.
* Watering: Water your sage plant when the top inch of soil feels dry to the touch. Avoid overwatering, as this can lead to root rot. During hot, dry weather, you may need to water more frequently.
* Fertilizing: Sage doesn’t need a lot of fertilizer. In fact, too much fertilizer can actually reduce its flavor. I like to give my sage plant a light feeding of balanced liquid fertilizer every few weeks during the growing season (spring and summer).
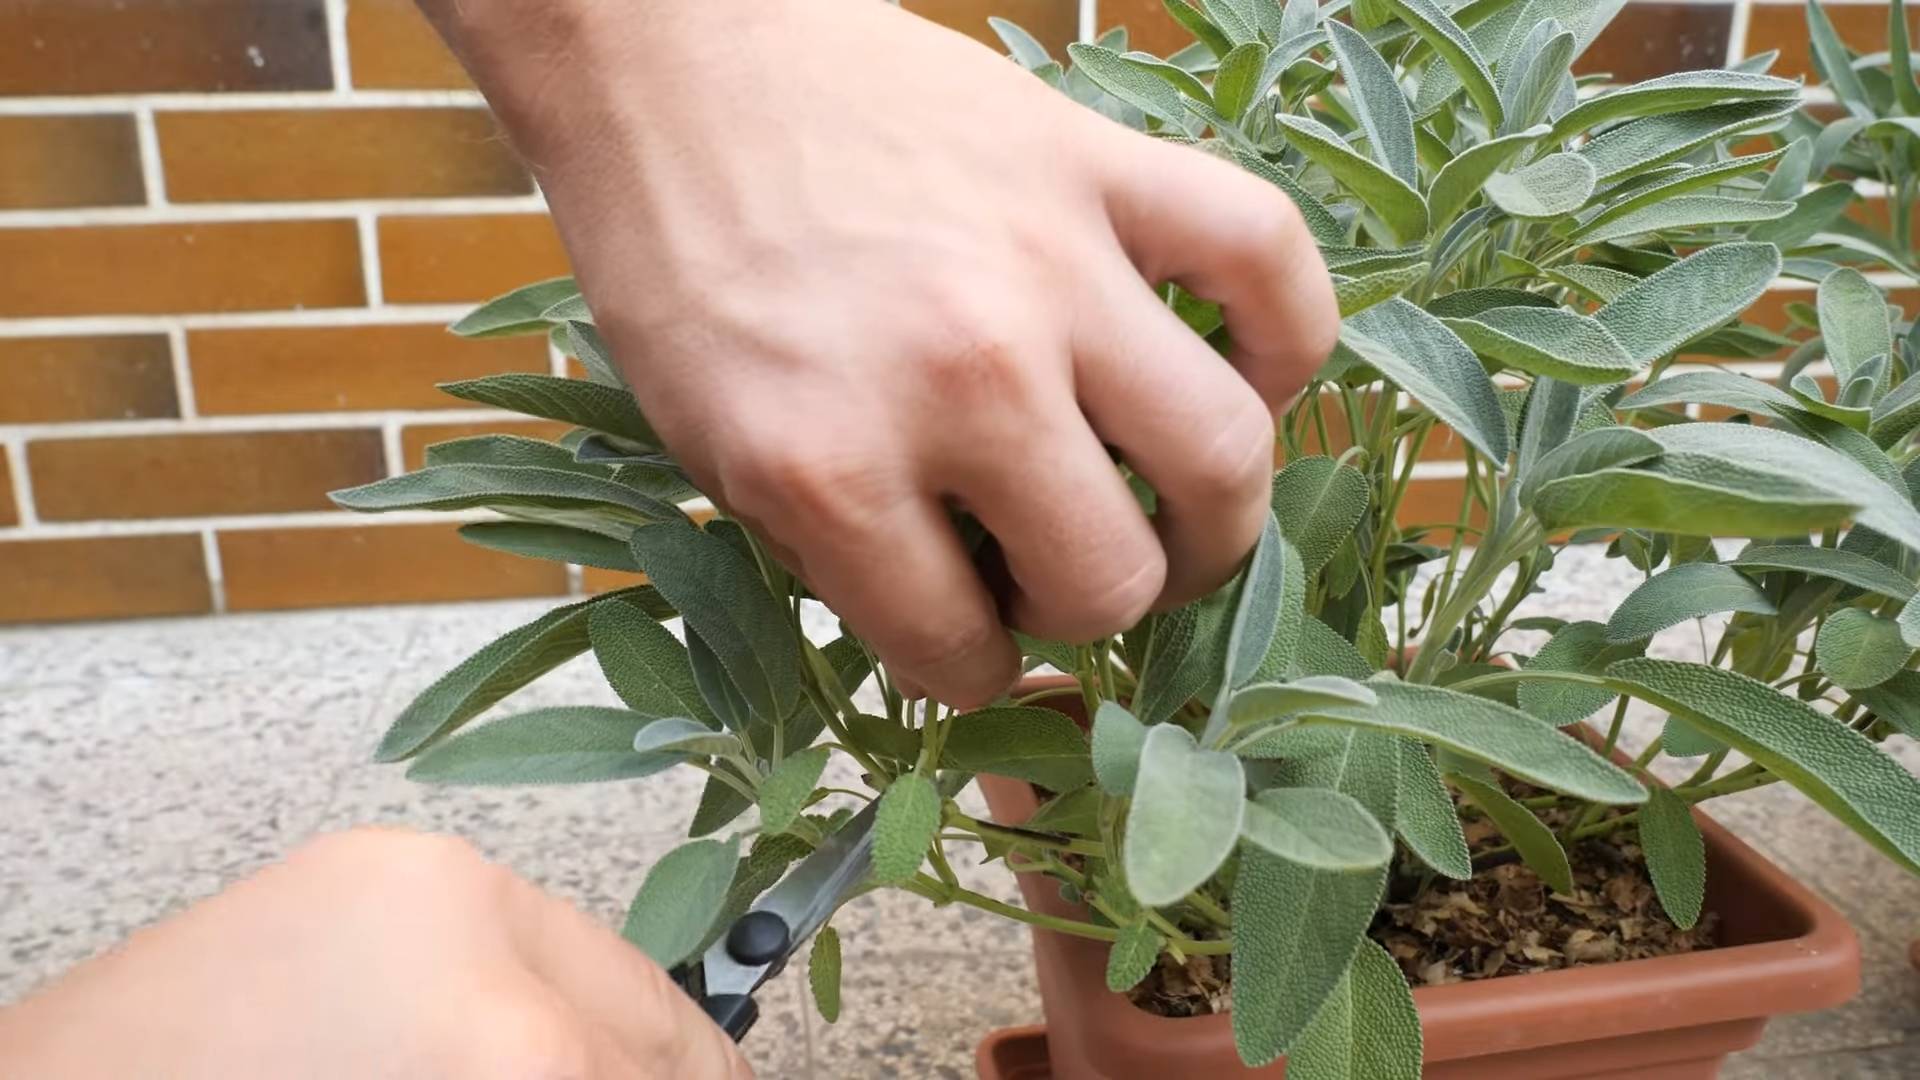
* Pruning: Pruning is essential for keeping your sage plant healthy and productive. Prune regularly to remove dead or damaged leaves and to encourage bushier growth. You can also prune to shape the plant to your liking.
* Overwintering: Sage is a perennial, which means it can live for several years. However, in colder climates, it may need some protection during the winter. If you live in a zone where temperatures drop below freezing, you can either bring your sage container indoors or insulate it with burlap or straw.
* Pest Control: Sage is relatively pest-resistant, but it can sometimes be affected by aphids, spider mites, or whiteflies. If you notice any pests, you can try spraying the plant with insecticidal soap or neem oil.
Harvesting Your Sage
The best part – enjoying the fruits (or rather, leaves!) of your labor!
1. When to Harvest: You can start harvesting sage leaves as soon as the plant is established, usually a few weeks after planting. The flavor is most intense just before the plant flowers.
2. How to Harvest: Use scissors or pruning shears to cut off individual leaves or entire stems. Avoid cutting off more than one-third of the plant at a time, as this can stress it.
3. Drying Sage: If you want to preserve your sage for later use, you can dry it. There are several ways to dry sage:
* Air Drying: Tie the stems together in small bundles and hang them upside down in a cool, dry, well-ventilated place. It usually takes a few weeks for the sage to dry completely.
* Oven Drying: Spread the sage leaves in a single layer on a baking sheet and bake them in a low oven (around 170°F) for a few hours, until they are dry and brittle.
* Dehydrator: If you have a food dehydrator, you can use it to dry sage leaves quickly and easily.
4. Storing Dried Sage: Once the sage is completely dry, store it in an airtight container in a cool, dark place. Dried sage can last for up to a year.
Troubleshooting Common Sage Problems
Even with the best care, sometimes things can go wrong. Here are a few common problems you might encounter with your sage plant and how to fix them:
* Yellowing Leaves: This can be caused by overwatering, underwatering, or nutrient deficiencies. Check the soil moisture and adjust your watering accordingly. If the soil is dry, water thoroughly. If the soil is soggy, allow it to dry out before watering again. You can also try fertilizing the plant with a balanced liquid fertilizer.
* Leggy Growth: This is usually caused by insufficient sunlight. Move your sage plant to a sunnier location or supplement with a grow light. Pruning can also help to encourage bushier growth.
* Root Rot: This is caused by overwatering and poor drainage. Make sure your container has drainage holes and that you’re not overwatering the plant. If you suspect root rot, you can try repotting the plant in fresh, well-draining soil.
* Powdery Mildew: This is a fungal disease that can affect sage plants, especially in humid conditions. It appears as a white, powdery coating on the leaves. To prevent powdery mildew, make sure your sage plant has good air circulation and avoid overhead watering. If you see signs of powdery mildew, you can try spraying the plant with a fungicide.
Propagating Sage
Want more sage plants? You can easily propagate sage from cuttings!
1. Take Cuttings: In the spring or summer, take 4-6 inch cuttings from healthy stems. Remove the leaves from the bottom inch of the cutting.
2. Rooting Hormone (Optional): Dip the cut end of the cutting in rooting hormone. This will help to encourage root growth.
3. Plant the Cuttings: Plant the cuttings in a pot filled with well-draining potting mix.
4. Keep Moist: Keep the soil moist but not soggy. You can cover the pot with a plastic bag to create a humid environment.
5. Wait for Roots: In a few weeks, the cuttings should start to develop roots. You can check for roots by gently tugging on the cuttings. If they resist, they have rooted.
6. Transplant: Once the cuttings have developed a good root system, you can transplant them into individual pots.
Sage Varieties to Consider
While common sage (Salvia officinalis) is a great choice, there are other varieties you might want to explore:
* Purple Sage (Salvia officinalis ‘Purpurascens’): Beautiful purple foliage and a slightly milder flavor.
* Golden Sage (Salvia officinalis ‘Aurea’): Variegated golden leaves that add a splash of color to your garden.
* Tricolor Sage (Salvia officinalis ‘Tricolor’): A mix of green,
Conclusion
So, there you have it! Mastering sage container gardening is not only achievable but also incredibly rewarding. We’ve walked through the simple steps, from selecting the right container and soil to nurturing your sage plant for a bountiful harvest. But why is this DIY trick a must-try? Because it puts fresh, aromatic sage right at your fingertips, ready to elevate your culinary creations and infuse your home with its delightful fragrance. No more last-minute trips to the grocery store or settling for dried herbs that lack the vibrant flavor of fresh sage.
Imagine stepping outside your door and snipping off a few sprigs of sage to add to your roasted chicken, stuffing, or even a soothing cup of tea. The possibilities are endless! And the best part? You’re in complete control of the growing environment, ensuring your sage is healthy, organic, and free from harmful pesticides.
But don’t stop there! Experiment with different varieties of sage to discover your favorites. Try growing common sage (Salvia officinalis), with its classic flavor, or explore the unique notes of pineapple sage (Salvia elegans) or purple sage (Salvia officinalis ‘Purpurascens’). You can also create a beautiful and functional herb garden by combining sage with other complementary herbs like rosemary, thyme, and oregano. Consider the size and growth habits of each herb when planning your container arrangement to ensure they all thrive.
For a visually stunning display, consider using terracotta pots, which allow for excellent drainage and breathability. Or, if you prefer a more modern look, opt for sleek, contemporary containers in neutral colors. You can even repurpose old buckets or baskets to create a rustic and charming herb garden. Just be sure to drill drainage holes in the bottom to prevent waterlogging.
Another variation to consider is companion planting within your sage container. Marigolds, for example, can help deter pests, while carrots can improve the soil structure. Research which plants thrive alongside sage to create a mutually beneficial ecosystem in your container garden.
Don’t be afraid to get creative and personalize your sage container garden to suit your style and preferences. The most important thing is to provide your sage plant with the right conditions to flourish.
Now, it’s your turn! We encourage you to embrace this DIY trick and experience the joy of growing your own fresh sage. It’s a simple, satisfying, and rewarding project that will enhance your cooking, your home, and your connection to nature.
Once you’ve embarked on your sage container gardening adventure, we’d love to hear about your experience! Share your tips, tricks, and photos with us in the comments below. Let’s create a community of sage-loving gardeners and inspire others to discover the magic of growing their own herbs. What varieties did you choose? What challenges did you face, and how did you overcome them? Your insights can help others succeed and learn from your experiences. Happy gardening!
Frequently Asked Questions (FAQs)
What is the best type of container for sage container gardening?
The best type of container for sage is one that provides adequate drainage and is appropriately sized for the plant’s mature size. Terracotta pots are a popular choice due to their excellent drainage and breathability. Plastic pots are also suitable, but be sure to choose a high-quality plastic that won’t leach chemicals into the soil. The size of the container will depend on the variety of sage you’re growing, but a pot that is at least 12 inches in diameter and 12 inches deep is generally recommended. Ensure the container has drainage holes to prevent waterlogging, which can lead to root rot.
What kind of soil should I use for my sage container?
Sage prefers well-draining soil that is slightly alkaline. A good potting mix for sage should consist of a blend of peat moss, perlite, and vermiculite. You can also add some compost to provide additional nutrients. Avoid using garden soil in containers, as it tends to compact and doesn’t drain well. A pH level between 6.0 and 7.5 is ideal for sage. You can test the pH of your soil using a soil testing kit and amend it as needed with lime to raise the pH or sulfur to lower it.
How much sunlight does sage need when grown in a container?
Sage thrives in full sun, which means it needs at least 6-8 hours of direct sunlight per day. If you’re growing sage indoors, place it near a sunny window or supplement with grow lights. Insufficient sunlight can lead to leggy growth and reduced flavor. If you live in a hot climate, provide some afternoon shade to prevent the leaves from scorching. Rotate the container regularly to ensure all sides of the plant receive adequate sunlight.
How often should I water my sage plant in a container?
Water sage regularly, but avoid overwatering. Allow the soil to dry out slightly between waterings. Check the soil moisture by sticking your finger about an inch into the soil. If it feels dry, it’s time to water. When watering, water deeply until water drains out of the drainage holes. Avoid getting the leaves wet, as this can promote fungal diseases. Reduce watering during the winter months when the plant is dormant.
How do I fertilize my sage plant in a container?
Sage doesn’t require heavy fertilization. In fact, too much fertilizer can reduce the plant’s flavor. Fertilize sparingly with a balanced, slow-release fertilizer in the spring. You can also use a liquid fertilizer diluted to half strength every few weeks during the growing season. Avoid fertilizing during the winter months. Organic fertilizers, such as compost tea or fish emulsion, are also excellent choices for feeding sage.
How do I prune my sage plant in a container?
Pruning sage regularly encourages bushier growth and prevents the plant from becoming leggy. Prune in the spring after the last frost, removing any dead or damaged stems. You can also prune lightly throughout the growing season to harvest leaves for culinary use. Avoid pruning too heavily, as this can weaken the plant. Remove any flowers that appear to encourage more leaf production.
What pests and diseases affect sage grown in containers?
Sage is generally resistant to pests and diseases, but it can be susceptible to aphids, spider mites, and powdery mildew. Inspect your plant regularly for signs of infestation or disease. Aphids and spider mites can be controlled with insecticidal soap or neem oil. Powdery mildew can be prevented by providing good air circulation and avoiding overhead watering. If powdery mildew does occur, treat it with a fungicide.
Can I overwinter my sage plant in a container?
Sage is a perennial plant, meaning it can live for several years. In colder climates, you’ll need to overwinter your sage plant indoors. Before the first frost, move the container to a cool, bright location, such as a garage or basement. Water sparingly during the winter months, allowing the soil to dry out between waterings. In the spring, after the last frost, gradually acclimate the plant to outdoor conditions before moving it back outside permanently.
How do I harvest sage leaves from my container plant?
Harvest sage leaves as needed throughout the growing season. Simply snip off the leaves with scissors or pruning shears. For the best flavor, harvest leaves in the morning after the dew has dried. You can use the fresh leaves immediately or dry them for later use. To dry sage leaves, hang them upside down in a cool, dry place or use a dehydrator.
Can I grow different varieties of sage in the same container?
While it’s possible to grow different varieties of sage in the same container, it’s generally best to avoid it. Different varieties of sage may have different growth habits and nutrient requirements, which can make it difficult to provide them with the optimal conditions. If you do choose to grow multiple varieties in the same container, be sure to select varieties that have similar growth habits and nutrient requirements. Also, provide ample space between the plants to allow for good air circulation.

Leave a Comment