
Salt and Detergent Cleaning: Sounds like a science experiment, right? Well, it’s actually a super simple and surprisingly effective way to tackle some of the most common cleaning challenges around your home! Forget those expensive, chemical-laden cleaners – I’m going to show you how to harness the power of these everyday ingredients for a sparkling clean space.
For centuries, people have been using natural ingredients like salt for cleaning. Think about it – before the advent of modern detergents, salt was a go-to for scrubbing pots, preserving food, and even disinfecting wounds. While detergent is a more modern invention, combining it with salt creates a synergistic effect, boosting its cleaning power and tackling tough stains and grime.
Why do you need this salt and detergent cleaning trick in your life? Because let’s face it, cleaning can be a chore! But with this DIY hack, you can save money, reduce your exposure to harsh chemicals, and achieve amazing results with minimal effort. Whether you’re battling stubborn grease in the kitchen, mildew in the bathroom, or just want a natural way to freshen up your home, this simple solution is a game-changer. So, grab your salt and detergent, and let’s get cleaning!

DIY Power Cleaner: Salt and Detergent Magic!
Hey everyone! I’m so excited to share this super simple, yet incredibly effective, DIY cleaning hack with you. I stumbled upon this trick while trying to find a natural and budget-friendly way to tackle some stubborn grime in my bathroom, and let me tell you, it’s a game-changer! Forget those expensive, chemical-laden cleaners – all you need is salt and detergent!
This powerful combination works wonders on a variety of surfaces, from greasy stovetops to grimy bathroom tiles. The salt acts as a gentle abrasive, scrubbing away dirt and grime without scratching, while the detergent helps to dissolve grease and lift away stains. Plus, it’s so easy to customize the strength of the cleaner depending on the task at hand.
So, are you ready to ditch the harsh chemicals and embrace the power of salt and detergent? Let’s get started!
What You’ll Need
Before we dive into the step-by-step instructions, let’s gather our supplies. You probably already have most of these items in your pantry and laundry room!
* **Table Salt:** Regular table salt works perfectly fine. You can also use sea salt or kosher salt, but make sure it’s finely ground to avoid scratching delicate surfaces.
* **Dish Soap or Laundry Detergent:** I’ve found that both dish soap and laundry detergent work well, depending on the type of cleaning you’re doing. For greasy surfaces like stovetops, dish soap is my go-to. For general cleaning and stain removal, laundry detergent is a great option. Choose a detergent that’s gentle and doesn’t contain bleach, especially if you’re cleaning colored surfaces.
* **Spray Bottle (Optional):** A spray bottle is handy for applying the cleaner to larger surfaces like shower walls or countertops.
* **Cleaning Cloths or Sponges:** You’ll need a few clean cloths or sponges to apply the cleaner and wipe away the grime. Microfiber cloths are my favorite because they’re super absorbent and gentle on surfaces.
* **Scrub Brush (Optional):** For really stubborn grime, a scrub brush can come in handy. Just be sure to use a soft-bristled brush to avoid scratching.
* **Gloves (Optional):** If you have sensitive skin, you might want to wear gloves to protect your hands from the detergent.
* **Warm Water:** Warm water helps to dissolve the salt and activate the cleaning power of the detergent.
* **Mixing Bowl (Optional):** If you’re making a larger batch of cleaner, a mixing bowl will make things easier.
Making the Salt and Detergent Cleaning Paste
This is where the magic happens! We’re going to create a simple paste that’s perfect for tackling tough stains and grime.
1. **Combine the Ingredients:** In a small bowl (or directly on the surface you’re cleaning), mix together equal parts salt and detergent. I usually start with about 1-2 tablespoons of each. You can adjust the amount depending on the size of the area you’re cleaning.
2. **Add a Little Water:** Add a few drops of warm water to the mixture and stir until you form a thick paste. The consistency should be similar to toothpaste. If the paste is too thick, add a little more water. If it’s too thin, add a little more salt.
3. **Mix Well:** Make sure the salt and detergent are thoroughly combined. You don’t want any clumps of salt left in the paste.
Cleaning with the Salt and Detergent Paste
Now that we have our cleaning paste, let’s put it to work!
1. **Apply the Paste:** Using a clean cloth or sponge, apply the paste to the surface you want to clean. Be generous with the application, especially on areas with stubborn grime.
2. **Let it Sit:** Allow the paste to sit on the surface for a few minutes. This will give the salt and detergent time to work their magic and loosen the dirt and grime. For heavily soiled areas, you can let it sit for up to 10-15 minutes.
3. **Scrub Gently:** Using a clean cloth, sponge, or scrub brush, gently scrub the surface in a circular motion. Apply a little pressure, but be careful not to scratch the surface. The salt will act as a gentle abrasive, helping to lift away the dirt and grime.
4. **Rinse Thoroughly:** Once you’ve scrubbed the surface, rinse it thoroughly with warm water. Make sure to remove all traces of the salt and detergent paste.
5. **Dry the Surface:** Use a clean, dry cloth to dry the surface. This will prevent water spots and leave your surface sparkling clean.
Cleaning with the Salt and Detergent Spray
For larger surfaces or for general cleaning, a salt and detergent spray is a great option.
1. **Combine the Ingredients:** In a spray bottle, combine 1 tablespoon of salt, 1 tablespoon of detergent, and 1 cup of warm water.
2. **Shake Well:** Shake the bottle vigorously to ensure that the salt and detergent are completely dissolved.
3. **Spray the Surface:** Spray the cleaner onto the surface you want to clean.
4. **Let it Sit:** Allow the cleaner to sit on the surface for a few minutes.
5. **Wipe Clean:** Wipe the surface clean with a damp cloth or sponge.
6. **Dry the Surface:** Use a clean, dry cloth to dry the surface.
Specific Cleaning Applications
Here are a few specific ways I’ve used this DIY cleaner around my house:
Cleaning the Stovetop
My stovetop is constantly covered in grease and splatters, and this cleaner works wonders!
1. **Apply the Paste:** Apply the salt and dish soap paste to the cooled stovetop, focusing on the greasy areas.
2. **Let it Sit:** Let the paste sit for about 10 minutes to loosen the grease.
3. **Scrub Gently:** Scrub the stovetop with a non-abrasive sponge or cloth.
4. **Rinse Thoroughly:** Rinse the stovetop with warm water.
5. **Dry the Surface:** Dry the stovetop with a clean cloth.
Cleaning Bathroom Tiles
Soap scum and mildew can be a real pain to remove from bathroom tiles, but this cleaner makes it easy!
1. **Apply the Spray:** Spray the salt and detergent spray onto the tiles, focusing on areas with soap scum or mildew.
2. **Let it Sit:** Let the spray sit for about 5 minutes.
3. **Scrub Gently:** Scrub the tiles with a sponge or scrub brush.
4. **Rinse Thoroughly:** Rinse the tiles with warm water.
5. **Dry the Surface:** Dry the tiles with a clean cloth.
Removing Stains from Clothes
This cleaner can also be used to remove stains from clothes, but it’s important to test it on an inconspicuous area first to make sure it doesn’t damage the fabric.
1. **Apply the Paste:** Apply the salt and laundry detergent paste to the stain.
2. **Let it Sit:** Let the paste sit for about 30 minutes.
3. **Rub Gently:** Gently rub the paste into the stain.
4. **Rinse Thoroughly:** Rinse the garment with cold water.
5. **Launder as Usual:** Launder the garment as usual.
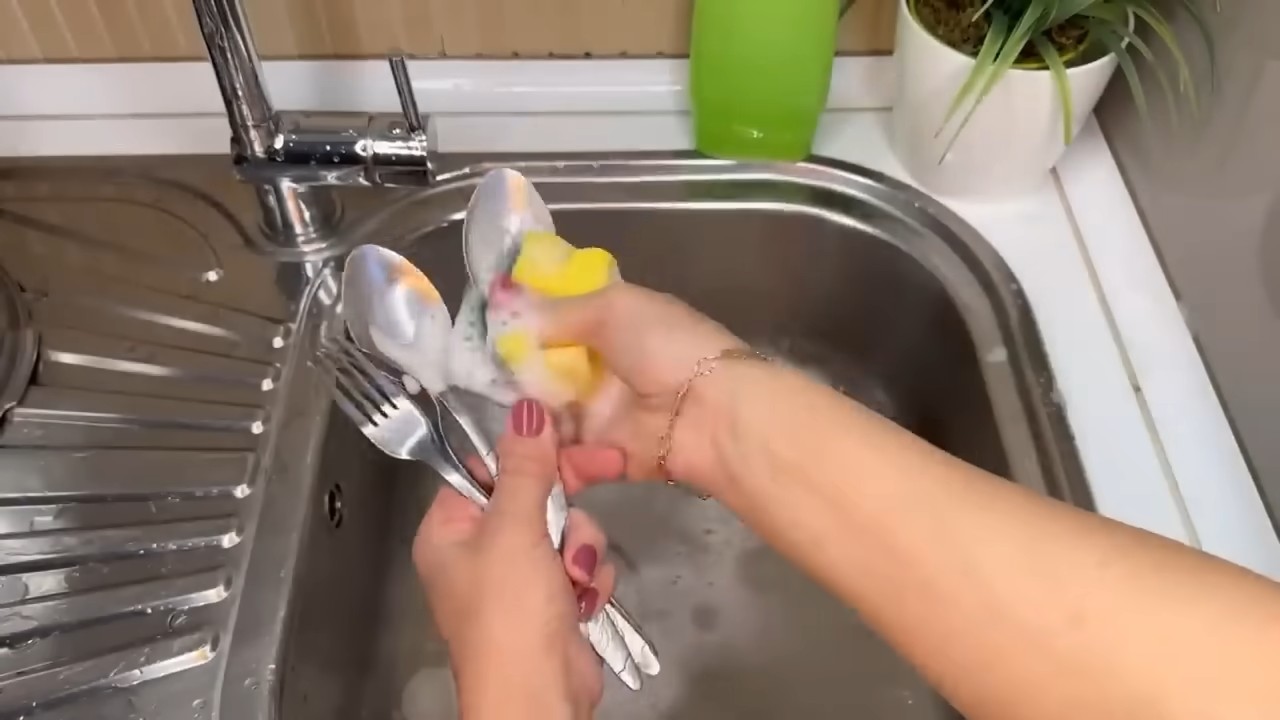
Cleaning Sinks and Faucets
This cleaner is great for removing water spots and grime from sinks and faucets.
1. **Apply the Paste:** Apply the salt and dish soap paste to the sink and faucet.
2. **Scrub Gently:** Scrub the sink and faucet with a sponge or cloth.
3. **Rinse Thoroughly:** Rinse the sink and faucet with warm water.
4. **Dry the Surface:** Dry the sink and faucet with a clean cloth.
Important Considerations
While this DIY cleaner is generally safe and effective, there are a few things to keep in mind:
* **Test on an Inconspicuous Area:** Before using this cleaner on any surface, test it on an inconspicuous area first to make sure it doesn’t damage the finish.
* **Avoid Abrasive Scrubbing:** While the salt acts as a gentle abrasive, avoid scrubbing too hard, especially on delicate surfaces.
* **Don’t Use on Certain Surfaces:** Avoid using this cleaner on surfaces that are easily scratched, such as polished wood or soft plastics.
* **Rinse Thoroughly:** Always rinse the surface thoroughly after cleaning to remove all traces of the salt and detergent.
* **Store Properly:** Store any leftover cleaner in a sealed container in a cool, dry place.
I hope you found this DIY cleaning hack helpful! I’ve been using it for a while now, and I’m amazed at how well it works. It’s a great way to save money and reduce your exposure to harsh chemicals. Give it a try and let me know what you think! Happy cleaning!
Conclusion
So, there you have it! This simple yet incredibly effective DIY cleaning trick using salt and detergent is a game-changer for anyone looking to tackle stubborn stains and grime without resorting to harsh chemicals or expensive cleaning products. We’ve shown you how easily accessible and affordable these ingredients are, making this a truly budget-friendly solution for a sparkling clean home.
But why is this DIY trick a must-try? Firstly, the abrasive nature of salt, combined with the degreasing power of detergent, creates a synergistic effect that lifts dirt and grime with minimal effort. Think of it as a gentle exfoliant for your surfaces! Secondly, it’s incredibly versatile. From scrubbing burnt food off pots and pans to revitalizing dingy grout, this mixture can handle a wide range of cleaning tasks. And thirdly, it’s a more eco-conscious choice compared to many commercially available cleaners, reducing your environmental impact.
Looking for variations? Absolutely! For extra stubborn stains, consider adding a squeeze of lemon juice to the mixture. The citric acid will help break down grease and add a fresh, clean scent. For delicate surfaces, use a finer grain of salt, like table salt, and test the mixture on an inconspicuous area first. You can also adjust the ratio of salt to detergent to suit the specific cleaning task. For example, a higher concentration of salt might be beneficial for scrubbing tough stains, while a higher concentration of detergent might be better for general cleaning. You can even add a few drops of your favorite essential oil, like lavender or tea tree, for an added boost of fragrance and antibacterial properties.
We are confident that this salt and detergent cleaning method will become a staple in your cleaning routine. It’s simple, effective, and economical – what’s not to love?
Now, it’s your turn! We encourage you to give this DIY cleaning trick a try and see the amazing results for yourself. Don’t be afraid to experiment with the variations and find what works best for your needs. And most importantly, we want to hear about your experience! Share your before-and-after photos, tips, and tricks in the comments section below. Let’s build a community of clean-living enthusiasts who are passionate about finding simple, sustainable solutions for a sparkling home. We can’t wait to see what you create!
Frequently Asked Questions (FAQs)
1. What types of detergent can I use for this cleaning trick?
You can use a variety of detergents, but dish soap is generally the most effective due to its grease-cutting properties. However, laundry detergent can also work well, especially for cleaning fabrics or upholstery. Just be sure to use a small amount and dilute it properly to avoid any residue. Avoid using detergents with bleach, especially when mixing with other cleaning agents like lemon juice, as this can create harmful fumes. Always read the label of your detergent to ensure it’s suitable for the surface you’re cleaning.
2. What kind of salt is best for cleaning?
The best type of salt depends on the surface you’re cleaning. Coarse salt, like kosher salt or sea salt, is ideal for scrubbing tough stains on durable surfaces like pots, pans, and grout. However, for more delicate surfaces like stainless steel or porcelain, it’s best to use a finer grain of salt, such as table salt, to avoid scratching. You can even use Epsom salt for its added cleaning and deodorizing properties, especially in bathrooms. Always test the salt on an inconspicuous area first to ensure it doesn’t damage the surface.
3. Can I use this salt and detergent mixture on all surfaces?
No, this mixture is not suitable for all surfaces. Avoid using it on delicate or easily scratched surfaces like polished wood, painted surfaces, or certain types of plastic. Always test the mixture on an inconspicuous area first to ensure it doesn’t cause any damage or discoloration. For surfaces that are sensitive to abrasives, consider using a gentler cleaning solution or diluting the salt and detergent mixture with more water.
4. How do I make the salt and detergent mixture?
The basic recipe is simple: Mix equal parts salt and detergent in a small bowl. For example, you can start with 1 tablespoon of salt and 1 tablespoon of detergent. Add a small amount of water to create a paste-like consistency. Adjust the ratio of salt to detergent depending on the cleaning task. For tougher stains, use more salt; for general cleaning, use more detergent. Remember to mix thoroughly to ensure the salt is evenly distributed throughout the detergent.
5. How do I use the salt and detergent mixture to clean?
Apply the mixture to the surface you want to clean and gently scrub with a sponge, cloth, or brush. For stubborn stains, let the mixture sit for a few minutes before scrubbing. Rinse the surface thoroughly with water to remove any residue. If necessary, repeat the process until the stain is completely gone. Always wear gloves to protect your hands from irritation.
6. Is this cleaning mixture safe for the environment?
While this mixture is generally considered more eco-friendly than many commercially available cleaners, it’s still important to use it responsibly. Avoid using excessive amounts of detergent, as this can contribute to water pollution. Consider using biodegradable or plant-based detergents to further reduce your environmental impact. Dispose of the cleaning water properly, avoiding pouring it down storm drains.
7. Can I store the leftover salt and detergent mixture?
It’s best to make a fresh batch of the mixture each time you clean, as the salt can settle and the detergent can dry out over time. However, if you have leftover mixture, you can store it in an airtight container in a cool, dry place for a few days. Be sure to label the container clearly to avoid any confusion. Before using the stored mixture, check its consistency and add a little water if necessary to restore its paste-like texture.
8. What are some specific cleaning tasks that this mixture is good for?
This mixture is incredibly versatile and can be used for a variety of cleaning tasks, including:
* Scrubbing burnt food off pots and pans
* Cleaning grout in bathrooms and kitchens
* Removing soap scum from shower doors and tiles
* Revitalizing dingy sinks and countertops
* Cleaning oven interiors
* Removing stains from clothing and upholstery (test on an inconspicuous area first)
* Cleaning outdoor furniture
9. Can I add other ingredients to the salt and detergent mixture?
Yes, you can add other ingredients to enhance the cleaning power of the mixture. Some popular additions include:
* Lemon juice: For extra grease-cutting and a fresh scent
* Vinegar: For removing hard water stains and mildew
* Baking soda: For added scrubbing power and deodorizing
* Essential oils: For fragrance and antibacterial properties (e.g., lavender, tea tree)
Always use caution when mixing cleaning agents, and avoid combining bleach with other ingredients, as this can create harmful fumes.
10. What safety precautions should I take when using this cleaning mixture?
Always wear gloves to protect your hands from irritation. Avoid getting the mixture in your eyes or mouth. If contact occurs, rinse thoroughly with water. Keep the mixture out of reach of children and pets. When cleaning in enclosed spaces, ensure proper ventilation. Always test the mixture on an inconspicuous area first to ensure it doesn’t damage the surface.

Leave a Comment