
Spinach garden DIY projects are a fantastic way to bring fresh, nutritious greens right to your doorstep! Have you ever dreamed of snipping vibrant, leafy spinach for your salad just moments before you eat it? Or perhaps you’re tired of the wilted, pre-packaged spinach at the grocery store? Well, you’re in the right place!
For centuries, spinach has been a staple in diets around the world, celebrated not only for its versatility in cooking but also for its incredible health benefits. From ancient Persia, where it originated, to its adoption by Catherine de Medici in 16th-century France (leading to dishes “à la Florentine”), spinach boasts a rich history. But you don’t need royal connections to enjoy this leafy green!
In today’s busy world, knowing exactly where your food comes from is more important than ever. That’s why I’m so excited to share these simple and effective spinach garden DIY tricks with you. Whether you have a sprawling backyard or just a sunny windowsill, I’ll show you how to cultivate your own thriving spinach patch. Imagine the satisfaction of harvesting your own organic spinach, knowing you’ve nurtured it from seed to table. Plus, growing your own spinach is a budget-friendly way to enjoy fresh, healthy produce all season long. Let’s get started and unlock the secrets to a bountiful spinach harvest!
Creating Your Own Thriving Spinach Garden: A DIY Guide
Hey there, fellow garden enthusiasts! I’m so excited to share my tried-and-true method for growing a bountiful spinach garden right in your own backyard (or even on your balcony!). Spinach is a nutritional powerhouse, packed with vitamins and minerals, and nothing beats the taste of freshly harvested, homegrown greens. Plus, it’s surprisingly easy to grow, even for beginners. Let’s dive in!
What You’ll Need: The Essentials for Spinach Success
Before we get our hands dirty, let’s gather all the necessary supplies. Having everything ready beforehand will make the whole process smoother and more enjoyable.
* Spinach Seeds: Choose a variety that suits your climate and growing conditions. Some popular choices include ‘Bloomsdale Long Standing’ (heat tolerant), ‘Winter Bloomsdale’ (cold hardy), and ‘Baby’s Leaf Hybrid’ (fast growing).
* Potting Mix (for containers) or Garden Soil (for in-ground planting): Spinach needs well-draining soil rich in organic matter. For containers, a high-quality potting mix is essential. For in-ground planting, amend your existing soil with compost or well-rotted manure.
* Compost or Well-Rotted Manure: This will enrich the soil and provide essential nutrients for healthy spinach growth.
* Gardening Gloves: Protect your hands from dirt and potential irritants.
* Hand Trowel or Garden Fork: For digging and preparing the soil.
* Watering Can or Hose with a Gentle Spray Nozzle: Spinach needs consistent moisture, but avoid overwatering.
* Optional: Row Covers or Shade Cloth: These can protect your spinach from pests, extreme temperatures, and intense sunlight.
* Optional: Fertilizer (Organic): A balanced organic fertilizer can give your spinach a boost, but it’s not always necessary if your soil is already rich in nutrients.
* Containers (if planting in containers): Choose containers that are at least 6 inches deep and have drainage holes.
Preparing Your Spinach Patch: Location, Location, Location!
Spinach thrives in cool weather, so timing is key. I usually plant my spinach in early spring or late summer for a fall harvest. Here’s what to consider when choosing a location:
* Sunlight: Spinach needs at least 3-6 hours of sunlight per day. In hotter climates, partial shade is preferable to prevent bolting (premature flowering).
* Soil: As mentioned earlier, well-draining soil is crucial. Spinach doesn’t like soggy roots. The ideal pH is between 6.0 and 7.0.
* Space: Spinach plants need about 2-3 inches of space between them.
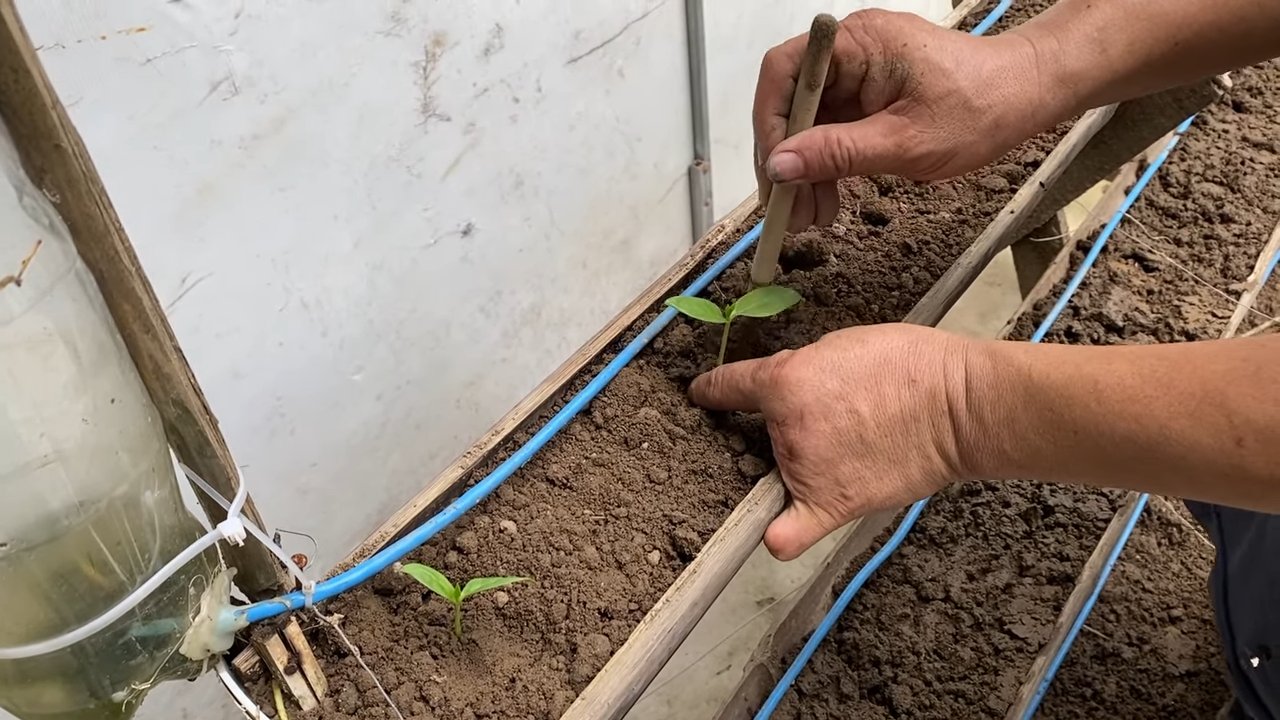
Planting Your Spinach Seeds: Getting Started
Now for the fun part! Let’s get those seeds in the ground (or container).
1. Prepare the Soil: Whether you’re planting in a container or in the ground, start by loosening the soil with a hand trowel or garden fork. Remove any rocks, weeds, or debris.
2. Amend the Soil: Mix in compost or well-rotted manure to enrich the soil and improve drainage. I usually add a generous amount – about 2-3 inches of compost per square foot.
3. Sow the Seeds: Sow the spinach seeds about ½ inch deep and 1-2 inches apart. If you’re planting in rows, space the rows about 6-8 inches apart.
4. Cover the Seeds: Gently cover the seeds with soil and lightly pat it down.
5. Water Thoroughly: Water the soil gently but thoroughly, making sure to moisten the entire area.
6. Label Your Planting: It’s always a good idea to label your planting area with the date and variety of spinach you planted. This will help you keep track of your progress.
Caring for Your Spinach: Keeping it Happy and Healthy
Once your spinach seeds are planted, it’s important to provide them with the care they need to thrive.
1. Watering: Spinach needs consistent moisture, especially during hot weather. Water deeply whenever the top inch of soil feels dry to the touch. Avoid overwatering, as this can lead to root rot.
2. Thinning: Once your spinach seedlings emerge, thin them out to about 2-3 inches apart. This will give them enough space to grow and prevent overcrowding. You can eat the thinned seedlings as baby spinach!
3. Weeding: Keep your spinach patch free of weeds, as they can compete with your spinach for nutrients and water. Gently pull weeds by hand, being careful not to disturb the spinach roots.
4. Fertilizing (Optional): If your spinach plants are looking pale or growing slowly, you can give them a boost with a balanced organic fertilizer. Follow the instructions on the fertilizer package.
5. Pest Control: Keep an eye out for pests such as aphids, slugs, and snails. You can control these pests with organic methods such as handpicking, insecticidal soap, or diatomaceous earth.
6. Bolting Prevention: Spinach is prone to bolting (premature flowering) in hot weather. To prevent bolting, provide shade during the hottest part of the day, water regularly, and harvest your spinach frequently.
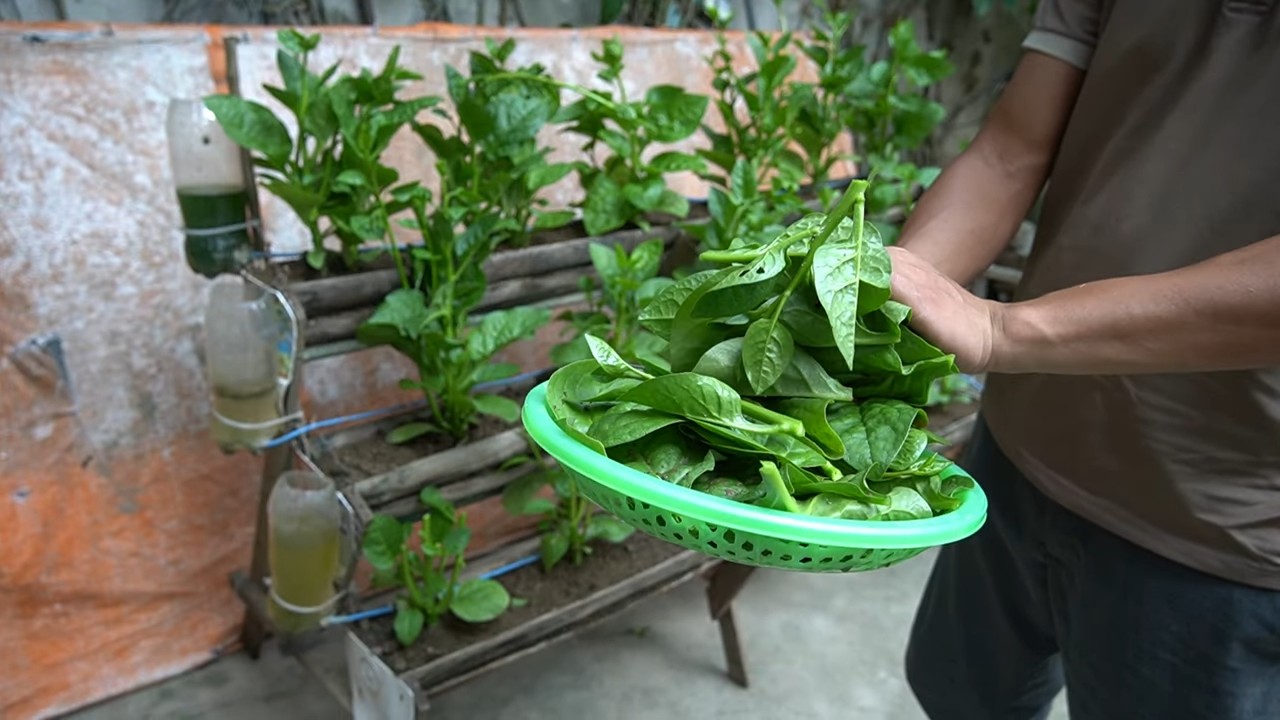
Harvesting Your Spinach: The Fruits (or Leaves!) of Your Labor
Harvesting your spinach is the most rewarding part of the process! You can start harvesting your spinach when the leaves are about 4-6 inches long.
1. Harvesting Method: You can harvest individual leaves or cut the entire plant at the base. If you harvest individual leaves, the plant will continue to produce more leaves.
2. Harvesting Time: Harvest your spinach in the morning, when the leaves are crisp and cool.
3. Washing and Storing: Wash your harvested spinach thoroughly and store it in the refrigerator in a plastic bag or container. Spinach is best used within a few days of harvesting.
Troubleshooting: Common Spinach Problems and Solutions
Even with the best care, you might encounter some problems while growing spinach. Here are some common issues and how to address them:
* Yellowing Leaves: This could be a sign of nutrient deficiency, overwatering, or underwatering. Check the soil moisture and consider adding fertilizer.
* Slow Growth: This could be due to lack of sunlight, poor soil, or cool temperatures. Make sure your spinach is getting enough sunlight and amend the soil with compost.
* Bolting: As mentioned earlier, bolting is caused by hot weather. Provide shade and water regularly to prevent bolting.
* Pest Infestations: Keep an eye out for pests and take action promptly to prevent them from damaging your spinach plants.
Extending Your Spinach Season: Tips and Tricks
Want to enjoy fresh spinach for as long as possible? Here are some tips for extending your spinach season:
* Succession Planting: Plant new spinach seeds every few weeks to ensure a continuous harvest.
* Cold Frames or Row Covers: Use cold frames or row covers to protect your spinach from frost and extend the growing season into the fall and winter.
* Heat-Tolerant Varieties: Choose heat-tolerant spinach varieties for summer planting.
* Shade Cloth: Use shade cloth to protect your spinach from intense sunlight during hot weather.
Container Gardening: Growing Spinach in Pots
Don’t have a garden? No problem! You can easily grow spinach in containers. Here’s what you need to know:
* Choose the Right Container: Select a container that is at least 6 inches deep and has drainage holes.
* Use High-Quality Potting Mix: Avoid using garden soil in containers, as it can become compacted and poorly drained.
* Water Regularly: Containers tend to dry out more quickly than in-ground gardens, so water your spinach regularly.
* Fertilize as Needed: Container-grown spinach may need to be fertilized more frequently than in-ground spinach.
Spinach Varieties: Choosing the Right One for You
There are many different varieties of spinach to choose from, each with its own unique characteristics. Here are a few popular options:
* Bloomsdale Long Standing: A classic variety known for its heat tolerance and resistance to bolting.
* Winter Bloomsdale: A cold-hardy variety that is ideal for fall and winter planting.
* Baby’s Leaf Hybrid: A fast-growing variety that produces tender, baby spinach leaves.
* Savoy: A variety with crinkled leaves and a slightly stronger flavor.
* Smooth Leaf: A variety with smooth leaves and a milder flavor.
Enjoying Your Harvest: Delicious Spinach Recipes
Now that you’ve harvested your spinach, it’s time to enjoy it! Here are a few delicious recipes to get you started:
* Spinach Salad: A classic salad with fresh spinach, berries, nuts,
Conclusion
So, there you have it! Creating your own spinach garden DIY project is not just a fun weekend activity; it’s a gateway to fresher, healthier meals and a deeper connection with the food you eat. We’ve walked you through the simple steps, highlighted the benefits, and addressed potential challenges. Now, it’s time to get your hands dirty and experience the joy of harvesting your own vibrant, leafy greens.
Why is this a must-try? Because store-bought spinach, while convenient, often lacks the robust flavor and nutritional punch of freshly picked, homegrown varieties. Plus, you have complete control over the growing process, ensuring your spinach is free from harmful pesticides and herbicides. Imagine the satisfaction of adding a handful of your own spinach to your morning smoothie, knowing exactly where it came from and how it was grown.
But the beauty of a spinach garden DIY lies in its adaptability. Feel free to experiment with different spinach varieties. Try ‘Bloomsdale Long Standing’ for its heat tolerance, or ‘Winter Bloomsdale’ for its resilience in colder climates. You can also explore companion planting. Marigolds, for instance, can help deter pests, while radishes can loosen the soil and improve drainage. Consider interplanting your spinach with other cool-season crops like lettuce or kale for a continuous harvest.
Don’t have a large garden space? No problem! Spinach thrives in containers, making it perfect for balconies, patios, or even sunny windowsills. Just be sure to choose a pot that’s at least 6 inches deep and provides adequate drainage. You can even create a vertical spinach garden using repurposed pallets or hanging planters, maximizing your space and adding a touch of green to your surroundings.
Beyond the practical benefits, creating a spinach garden DIY is a rewarding experience in itself. It’s a chance to connect with nature, learn about the growing process, and appreciate the simple pleasures of life. It’s also a fantastic way to teach children about healthy eating habits and the importance of sustainable living.
We are confident that with a little effort and patience, you’ll be enjoying a bountiful harvest of delicious, homegrown spinach in no time. So, grab your gardening gloves, gather your supplies, and embark on this exciting adventure.
We’re eager to hear about your experiences! Share your photos, tips, and challenges in the comments below. Let’s create a community of spinach-loving gardeners and inspire others to embrace the joy of growing their own food. What variety did you choose? Did you encounter any unexpected challenges? What are your favorite ways to use your homegrown spinach? Your insights will be invaluable to other aspiring gardeners. Happy gardening!
Frequently Asked Questions (FAQ)
What is the best time of year to plant spinach?
Spinach is a cool-season crop, meaning it thrives in cooler temperatures. The best time to plant spinach is either in early spring or early fall. For a spring crop, sow seeds as soon as the ground can be worked, typically 4-6 weeks before the last expected frost. For a fall crop, plant seeds about 6-8 weeks before the first expected frost. This allows the spinach to mature before the onset of harsh winter conditions. In warmer climates, you can even grow spinach throughout the winter, provided you offer some protection from frost.
How much sunlight does spinach need?
Spinach needs at least 3-6 hours of direct sunlight per day to thrive. While it can tolerate some shade, especially during the hottest part of the day, insufficient sunlight can result in leggy growth and reduced yields. If you’re growing spinach indoors, place it near a sunny window or use grow lights to supplement natural light. Rotate the plants regularly to ensure even exposure to light.
What kind of soil is best for spinach?
Spinach prefers well-drained soil that is rich in organic matter. The ideal soil pH is between 6.5 and 7.0. Before planting, amend the soil with compost or well-rotted manure to improve its fertility and drainage. Avoid soils that are heavy clay or prone to waterlogging, as these can lead to root rot. If you’re growing spinach in containers, use a high-quality potting mix that is specifically formulated for vegetables.
How often should I water spinach?
Spinach needs consistent moisture to thrive. Water deeply and regularly, especially during dry periods. Aim to keep the soil consistently moist but not waterlogged. Check the soil moisture regularly by sticking your finger into the soil. If the top inch feels dry, it’s time to water. Avoid overhead watering, as this can increase the risk of fungal diseases. Instead, water at the base of the plants.
What are some common pests and diseases that affect spinach?
Spinach is susceptible to several pests and diseases, including aphids, leaf miners, flea beetles, and downy mildew. To prevent pest infestations, inspect your plants regularly and remove any pests by hand or with a strong spray of water. You can also use insecticidal soap or neem oil to control pests. To prevent diseases, ensure good air circulation around your plants and avoid overhead watering. If you notice signs of disease, remove the affected leaves immediately.
How do I harvest spinach?
You can harvest spinach leaves as soon as they are large enough to eat, typically when they are about 4-6 inches long. Harvest the outer leaves first, leaving the inner leaves to continue growing. This will allow you to enjoy a continuous harvest over several weeks. To harvest, simply snip the leaves off at the base of the plant with scissors or a knife. Avoid pulling the entire plant out of the ground, as this will prevent further growth.
Can I grow spinach indoors?
Yes, you can definitely grow spinach indoors! Choose a sunny location, such as a south-facing window, or use grow lights to provide adequate light. Use a well-draining potting mix and water regularly. Be sure to provide good air circulation to prevent fungal diseases. You can also use a small fan to improve air circulation.
How can I prevent my spinach from bolting (going to seed)?
Bolting is a common problem with spinach, especially during hot weather. To prevent bolting, choose heat-tolerant varieties, provide shade during the hottest part of the day, and water regularly. You can also mulch around the plants to help keep the soil cool. Harvest the leaves regularly to encourage continued growth and prevent the plant from focusing on seed production.
What are some creative ways to use homegrown spinach?
The possibilities are endless! You can add it to salads, smoothies, soups, stews, and omelets. You can also sauté it with garlic and olive oil, or use it as a filling for ravioli or lasagna. Spinach is also a great addition to dips and spreads. Get creative and experiment with different recipes to find your favorite ways to enjoy your homegrown spinach. Consider making a delicious spinach and artichoke dip, or adding it to your favorite pasta sauce for an extra boost of nutrients.
Is growing a spinach garden DIY really worth the effort?
Absolutely! While it requires some initial effort, the rewards of growing your own spinach far outweigh the challenges. You’ll enjoy fresher, more flavorful spinach, save money on groceries, and have the satisfaction of knowing exactly where your food comes from. Plus, gardening is a great way to relieve stress and connect with nature. So, give it a try and see for yourself!


Leave a Comment