
Sponge hacks for everyday use – who knew these humble kitchen staples could be so versatile? I’m always on the lookout for clever ways to simplify my life, and let me tell you, I’ve stumbled upon some absolute gems when it comes to using sponges beyond just washing dishes. For generations, sponges have been our go-to for cleaning, but their absorbent nature and pliable texture make them perfect for so much more!
Think about it: from ancient civilizations using natural sea sponges for hygiene to the modern synthetic sponges we know and love, these little helpers have been around for ages. But are you truly maximizing their potential? In this article, I’m going to share some of my favorite DIY sponge hacks that will save you time, money, and maybe even a little bit of sanity.
Let’s face it, life gets busy, and we’re all looking for shortcuts. Whether you’re trying to keep your plants watered while you’re on vacation, need a quick and easy way to clean those hard-to-reach spots, or want to create a fun and educational activity for your kids, these sponge hacks for everyday use are guaranteed to come in handy. Get ready to be amazed by the surprising power of the simple sponge!
Sponge Hacks to Simplify Your Life: A DIY Guide
Hey there, fellow DIY enthusiasts! I’m always on the lookout for clever ways to make life a little easier, and let me tell you, the humble sponge is a powerhouse of potential. Forget just washing dishes – these absorbent wonders can tackle all sorts of tasks around the house. I’m going to share some of my favorite sponge hacks that will save you time, money, and a whole lot of effort. Get ready to be amazed!
Hack 1: Seed Starting Sponges
Forget those bulky seed starting trays! Sponges are perfect for germinating seeds, especially if you’re short on space.
What you’ll need:
* New sponges (the kind without the abrasive side)
* Seeds of your choice
* A shallow container (like a plastic food container or a baking dish)
* Water
* A sunny windowsill or grow light
Step-by-step instructions:
1. Prepare the Sponges: Thoroughly wet your sponges and squeeze out the excess water. You want them damp, not dripping.
2. Create Seed Pockets: Using scissors or a knife, carefully cut small slits or pockets into the top of each sponge. Make sure the pockets are deep enough to hold the seeds comfortably.
3. Plant the Seeds: Place 2-3 seeds into each pocket. This increases your chances of germination.
4. Arrange in Container: Place the sponges in your shallow container. Make sure they’re not overcrowded.
5. Add Water: Pour a small amount of water into the container, just enough to keep the bottom of the sponges moist. Don’t submerge the sponges completely.
6. Provide Light: Place the container on a sunny windowsill or under a grow light. Seeds need light to germinate.
7. Maintain Moisture: Check the sponges daily and add water as needed to keep them consistently damp.
8. Transplant Seedlings: Once the seedlings have developed a few true leaves, carefully transplant them into larger pots or directly into your garden.
Hack 2: DIY Soap Dispensing Dish Wand
Say goodbye to messy dish soap bottles! This hack creates a convenient and refillable dish wand.
What you’ll need:
* A new sponge (again, without the abrasive side)
* A wooden dowel or chopstick
* Dish soap
* A drill (or a skewer if you’re feeling patient)
* Hot glue gun (optional, but recommended)
Step-by-step instructions:
1. Prepare the Sponge: Cut a small hole in the center of the sponge, just large enough to accommodate the dowel or chopstick.
2. Create the Soap Reservoir: Using the drill (or skewer), carefully create a channel through the sponge, connecting the center hole to the top of the sponge. This will allow the soap to flow through.
3. Insert the Handle: Insert the dowel or chopstick into the center hole of the sponge.
4. Secure the Handle (Optional): For extra stability, use a hot glue gun to secure the dowel to the sponge.
5. Fill with Soap: Pour dish soap into the channel you created. You may need to gently squeeze the sponge to help the soap flow through.
6. Start Washing: Wet the sponge and start washing dishes! Squeeze the sponge gently to release more soap as needed.
7. Refill as Needed: When the soap runs out, simply refill the channel.
Hack 3: Fridge Odor Absorber
Sponges are surprisingly effective at absorbing odors. This hack will keep your fridge smelling fresh.
What you’ll need:
* A new sponge
* Baking soda
* A small container or dish
Step-by-step instructions:
1. Wet and Squeeze: Wet the sponge thoroughly and squeeze out the excess water.
2. Coat with Baking Soda: Generously sprinkle baking soda onto the damp sponge, ensuring it’s well coated.
3. Place in Container: Place the sponge in a small container or dish to prevent any drips.
4. Place in Fridge: Place the container in your refrigerator, preferably in the back where odors tend to accumulate.
5. Replace Regularly: Replace the sponge and baking soda every 1-2 weeks, or more frequently if you notice strong odors.
Hack 4: Plant Watering System for Vacation
Going on vacation? Don’t let your plants wither! This simple hack will keep them watered while you’re away.
What you’ll need:
* A new sponge
* A container of water (larger than the plant pot)
* Scissors or a knife
Step-by-step instructions:
1. Cut the Sponge: Cut the sponge into strips or cubes. The size will depend on the size of your plant pot.
2. Saturate the Sponge: Thoroughly wet the sponge pieces and squeeze out the excess water.
3. Place in Water Container: Place the container of water near your plant.
4. Position Sponge: Place one end of the sponge strip into the water container and the other end into the soil of your plant pot. Make sure the sponge is in direct contact with the soil. You can bury the end slightly.
5. Monitor Water Level: Before you leave, check the water level in the container and make sure it’s sufficient for the duration of your trip. You may need to experiment with the size of the sponge and the amount of water to find the right balance.
6. Enjoy Your Vacation: The sponge will act as a wick, slowly drawing water from the container and delivering it to the plant’s roots.
Hack 5: Cleaning Tight Spaces
Sponges can be cut and shaped to clean those hard-to-reach areas.
What you’ll need:
* Old sponges (clean, of course!)
* Scissors or a knife
* Cleaning solution of your choice
Step-by-step instructions:
1. Identify the Target Area: Determine the specific area you need to clean (e.g., window tracks, grout lines, corners).
2. Cut and Shape the Sponge: Cut the sponge into a shape that fits the target area. For example, you can cut a sponge into a thin strip to clean window tracks, or into a pointed shape to clean corners.
3. Apply Cleaning Solution: Apply your chosen cleaning solution to the sponge.
4. Clean the Area: Use the shaped sponge to scrub and clean the target area. The sponge’s shape will allow you to reach into tight spaces and remove dirt and grime.
5. Rinse and Repeat: Rinse the sponge and repeat the process as needed until the area is clean.
Hack 6: Ice Pack Alternative
Need a quick ice pack? A frozen sponge works wonders!
What you’ll need:
* A new sponge
* A resealable plastic bag
Step-by-step instructions:
1. Wet the Sponge: Thoroughly wet the sponge.
2. Place in Bag: Place the wet sponge in a resealable plastic bag.
3. Freeze: Place the bag in the freezer until the sponge is frozen solid.
4. Use as Ice Pack: When you need an ice pack, remove the frozen sponge from the freezer and apply it to the affected area. The plastic bag will prevent the sponge from directly contacting your skin and causing frostbite.
5. Reuse: After use, refreeze the sponge for future use.
Hack 7: Makeup Brush Cleaner
Keep your makeup brushes clean and hygienic with this simple sponge hack.
What you’ll need:
* A new sponge (a textured sponge works best)
* A small container
* Makeup brush cleaner or mild soap
Step-by-step instructions:
1. Place Sponge in Container: Place the sponge in the small container.
2. Apply Cleaner: Apply a small amount of makeup brush cleaner or mild soap to the sponge.
3. Swirl Brushes: Wet your makeup brush slightly. Gently swirl the brush bristles across the surface of the sponge. The texture of the sponge will help to dislodge makeup residue.
4. Rinse Brushes: Rinse the brushes thoroughly under running water until the water runs clear.
5. Dry Brushes: Lay the brushes flat to dry completely.
Hack 8: Dusting Plants
Dusty plant leaves can hinder photosynthesis. Use a damp sponge to gently clean them.
What you’ll need:
* A new sponge
* Water
Step-by-step instructions:
1. Wet and Wring: Wet the sponge and wring out almost all
Conclusion
So, there you have it – a collection of incredible sponge hacks that will revolutionize your cleaning routine and beyond! We’ve explored how these humble kitchen staples can be transformed into powerful tools for everything from tackling stubborn grime to creating innovative solutions for everyday problems. But why should you bother with these DIY tricks? Because they are efficient, cost-effective, and surprisingly satisfying.
These sponge hacks aren’t just about saving money; they’re about unlocking the hidden potential of an item you likely already have in your home. Think about it: instead of reaching for a specialized (and often expensive) cleaning product, you can create a targeted solution with a simple sponge and a few common household ingredients. This is especially true when it comes to deep cleaning tasks.
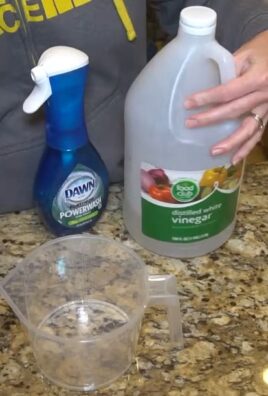
One of the most compelling reasons to embrace these sponge hacks is their versatility. Need to scrub a delicate surface without scratching? A gentle sponge, properly prepared, is your answer. Struggling to reach those awkward corners in your bathroom? A strategically cut sponge can get the job done. Want to create a long-lasting cleaning solution for your shower? A sponge infused with vinegar is your new best friend.
But the real magic of these sponge hacks lies in their adaptability. Feel free to experiment with different ingredients and techniques to find what works best for you. For instance, if you’re not a fan of vinegar, try using lemon juice as a natural cleaning agent. If you find that a particular sponge hack isn’t quite meeting your needs, don’t be afraid to tweak it until it does.
Here are a few suggestions and variations to get you started:
* Scented Sponges: Add a few drops of your favorite essential oil to your cleaning solution for a refreshing and aromatic cleaning experience. Lavender, lemon, and eucalyptus are all great choices.
* Multi-Purpose Sponges: Create a set of sponges dedicated to specific tasks, such as cleaning the bathroom, kitchen, or car. This will help prevent cross-contamination and keep your sponges fresh.
* Textured Sponges: Experiment with different types of sponges, such as those with abrasive pads or textured surfaces, to tackle tougher cleaning jobs. Just be sure to test them on a small, inconspicuous area first to avoid damaging delicate surfaces.
* DIY Sponge Mops: Attach a sponge to a mop handle for an easy and effective way to clean floors. This is a great alternative to traditional mops, which can be bulky and difficult to maneuver.
Ultimately, the best way to discover the full potential of these sponge hacks is to try them for yourself. So, grab a sponge, gather your supplies, and get ready to transform your cleaning routine. We’re confident that you’ll be amazed by the results.
We encourage you to try these sponge hacks and share your experiences with us! Let us know which ones worked best for you, what variations you tried, and any other tips or tricks you discovered along the way. Your feedback will help us continue to improve and refine these techniques, making them even more effective and accessible for everyone. Share your stories in the comments below!
Frequently Asked Questions (FAQ)
What type of sponge is best for these hacks?
The type of sponge you use will depend on the specific hack and the surface you’re cleaning. For general cleaning, a standard cellulose sponge is a good all-around choice. For more abrasive cleaning, consider a sponge with a scrubbing pad. For delicate surfaces, opt for a soft, non-abrasive sponge. Microfiber sponges are also excellent for polishing and removing streaks. Avoid using sponges that are heavily soiled or have a strong odor, as these can spread bacteria and leave behind unpleasant smells. Always rinse your sponges thoroughly after each use and allow them to air dry completely to prevent the growth of mold and mildew.
How often should I replace my sponges?
Sponges are breeding grounds for bacteria, so it’s important to replace them regularly. As a general rule, you should replace your sponges every one to two weeks, or more frequently if they are heavily soiled or have a strong odor. You can also sanitize your sponges in the microwave or dishwasher to extend their lifespan, but eventually, they will need to be replaced. Look for signs of wear and tear, such as crumbling or discoloration, as indicators that it’s time for a new sponge.
Can I use these sponge hacks on all surfaces?
No, not all sponge hacks are suitable for all surfaces. It’s important to consider the material you’re cleaning and the potential for damage. For example, abrasive sponges should not be used on delicate surfaces like polished wood or stainless steel, as they can cause scratches. Always test a small, inconspicuous area first to ensure that the sponge hack won’t damage the surface. When in doubt, err on the side of caution and use a softer sponge or a gentler cleaning solution.
Are these sponge hacks safe for the environment?
Many of these sponge hacks utilize natural cleaning agents like vinegar, baking soda, and lemon juice, which are generally considered to be safe for the environment. However, it’s important to be mindful of the products you’re using and to avoid harsh chemicals that can pollute waterways. Consider using biodegradable sponges and disposing of them properly. You can also reduce your environmental impact by making your own cleaning solutions and reusing containers whenever possible.
How can I prevent my sponges from smelling bad?
Sponges can develop unpleasant odors due to the buildup of bacteria and food particles. To prevent this, rinse your sponges thoroughly after each use and squeeze out any excess water. Allow them to air dry completely in a well-ventilated area. You can also sanitize your sponges in the microwave or dishwasher to kill bacteria. Another tip is to soak your sponges in a solution of vinegar and water for a few minutes each week. This will help to neutralize odors and prevent the growth of mold and mildew.
What are some other uses for sponges besides cleaning?
Sponges are incredibly versatile and can be used for a variety of purposes beyond cleaning. They can be used for arts and crafts projects, such as painting and stamping. They can also be used for gardening, such as starting seeds or retaining moisture in potted plants. Sponges can even be used for personal care, such as exfoliating skin or applying makeup. Get creative and explore the many possibilities!
Can I use these sponge hacks to clean my car?
Yes, many of these sponge hacks can be used to clean your car. Sponges are great for washing the exterior of your car, cleaning the interior surfaces, and even detailing the tires. Just be sure to use a soft, non-abrasive sponge to avoid scratching the paint. You can also use a sponge to apply wax or polish to your car. For the interior, use a damp sponge to wipe down the dashboard, seats, and other surfaces.
Are these sponge hacks effective for removing stubborn stains?
Yes, many of these sponge hacks are effective for removing stubborn stains. The key is to use the right cleaning solution and to apply it properly. For example, a sponge soaked in vinegar can be used to remove hard water stains from shower doors. A sponge sprinkled with baking soda can be used to scrub away grease and grime from kitchen surfaces. For tougher stains, you may need to let the cleaning solution sit for a few minutes before scrubbing.
How do I store my sponges properly?
Proper storage is essential for keeping your sponges clean and hygienic. After each use, rinse your sponges thoroughly and squeeze out any excess water. Store them in a well-ventilated area where they can air dry completely. Avoid storing sponges in a damp or enclosed space, as this can promote the growth of mold and mildew. You can also use a sponge holder to keep your sponges organized and off the countertop.
Leave a Comment