
Water Only Lettuce Indoors: Sounds too good to be true, right? I get it! You’re probably picturing sad, wilted lettuce leaves and thinking, “There’s no way that’ll work.” But trust me, it can! We’re diving into a super simple, surprisingly effective DIY trick that will have you harvesting fresh lettuce from your windowsill, even if you’re short on space, time, or gardening experience.
Growing lettuce indoors isn’t a new concept. In fact, historically, people have cultivated leafy greens indoors for centuries, especially in regions with harsh winters. Think of it as a miniature, personal victory garden, bringing a touch of spring to your kitchen year-round. But the beauty of this particular method – using just water – lies in its sheer simplicity. No soil, no complicated nutrient solutions, just water and a little bit of know-how.
Why is this DIY trick so valuable? Well, for starters, it’s incredibly convenient. Imagine having fresh lettuce readily available for salads, sandwiches, or garnishes without ever having to run to the grocery store. Plus, it’s a fantastic way to reduce food waste by regrowing lettuce from leftover stems. More importantly, it’s a sustainable and cost-effective way to enjoy fresh produce, especially if you’re trying to eat healthier on a budget. So, let’s unlock the secrets to successfully water only lettuce indoors and enjoy the delicious rewards!
Growing Lettuce Indoors with Just Water: A DIY Hydroponic Adventure!
Hey there, fellow plant enthusiasts! Ever dreamt of having fresh, crisp lettuce right at your fingertips, no matter the season? Well, you’re in the right place! I’m going to walk you through a super simple DIY hydroponic setup that lets you grow lettuce indoors using just water. Yes, you read that right – no soil needed! It’s a fun, rewarding project, and trust me, the taste of homegrown lettuce is unbeatable.
What You’ll Need: The Essentials
Before we dive in, let’s gather our supplies. Don’t worry, you probably have most of these lying around already!
* Lettuce Seeds: Choose your favorite variety! Romaine, butter lettuce, or even a mixed salad blend work great.
* A Container: This could be a plastic storage bin, a large bowl, or even a repurposed bucket. Just make sure it’s food-grade and opaque (to prevent algae growth). I’m using a 5-gallon bucket for this project.
* Net Cups or Small Plastic Cups: These will hold your lettuce seedlings. You’ll need enough for the number of lettuce plants you want to grow.
* Growing Medium: Rockwool cubes, coco coir plugs, or even just cotton balls will work. This is where your seeds will sprout.
* An Air Pump and Air Stone: This is crucial for oxygenating the water, which is essential for healthy root growth.
* Air Tubing: To connect the air pump to the air stone.
* Nutrient Solution: While we’re focusing on water-only for the initial sprouting, you’ll eventually need a hydroponic nutrient solution to feed your lettuce. I recommend a balanced formula specifically designed for leafy greens.
* pH Testing Kit: To monitor and adjust the pH of your nutrient solution. Lettuce prefers a pH between 6.0 and 7.0.
* Grow Lights (Optional but Recommended): If you don’t have a sunny windowsill, grow lights will provide the necessary light for your lettuce to thrive.
* Drill with Hole Saw Attachment (Optional): If your container doesn’t have pre-made holes for the net cups.
* Measuring Cups and Spoons: For mixing your nutrient solution.
* Water: Tap water is fine, but let it sit out for 24 hours to allow chlorine to dissipate.
Phase 1: Seed Starting – The Germination Game
This is where the magic begins! We’re going to get those tiny lettuce seeds to sprout into adorable little seedlings.
1. Prepare Your Growing Medium: If you’re using rockwool cubes or coco coir plugs, soak them in water for a few minutes until they’re fully saturated. Gently squeeze out any excess water. If you’re using cotton balls, moisten them thoroughly.
2. Sow the Seeds: Place 2-3 lettuce seeds into each rockwool cube, coco coir plug, or cotton ball. Don’t bury them too deep; just gently press them into the surface.
3. Create a Humid Environment: Place the seed-filled growing medium in a tray or container with a lid. This will help retain moisture and create a humid environment, which is ideal for germination. You can also use a plastic bag to cover the tray.
4. Provide Light and Warmth: Place the tray in a warm location (around 70-75°F) with indirect light. If you’re using grow lights, position them a few inches above the tray.
5. Keep it Moist: Check the growing medium daily and mist it with water as needed to keep it moist but not soggy.
6. Wait Patiently: Lettuce seeds typically germinate within 3-7 days. Once you see tiny sprouts emerging, remove the lid or plastic bag to allow for better air circulation.
Phase 2: Setting Up Your Hydroponic System – The Water Works
Now that we have seedlings, it’s time to build our hydroponic system!
1. Prepare Your Container: If your container doesn’t have pre-made holes for the net cups, use a drill with a hole saw attachment to create holes that are slightly smaller than the diameter of your net cups. The holes should be spaced evenly across the lid of the container.
2. Assemble the Air Pump System: Connect the air tubing to the air pump and the air stone. Place the air stone at the bottom of the container.
3. Fill the Container with Water: Fill the container with water, leaving a few inches of space at the top.
4. Test the pH: Use your pH testing kit to check the pH of the water. Adjust it to between 6.0 and 7.0 using pH up or pH down solutions if necessary.
5. Turn on the Air Pump: Plug in the air pump and make sure the air stone is producing bubbles. This will oxygenate the water and provide essential oxygen to the roots.
Phase 3: Transplanting and Growing – From Seedling to Salad
The moment we’ve been waiting for! Let’s get those seedlings into their new watery home.
1. Gently Remove Seedlings: Once your seedlings have developed a few true leaves (the leaves that look like miniature lettuce leaves), they’re ready to be transplanted. Carefully remove them from the tray, being careful not to damage the roots.
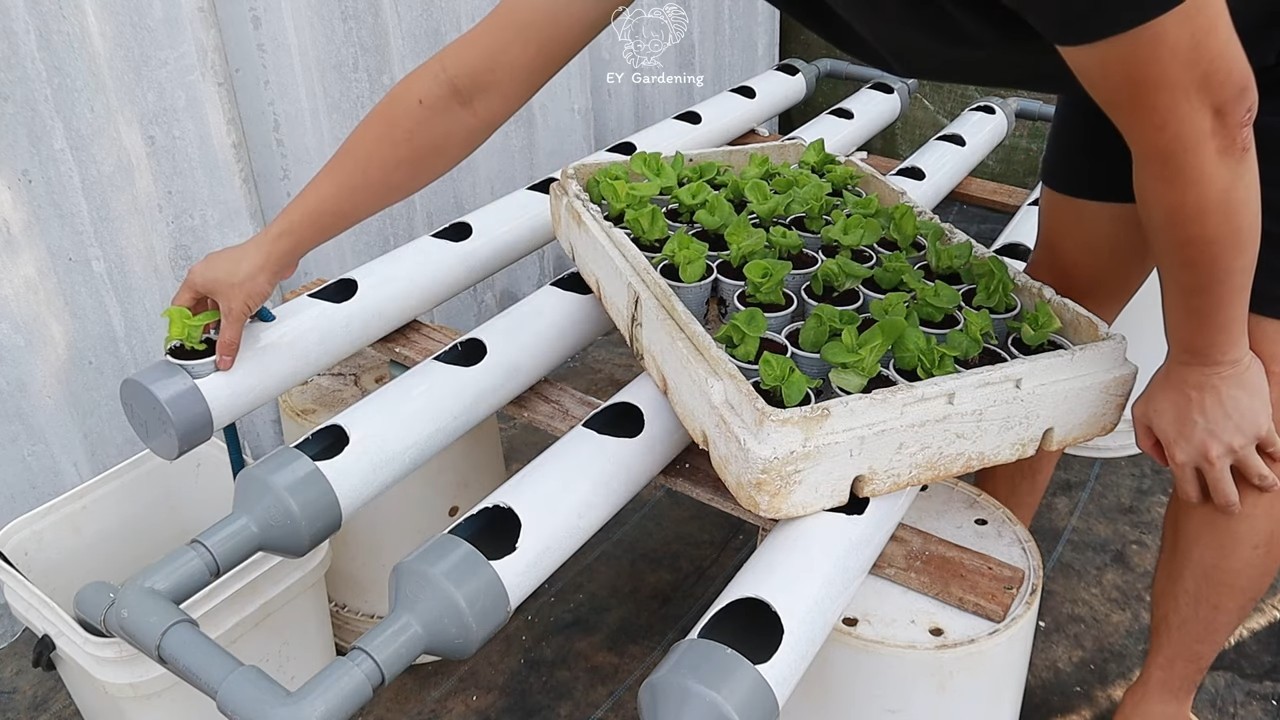
2. Place Seedlings in Net Cups: Place each seedling (still in its rockwool cube, coco coir plug, or cotton ball) into a net cup.
3. Position Net Cups in Container: Place the net cups into the holes in the lid of the container. The bottom of the rockwool cube, coco coir plug, or cotton ball should be submerged in the water.
4. Provide Light: If you’re using a sunny windowsill, place the container in a location that receives at least 6 hours of direct sunlight per day. If you’re using grow lights, position them a few inches above the lettuce plants and keep them on for 12-16 hours per day.
5. Monitor Water Level: Check the water level regularly and add more water as needed to keep the bottom of the growing medium submerged.
6. Introduce Nutrients (After a Week or Two): After a week or two, when the lettuce plants have established themselves, it’s time to start adding nutrients. Follow the instructions on your hydroponic nutrient solution to mix the correct concentration. Replace the water in the container with the nutrient solution.
7. Monitor pH and Nutrient Levels: Regularly test the pH and nutrient levels of the solution and adjust as needed.
8. Maintain Air Circulation: Ensure good air circulation around the lettuce plants to prevent diseases. You can use a small fan to circulate the air.
Phase 4: Harvesting and Enjoying – The Salad Celebration
The best part! After about 4-6 weeks, your lettuce should be ready to harvest.
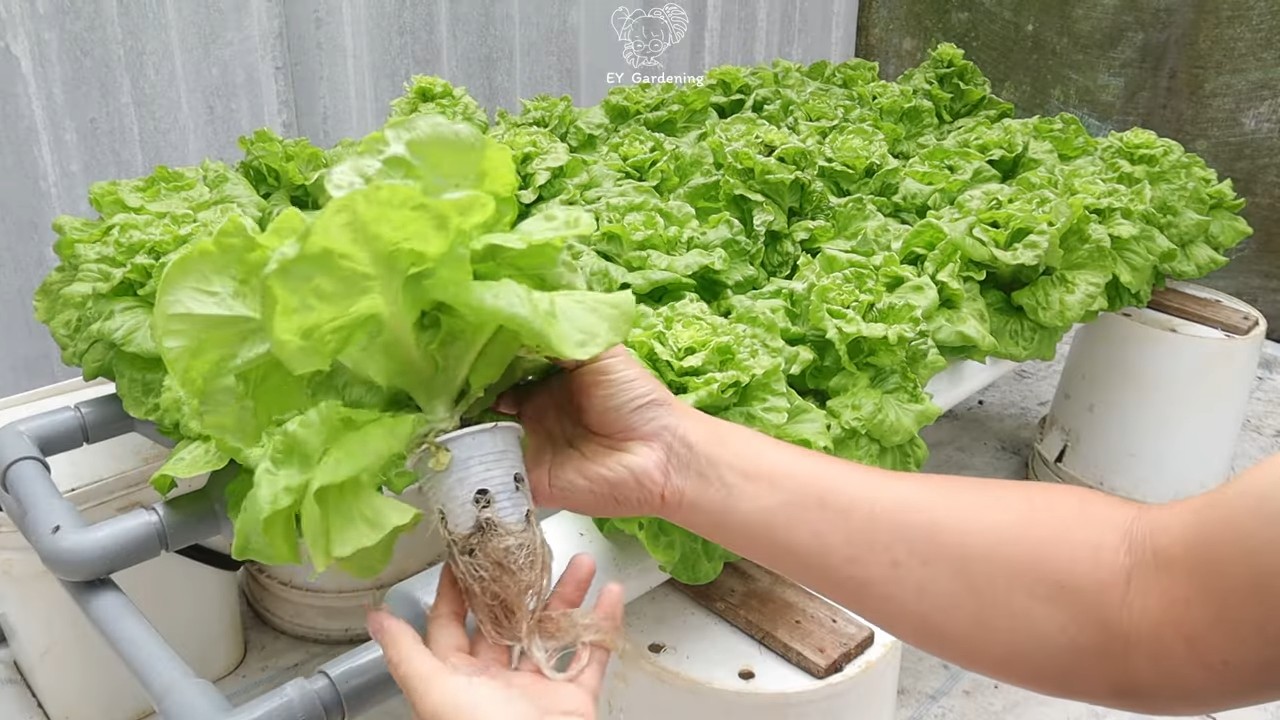
1. Harvesting: You can harvest the entire head of lettuce at once, or you can harvest individual leaves as needed. To harvest individual leaves, simply snip them off with scissors.
2. Enjoy Your Harvest: Rinse the lettuce leaves thoroughly and enjoy them in salads, sandwiches, or wraps.
Troubleshooting Tips: Keeping Your Lettuce Happy
Even with the best intentions, things can sometimes go awry. Here are a few common issues and how to fix them:
* Yellowing Leaves: This could be a sign of nutrient deficiency. Make sure you’re using a balanced hydroponic nutrient solution and that the pH is within the optimal range.
* Slow Growth: This could be due to insufficient light. Make sure your lettuce plants are receiving enough light, either from a sunny windowsill or grow lights.
* Algae Growth: Algae can grow in the water if it’s exposed to too much light. Make sure your container is opaque and that the water is not exposed to direct sunlight. You can also add a small amount of hydrogen peroxide to the water to kill algae.
* Root Rot: This is caused by a lack of oxygen in the water. Make sure your air pump and air stone are working properly and that the water is well-oxygenated.
Advanced Techniques: Taking Your Hydroponics to the Next Level
Once you’ve mastered the basics, you can experiment with some advanced techniques to improve your lettuce-growing game:
* Deep Water Culture (DWC): This is a more advanced hydroponic system where the roots of the lettuce plants are constantly submerged in nutrient-rich water.
* Nutrient Film Technique (NFT): This is another advanced system where a thin film of nutrient solution is constantly flowing over the roots of the lettuce plants.
* pH Controllers: These devices automatically monitor and adjust the pH of your nutrient solution, making it easier to maintain the optimal pH range.
* Timers: You can use timers to automate the lighting
Conclusion
So, there you have it! Growing lettuce indoors using only water might seem like a futuristic farming technique, but it’s surprisingly simple and incredibly rewarding. We’ve walked you through the process, highlighting the ease and accessibility of this method. Forget about messy soil, complicated nutrient solutions, and the constant battle against garden pests. This water-only approach offers a clean, efficient, and space-saving way to enjoy fresh, crisp lettuce right from your kitchen.
Why is this DIY trick a must-try? Because it empowers you to take control of your food source, even in the smallest of spaces. Imagine the satisfaction of harvesting your own salad greens, knowing exactly where they came from and what they’ve been exposed to. It’s a step towards a more sustainable lifestyle, reducing your reliance on store-bought produce and minimizing your environmental footprint. Plus, it’s a fantastic educational opportunity for kids (and adults!) to learn about plant growth and the wonders of hydroponics, even in its simplest form.
But don’t think you’re limited to just one type of lettuce! Experiment with different varieties like romaine, butterhead, or even loose-leaf mixes. Each will offer a unique flavor and texture to your salads. You can also play around with the lighting. While a sunny windowsill works wonders, you might find that supplementing with a grow light during the darker months can significantly boost your lettuce production. Consider adding a small air pump and air stone to your water reservoir to further oxygenate the water, potentially leading to even faster growth. Another variation is to try different containers. While a simple glass jar works perfectly, you could explore using repurposed plastic containers or even a dedicated hydroponic setup for a more streamlined approach.
This method of growing lettuce indoors with water is not just a trend; it’s a practical and sustainable solution for anyone looking to add fresh greens to their diet. It’s a testament to the resilience of nature and the power of simple techniques.
We wholeheartedly encourage you to give this DIY trick a try. It’s a fun, educational, and ultimately delicious experience. And most importantly, we want to hear about your journey! Share your successes, your challenges, and your variations with us. Post pictures of your water-grown lettuce on social media using #WaterOnlyLettuce and let’s build a community of indoor gardeners. Together, we can explore the endless possibilities of growing our own food, one water-filled jar at a time. So, grab some lettuce seeds, find a sunny spot, and get ready to enjoy the freshest salad you’ve ever tasted! You’ll be amazed at how easy it is to cultivate your own supply of crisp, delicious lettuce indoors, using nothing but water and a little bit of sunshine.
Frequently Asked Questions (FAQ)
1. What kind of lettuce works best for growing in water only?
While most lettuce varieties can be grown using this method, some tend to thrive more than others. Loose-leaf varieties like Black Seeded Simpson, Salad Bowl, and Red Sails are generally considered excellent choices for beginners. They tend to grow quickly and are relatively tolerant of varying conditions. Romaine and butterhead lettuce can also be successful, but they might require a bit more attention to ensure optimal growth. Experimenting with different varieties is part of the fun, so don’t be afraid to try something new! Just remember to start with fresh, high-quality seeds for the best results.
2. How often should I change the water?
Maintaining clean water is crucial for the health of your lettuce. We recommend changing the water every 2-3 days. This helps prevent the buildup of algae and bacteria, which can inhibit growth and potentially harm your plants. When changing the water, be gentle with the roots to avoid damaging them. You can also use filtered water or let tap water sit for 24 hours to allow chlorine to dissipate before using it.
3. Do I need to add any nutrients to the water?
The beauty of this method is its simplicity – it’s designed to work with water only. However, if you notice your lettuce struggling to grow or showing signs of nutrient deficiency (e.g., yellowing leaves), you can consider adding a very diluted hydroponic nutrient solution. Start with a very small amount (e.g., 1/4 of the recommended dosage) and observe how your plants respond. Over-fertilizing can be more harmful than under-fertilizing, so err on the side of caution. Remember, the goal is to supplement the water, not replace it with a nutrient solution.
4. How much light does my water-grown lettuce need?
Lettuce needs plenty of light to thrive. A sunny windowsill that receives at least 6 hours of direct sunlight per day is ideal. If you don’t have access to a sunny windowsill, you can supplement with a grow light. LED grow lights are energy-efficient and provide the full spectrum of light that plants need for photosynthesis. Position the grow light a few inches above the lettuce leaves and keep it on for 12-16 hours per day.
5. How long does it take to grow lettuce in water only?
The time it takes to grow lettuce in water only depends on several factors, including the variety of lettuce, the amount of light it receives, and the temperature. Generally, you can expect to start harvesting leaves within 3-4 weeks of germination. Loose-leaf varieties tend to mature faster than head lettuce. You can harvest individual leaves as needed, allowing the plant to continue growing and producing more leaves.
6. What if algae starts growing in the water?
Algae growth is a common issue when growing plants in water. To prevent algae growth, keep the container clean and avoid exposing the water to direct sunlight. You can also use an opaque container to block light from reaching the water. If algae does start to grow, clean the container thoroughly and change the water more frequently. A small amount of hydrogen peroxide (3%) can also be added to the water to help control algae growth, but use it sparingly.
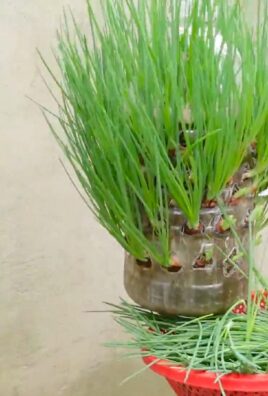
7. Can I grow other vegetables using this water-only method?
While this method is particularly well-suited for lettuce, you can experiment with growing other leafy greens like spinach and kale. However, keep in mind that different plants have different nutrient requirements, so you may need to adjust the conditions accordingly. Some plants may require supplemental nutrients to thrive in a water-only environment.
8. What do I do if the roots start to rot?
Root rot is a sign of poor water quality or lack of oxygen. To prevent root rot, change the water frequently and ensure that the roots are not sitting in stagnant water. You can also add a small air pump and air stone to the water to increase oxygen levels. If you notice signs of root rot (e.g., brown, slimy roots), remove the affected roots and change the water immediately.
9. Is it safe to eat lettuce grown in water only?
Yes, lettuce grown in water only is perfectly safe to eat, as long as you follow proper hygiene practices. Wash the lettuce thoroughly before eating it to remove any dirt or debris. If you’re concerned about contamination, you can also use a food-safe disinfectant to sanitize the lettuce.
10. Can I reuse the water after growing lettuce?
While you can technically reuse the water, it’s generally not recommended. The water will contain organic matter and potential contaminants that can harm your plants. It’s best to discard the water and start with fresh water each time you change it. You can use the old water to water other plants in your garden, as it will contain some nutrients.


Leave a Comment