
Water Spinach Growing Hack: Unlock the secrets to a bountiful harvest right in your backyard! Have you ever dreamed of effortlessly growing vibrant, delicious water spinach, also known as kangkong or ong choy? I know I have! This leafy green, a staple in Asian cuisine, is surprisingly easy to cultivate at home with a few clever tricks.
For centuries, water spinach has been a vital part of diets across Southeast Asia, prized for its nutritional value and refreshing taste. From stir-fries to soups, its versatility is unmatched. But what if I told you that you don’t need acres of land or a green thumb to enjoy fresh, homegrown water spinach?
Many gardeners struggle with getting water spinach to thrive, often facing issues like slow growth, pest infestations, or simply not knowing the ideal conditions. That’s where this DIY guide comes in! I’m going to share my tried-and-true water spinach growing hack that will transform your gardening experience. Imagine harvesting basketfuls of crisp, tender leaves, knowing exactly where your food comes from and saving money at the grocery store. This simple yet effective method will empower you to grow your own supply of this nutritious and delicious vegetable, regardless of your gardening experience. Let’s get started and turn your garden into a water spinach paradise!
Grow Water Spinach (Kangkong) Like a Pro: A DIY Floating Raft Method
Hey there, fellow gardening enthusiasts! I’m super excited to share one of my favorite DIY gardening hacks with you: growing water spinach, also known as kangkong, using a floating raft system. This method is not only incredibly fun but also allows you to maximize your yield, especially if you’re short on space or have access to a pond, pool, or even a large container of water. Trust me, once you taste freshly grown kangkong from your own backyard, you’ll be hooked!
What You’ll Need
Before we dive in, let’s gather all the necessary materials. Don’t worry, most of these are easily accessible and won’t break the bank.
* **A Large Container or Pond:** This will be your water source. A plastic storage bin, a kiddie pool, or even a small backyard pond will work perfectly. The bigger the container, the more kangkong you can grow!
* **Styrofoam Sheets or Recycled Plastic:** This will be the base of your floating raft. Aim for a thickness of at least 1-2 inches to provide adequate buoyancy. You can often find styrofoam sheets at craft stores or repurpose old packaging materials.
* **Net Pots or Small Plastic Cups:** These will hold the kangkong seedlings and their roots. Choose a size that allows the roots to dangle into the water.
* **Coco Coir or Rockwool Cubes:** This will be your growing medium. Coco coir is my personal favorite because it’s sustainable and retains moisture well. Rockwool is another great option.
* **Water Spinach Seeds or Cuttings:** You can purchase kangkong seeds online or at your local Asian grocery store. Alternatively, you can use cuttings from mature kangkong plants.
* **Nutrient Solution (Optional but Recommended):** A balanced hydroponic nutrient solution will provide your kangkong with the essential nutrients it needs to thrive.
* **Drill or Hot Knife:** For creating holes in the styrofoam raft to hold the net pots.
* **Measuring Tape and Marker:** For accurate measurements and marking the styrofoam.
* **Gloves:** To protect your hands.
* **pH Meter (Optional):** To monitor the pH level of the water.
Building Your Floating Raft
This is where the fun begins! We’re going to construct the floating platform that will house our kangkong plants.
1. **Measure and Cut the Styrofoam:** Determine the size of your container and cut the styrofoam sheet to fit comfortably inside, leaving a small gap around the edges. This will allow for easy removal and prevent the raft from getting stuck. Use a measuring tape and marker to ensure accurate cuts. I usually aim for a raft that’s about 1-2 inches smaller than the inside dimensions of my container on all sides.
2. **Mark the Net Pot Locations:** Decide how many kangkong plants you want to grow and space them evenly on the styrofoam raft. Use a marker to trace the outline of the net pots, ensuring they are far enough apart to allow for adequate growth. I typically space them about 6-8 inches apart.
3. **Cut the Holes:** Using a drill or hot knife, carefully cut out the holes for the net pots. Make sure the holes are slightly smaller than the diameter of the net pots so they fit snugly and don’t fall through. If you’re using a hot knife, be sure to work in a well-ventilated area.
4. **Test the Fit:** Place the net pots into the holes to ensure they fit properly. Adjust the size of the holes if necessary.
Preparing the Seedlings or Cuttings
Now, let’s get our kangkong ready for their new floating home.
1. **Starting from Seeds:** If you’re starting from seeds, soak them in water for 24 hours to improve germination. Then, fill the net pots with coco coir or rockwool cubes and sow a few seeds in each pot. Keep the growing medium moist and place the pots in a warm, sunny location. You should see seedlings emerge within a few days.
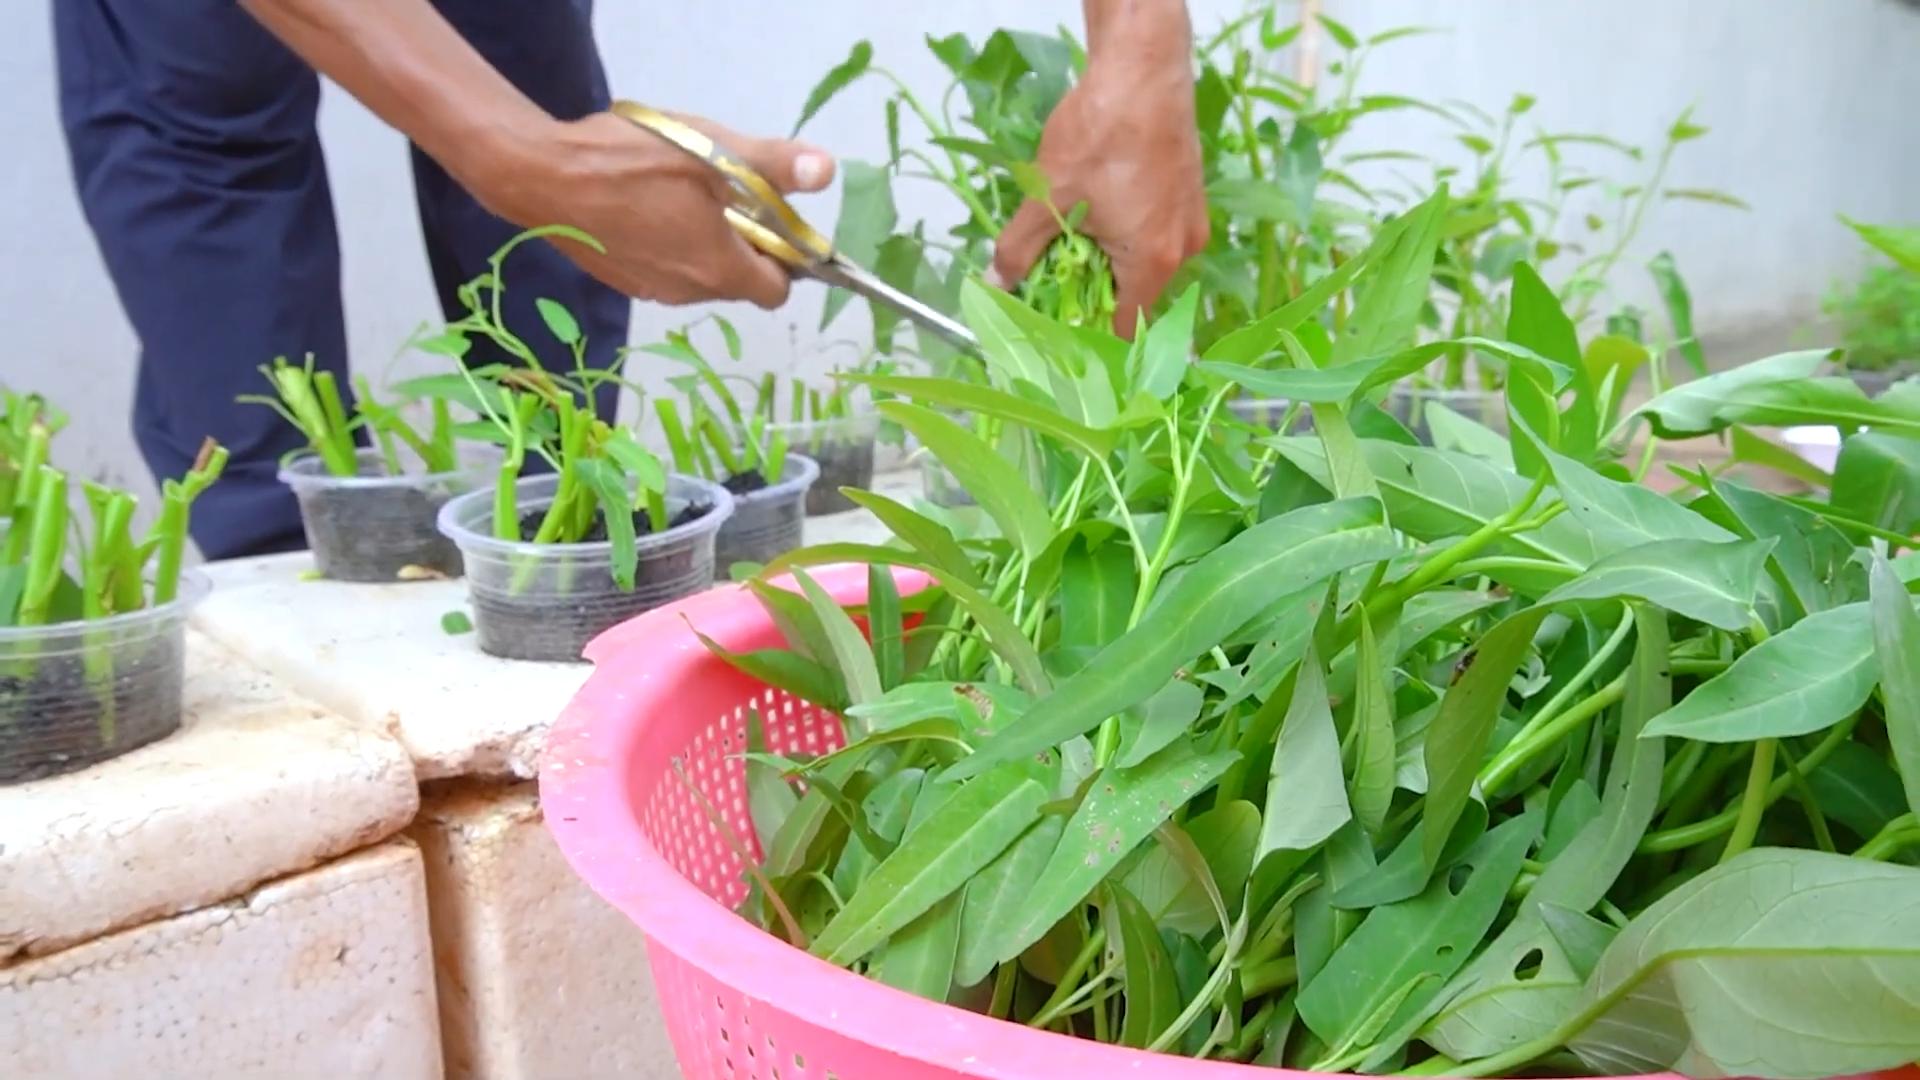
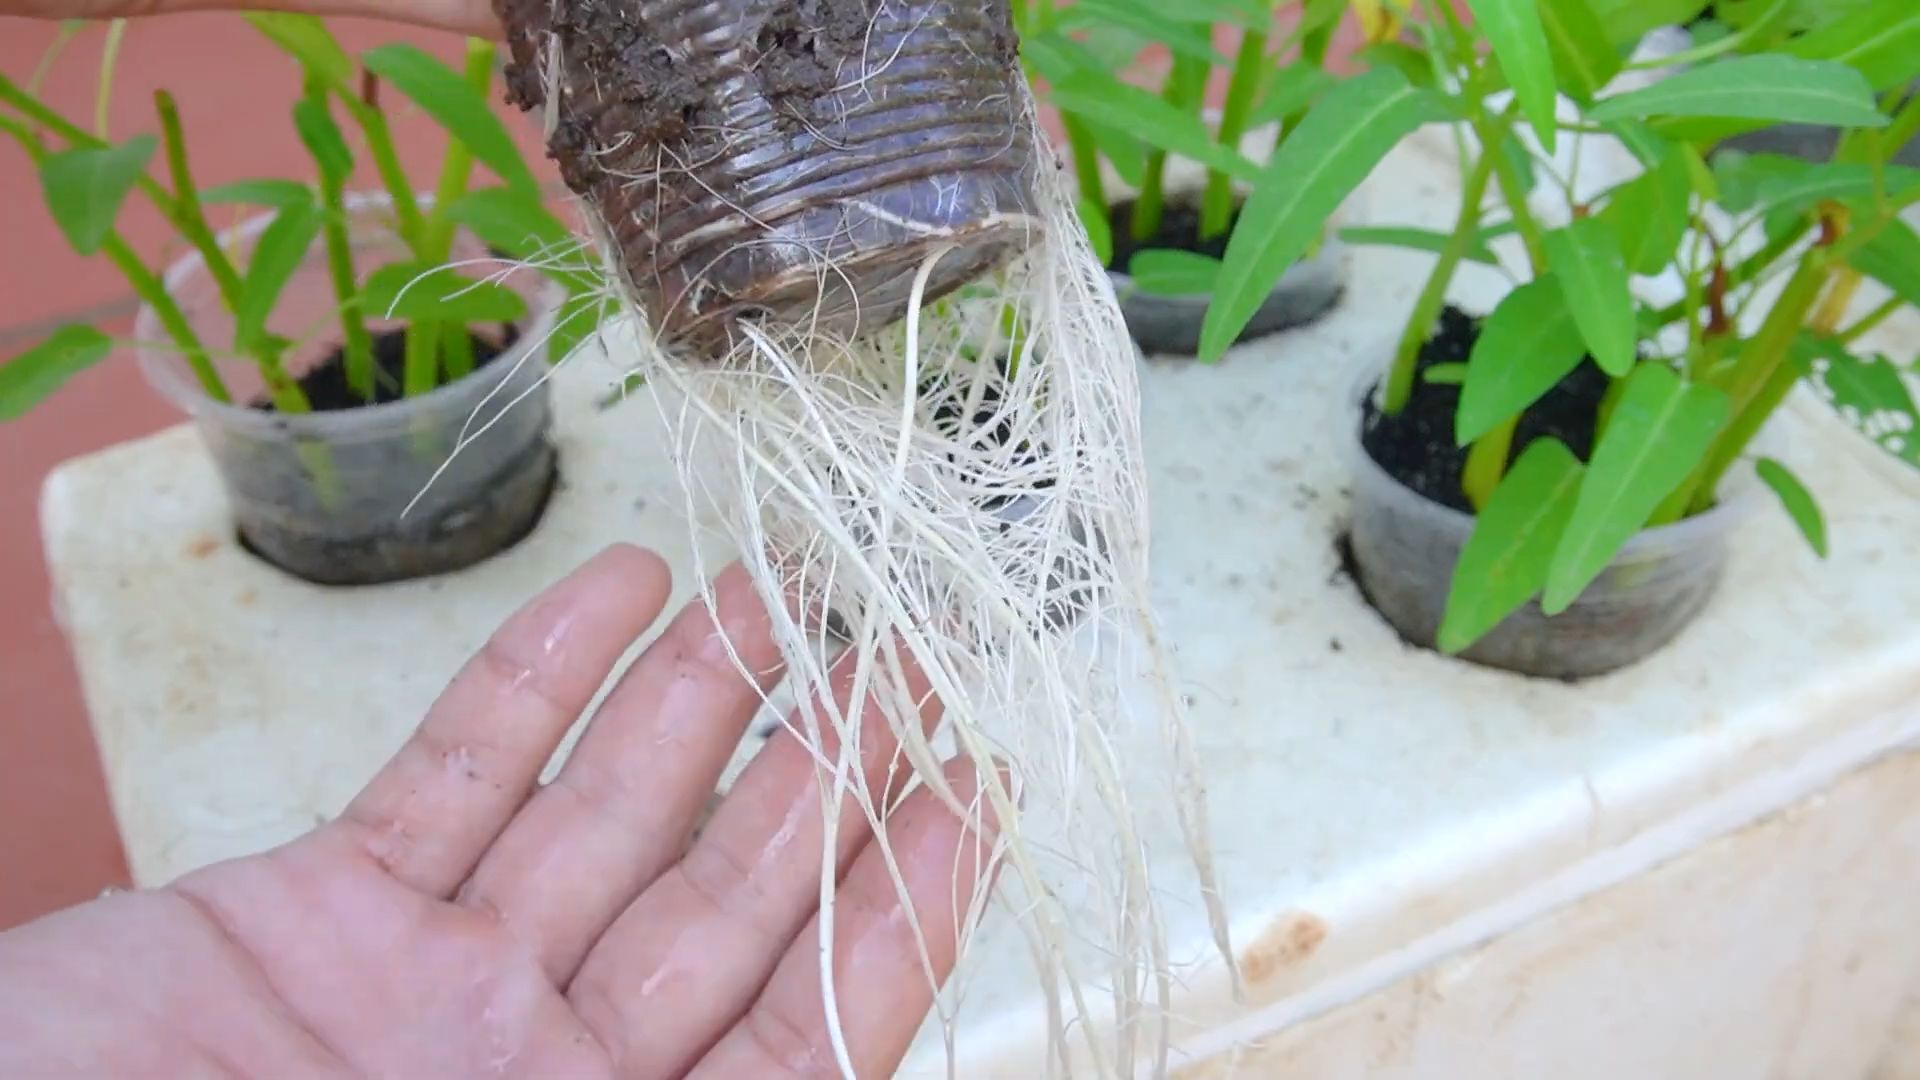
2. **Using Cuttings:** If you’re using cuttings, select healthy stems from mature kangkong plants. Cut the stems into 4-6 inch sections, removing the lower leaves. Place the cuttings in a glass of water until roots develop. This usually takes about a week or two.
3. **Transplanting:** Once the seedlings have a few sets of true leaves or the cuttings have developed roots, gently transplant them into the net pots filled with coco coir or rockwool. Make sure the roots are well-covered.
Setting Up the Floating System
Time to put everything together and create our floating kangkong garden!
1. **Fill the Container:** Fill your container with water, leaving a few inches of space at the top.
2. **Add Nutrient Solution (Optional):** If you’re using a nutrient solution, follow the instructions on the package to prepare the solution and add it to the water. I highly recommend using a nutrient solution, especially if you’re growing kangkong in a container, as it will provide the plants with the necessary nutrients for optimal growth.
3. **Check the pH Level (Optional):** Use a pH meter to check the pH level of the water. Kangkong prefers a pH level between 6.0 and 7.0. Adjust the pH if necessary using pH up or pH down solutions.
4. **Place the Raft:** Gently place the styrofoam raft onto the water, ensuring it floats evenly.
5. **Insert the Net Pots:** Insert the net pots containing the kangkong seedlings or cuttings into the holes in the raft. Make sure the roots are dangling into the water.
Caring for Your Floating Kangkong
Now that your floating kangkong garden is set up, it’s time to provide the necessary care to ensure a bountiful harvest.
1. **Sunlight:** Kangkong loves sunlight! Place your container in a location that receives at least 6 hours of direct sunlight per day. If you’re growing indoors, you may need to supplement with grow lights.
2. **Water Level:** Monitor the water level regularly and add water as needed to keep the roots submerged.
3. **Nutrient Solution:** If you’re using a nutrient solution, replenish it every 1-2 weeks, following the instructions on the package.
4. **Pest Control:** Keep an eye out for pests such as aphids and spider mites. If you notice any infestations, treat them with an organic insecticide or insecticidal soap.
5. **Harvesting:** You can start harvesting your kangkong about 3-4 weeks after transplanting. Simply cut the stems a few inches above the water level. The plants will continue to grow and produce new shoots, allowing for multiple harvests.
Troubleshooting
Even with the best planning, sometimes things don’t go exactly as expected. Here are a few common issues you might encounter and how to address them:
* **Yellowing Leaves:** This could indicate a nutrient deficiency. Try adding a balanced nutrient solution to the water. It could also be a sign of overwatering, though this is less likely with a floating system.
* **Slow Growth:** Ensure your kangkong is getting enough sunlight. If it’s not, consider moving it to a sunnier location or supplementing with grow lights. Also, check the pH level of the water and adjust if necessary.
* **Algae Growth:** Algae can sometimes grow in the water, especially in sunny locations. To prevent algae growth, try adding a small amount of hydrogen peroxide to the water or covering the container with a dark-colored cloth.
* **Root Rot:** This can occur if the water is stagnant or if there’s a lack of oxygen. Ensure the water is well-aerated by using an air pump or by regularly changing the water.
Enjoy Your Harvest!
Growing water spinach using a floating raft system is a rewarding and sustainable way to enjoy fresh, homegrown vegetables. With a little bit of effort and attention, you can have a thriving kangkong garden that provides you with a continuous supply of delicious greens. So, go ahead and give it a try! I’m confident you’ll be amazed at the results. Happy gardening!
Conclusion
So, there you have it! This simple, yet incredibly effective, water spinach growing hack is a game-changer for anyone looking to enjoy fresh, homegrown greens without the hassle of extensive gardening. Forget complicated setups and expensive equipment. This method, focusing on readily available materials and a straightforward process, allows you to cultivate vibrant, delicious water spinach right in your own home or backyard.
Why is this a must-try? Because it democratizes access to fresh produce. You no longer need acres of land or a green thumb passed down through generations. This hack empowers you to take control of your food source, ensuring you have access to healthy, pesticide-free water spinach whenever you crave it. Imagine the satisfaction of harvesting your own greens for a stir-fry, a salad, or a refreshing juice. The taste is simply unmatched!
Beyond the ease and accessibility, this method also promotes sustainability. By growing your own food, you reduce your carbon footprint associated with transportation and packaging. You also minimize your reliance on commercially grown produce, which often involves harmful chemicals and unsustainable farming practices. It’s a win-win for you and the environment.
Looking to personalize your water spinach growing experience? Consider these variations:
* Nutrient Boost: Experiment with different nutrient solutions. While water alone works wonders, adding a diluted organic fertilizer can further enhance growth and yield. Look for fertilizers specifically formulated for leafy greens.
* Container Size: Adjust the container size based on your available space and desired yield. Larger containers will allow for more plants and a bigger harvest.
* Lighting: While water spinach thrives in sunlight, you can supplement with grow lights, especially during the winter months or in areas with limited natural light.
* Water Source: While tap water is generally fine, consider using filtered water or rainwater for optimal results.
* Companion Planting: While this method focuses on water spinach alone, research companion plants that might benefit its growth or deter pests.
We are confident that this water spinach growing hack will revolutionize your approach to home gardening. It’s simple, effective, and incredibly rewarding. Don’t just take our word for it – try it yourself! We encourage you to embark on this exciting journey and witness the magic of homegrown water spinach firsthand.
Once you’ve experienced the joy of harvesting your own fresh greens, we’d love to hear about it! Share your experiences, tips, and variations in the comments below. Let’s build a community of water spinach enthusiasts and inspire others to embrace the power of DIY gardening. What challenges did you face? What successes did you celebrate? Your insights will be invaluable to fellow growers. So, grab your container, water, and water spinach cuttings, and get ready to experience the satisfaction of growing your own delicious greens!
Frequently Asked Questions (FAQ)
What exactly is water spinach, and why should I grow it?
Water spinach, also known as Ong Choy or Kang Kong, is a semi-aquatic leafy green vegetable popular in Southeast Asian cuisine. It’s incredibly versatile and can be used in stir-fries, soups, salads, and more. Growing your own water spinach ensures you have access to fresh, pesticide-free greens whenever you want them. It’s also a sustainable and cost-effective way to add healthy vegetables to your diet. Plus, the taste of homegrown water spinach is far superior to anything you can buy in the store.
How long does it take to grow water spinach using this hack?
One of the best things about this method is its speed. You can typically expect to see significant growth within a week or two. Harvestable leaves can often be ready in as little as 3-4 weeks, depending on environmental factors like sunlight and temperature. Regular harvesting encourages continued growth, so you can enjoy a continuous supply of fresh greens.
What kind of container should I use?
Almost any container that can hold water will work. Plastic tubs, buckets, even repurposed containers like large yogurt tubs are suitable. The key is to ensure the container is clean and food-safe. The size of the container will determine how many water spinach cuttings you can grow. A larger container allows for more plants and a bigger harvest.
Do I need special water or nutrients?
Generally, tap water is sufficient for growing water spinach using this method. However, if your tap water is heavily chlorinated, it’s best to let it sit for 24 hours to allow the chlorine to dissipate before using it. While not essential, adding a diluted organic fertilizer specifically formulated for leafy greens can boost growth and yield. Be sure to follow the instructions on the fertilizer packaging to avoid over-fertilizing.
How much sunlight does water spinach need?
Water spinach thrives in sunlight. Aim for at least 6 hours of direct sunlight per day. If you live in an area with limited sunlight, you can supplement with grow lights. Position the grow lights close to the plants for optimal results.
How often should I change the water?
It’s important to change the water regularly to prevent stagnation and the buildup of algae. A good rule of thumb is to change the water every 2-3 days. This will help keep the water fresh and provide the plants with the oxygen they need to thrive.
How do I harvest water spinach?
Harvesting water spinach is easy. Simply cut the stems about 2-3 inches above the water level. This will encourage new growth and allow you to continue harvesting from the same plants for several weeks.
What if I see algae growing in the water?
Algae growth is a common issue in water-based gardening. To minimize algae growth, keep the container in a location with good air circulation and avoid over-exposure to direct sunlight. Regularly changing the water also helps. If algae does appear, gently clean the container and roots of the plants before refilling with fresh water.
Can I grow water spinach indoors using this method?
Yes, you can absolutely grow water spinach indoors using this method. Just make sure to provide adequate lighting, either through a sunny window or with grow lights. Indoor growing can be a great option for those who live in apartments or have limited outdoor space.
What are some common problems I might encounter, and how can I fix them?
Some common problems include yellowing leaves, slow growth, and pest infestations. Yellowing leaves can indicate a nutrient deficiency, so try adding a diluted organic fertilizer. Slow growth can be due to insufficient sunlight or cold temperatures. Ensure the plants are getting enough light and warmth. Pest infestations are rare with this method, but if you do encounter pests, try spraying the plants with a diluted solution of neem oil or insecticidal soap.
Is this method suitable for beginners?
Absolutely! This water spinach growing hack is incredibly beginner-friendly. It requires minimal effort and resources, making it a perfect starting point for anyone interested in home gardening. The simplicity of the method makes it accessible to gardeners of all skill levels.

Leave a Comment