
Grow Carrots at Home: Your Guide to a Delicious and Rewarding Harvest
Have you ever dreamed of biting into a perfectly sweet, crunchy carrot, knowing you grew it yourself, from seed to table? That dream is closer than you think! This article is your complete guide to Grow Carrots at Home, revealing simple yet effective tricks and DIY solutions to ensure a bountiful harvest right in your backyard or even on your balcony.
For centuries, carrots have held a significant place in human diets and cultures worldwide. From ancient civilizations who valued them for their medicinal properties to modern-day culinary enthusiasts, the humble carrot has consistently proven its worth. But what if you could bypass the supermarket and experience the unparalleled satisfaction of cultivating your own? That’s the magic of home gardening.
Growing your own carrots offers numerous benefits beyond the delicious reward. It allows you to control the quality of your produce, ensuring they’re free from pesticides and other harmful chemicals. You’ll also save money in the long run, and the process itself is incredibly rewarding, connecting you to nature and providing a sense of accomplishment. Plus, nothing beats the taste of a freshly pulled, homegrown carrot!
Why This Guide is Essential for You
This guide isn’t just about throwing some seeds in the ground and hoping for the best. We’ll delve into the specific techniques and DIY solutions that make growing carrots at home a success, even for beginners. We’ll cover everything from soil preparation and seed starting to pest control and harvesting, ensuring you have all the knowledge you need to cultivate a thriving carrot patch. Get ready to transform your gardening dreams into a reality!
Upcycling Dollar Store Finds: Three Amazing Rack Projects
I love a good Dollar Store find, and racks are my absolute favorite! They’re so versatile and with a little creativity, you can transform them into something truly special. Here are three different projects I’ve tackled, each with detailed instructions to help you create your own amazing Dollar Store rack masterpieces.
Project 1: The Glamorous Jewelry Rack
This project takes a simple wire rack and turns it into a stunning jewelry organizer.
Materials You’ll Need:
- One wire rack from the Dollar Store (look for a small, rectangular one)
- Spray paint (your choice of color – I used a rose gold!)
- Fabric scraps (various colors and textures)
- Hot glue gun and glue sticks
- Scissors
- Optional: Small decorative embellishments (beads, ribbons, etc.)
Step-by-Step Instructions:
1. Prep the Rack: Clean the wire rack thoroughly with a damp cloth to remove any dust or debris. Let it dry completely. This ensures the spray paint adheres properly.
2. Spray Painting Time: Take your rack outside or to a well-ventilated area and apply several thin coats of spray paint. Allow each coat to dry completely before applying the next. I found two thin coats gave me perfect coverage.
3. Fabric Selection and Cutting: Choose your fabric scraps. I used a mix of velvet, satin, and lace for a luxurious look. Cut the fabric into strips slightly wider than the width of the rack’s shelves. The length should be long enough to drape nicely over the shelves.
4. Attaching the Fabric: Apply a thin line of hot glue along the back edge of a fabric strip. Carefully press the glued edge onto the back of the rack’s shelf, ensuring it’s smooth and even. Repeat this process for all shelves, covering them completely with fabric.
5. Adding Embellishments (Optional): Once the glue is dry, you can add small embellishments like beads or ribbons to enhance the look. I glued small pearl beads along the edges of the fabric for extra sparkle.
6. Let it Dry and Display: Allow the glue to dry completely before hanging your new glamorous jewelry rack. I hung mine in my closet, but it would also look amazing in a bathroom or bedroom.
Project 2: The Rustic Bathroom Organizer
This project transforms a simple wire rack into a charming bathroom organizer.
Materials You’ll Need:
- One wire rack from the Dollar Store (a larger, multi-tiered one works best)
- Wood stain (a dark walnut or espresso stain works well for a rustic look)
- Paintbrushes
- Sandpaper (fine grit)
- Cloth rags
- Optional: Small baskets or containers to add to the shelves
Step-by-Step Instructions:
1. Prep the Rack: Clean the wire rack thoroughly. If there’s any loose paint or rust, gently sand it down with fine-grit sandpaper.
2. Applying the Stain: Using a paintbrush, apply a thin, even coat of wood stain to the entire rack. Work in sections to avoid drips.
3. Drying and Second Coat: Allow the first coat of stain to dry completely according to the manufacturer’s instructions. Then, apply a second coat for deeper color and better coverage.
4. Sanding (Optional): Once the stain is completely dry, you can lightly sand the rack with fine-grit sandpaper to smooth out any rough spots. This step is optional but helps create a more polished look.
5. Adding Baskets (Optional): If you’re using small baskets or containers, place them on the shelves to organize your bathroom essentials.
6. Display and Enjoy: Place your rustic bathroom organizer in your bathroom and enjoy your newly organized space.
Project 3: The Chic Plant Stand
This project turns a simple wire rack into a stylish plant stand.
Materials You’ll Need:
- One wire rack from the Dollar Store (choose a sturdy one with a wide base)
- Spray paint (a color that complements your plants and décor)
- Small pots or planters (to fit the shelves)
- Plants (your favorite succulents, herbs, or small flowering plants)
- Optional: Decorative pebbles or moss to add to the shelves
Step-by-Step Instructions:
1. Prep the Rack: Clean the wire rack thoroughly and let it dry completely.
2. Spray Painting: Spray paint the rack with your chosen color. Apply several thin coats, allowing each coat to dry completely before applying the next.
3. Potting Your Plants: Pot your plants in small pots or planters that fit comfortably on the shelves of the rack.
4. Arranging Your Plants: Arrange your potted plants on the shelves of the rack. Consider varying the heights and sizes of your plants for a visually appealing display.
5. Adding Decorative Elements (Optional): Add decorative pebbles or moss to the shelves to enhance the look of your plant stand.
6. Display Your Greenery: Place your new plant stand in a sunny spot in your home and enjoy your beautiful display of greenery. Remember to water your plants regularly!
Remember to always prioritize safety when using spray paint and hot glue guns. Work in a well-ventilated area and follow the manufacturer’s instructions carefully. Have fun creating your own unique Dollar Store rack masterpieces!
Conclusion
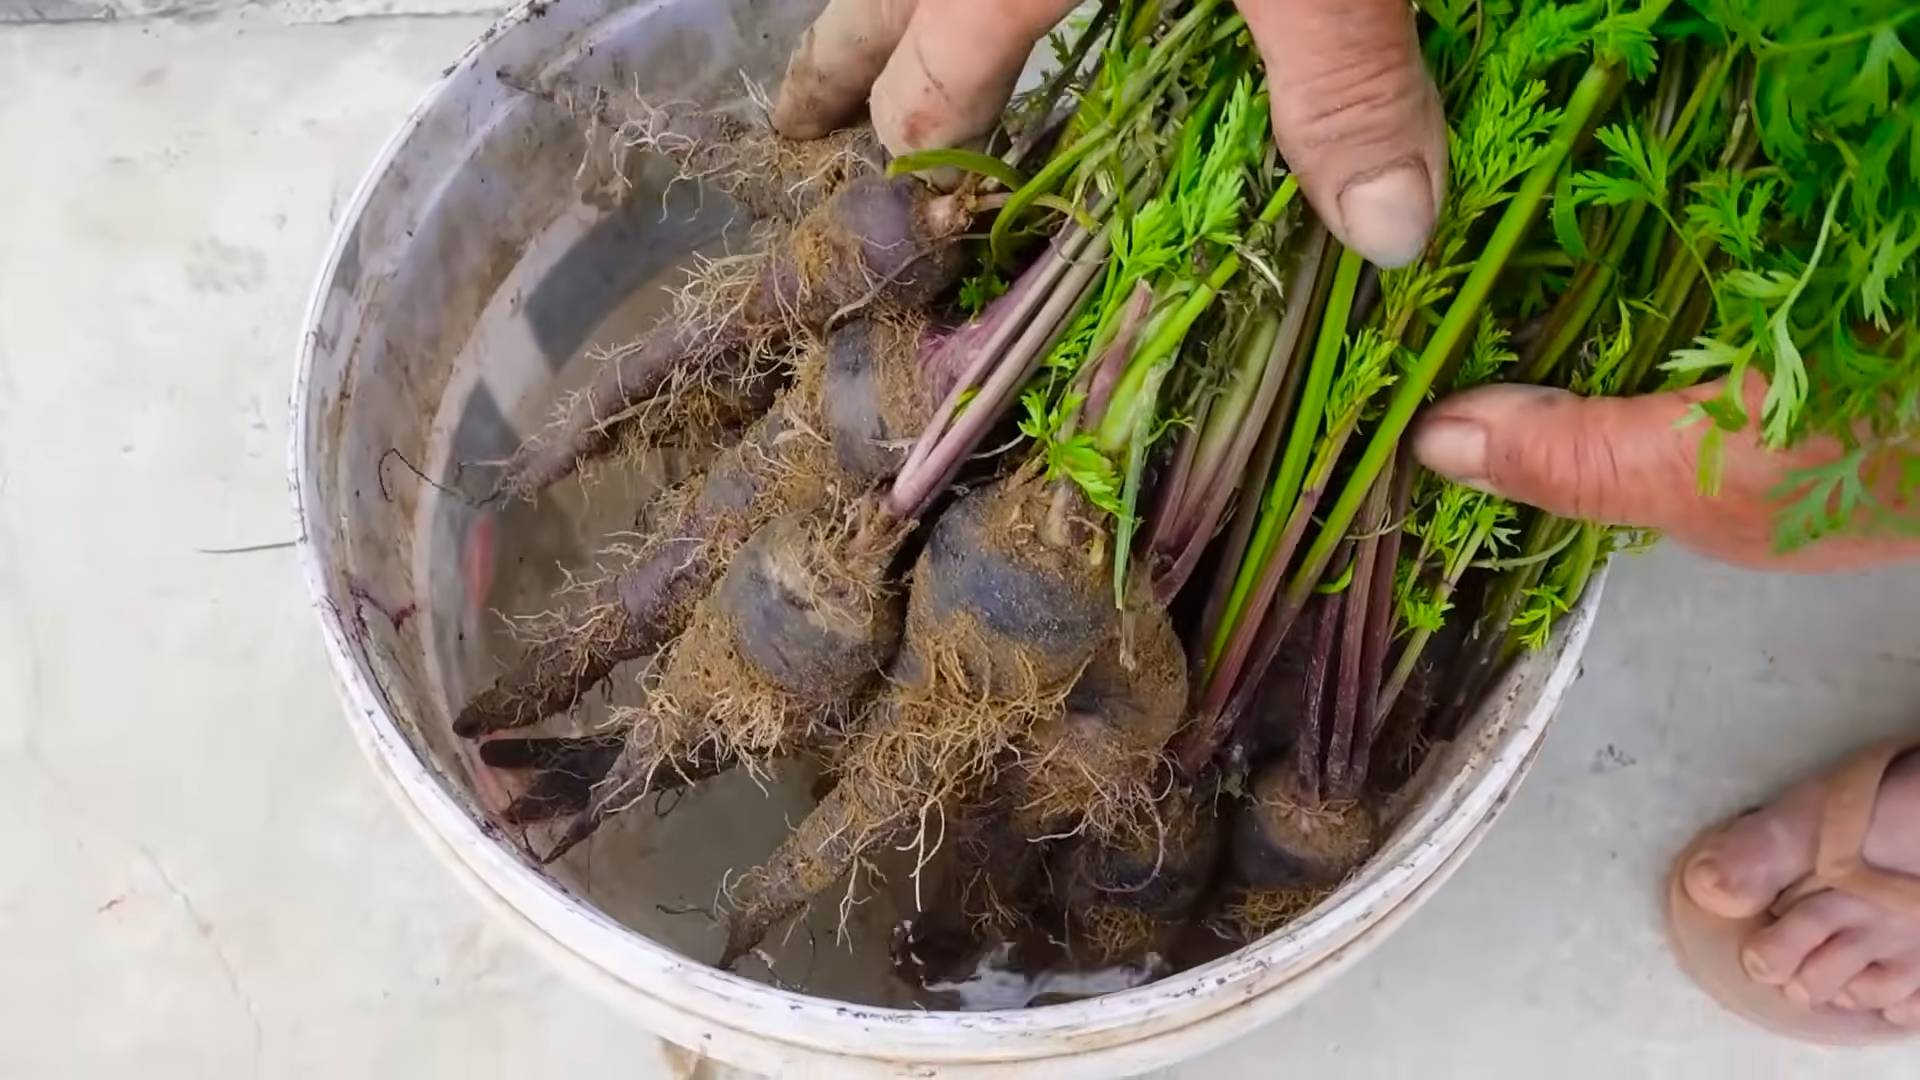
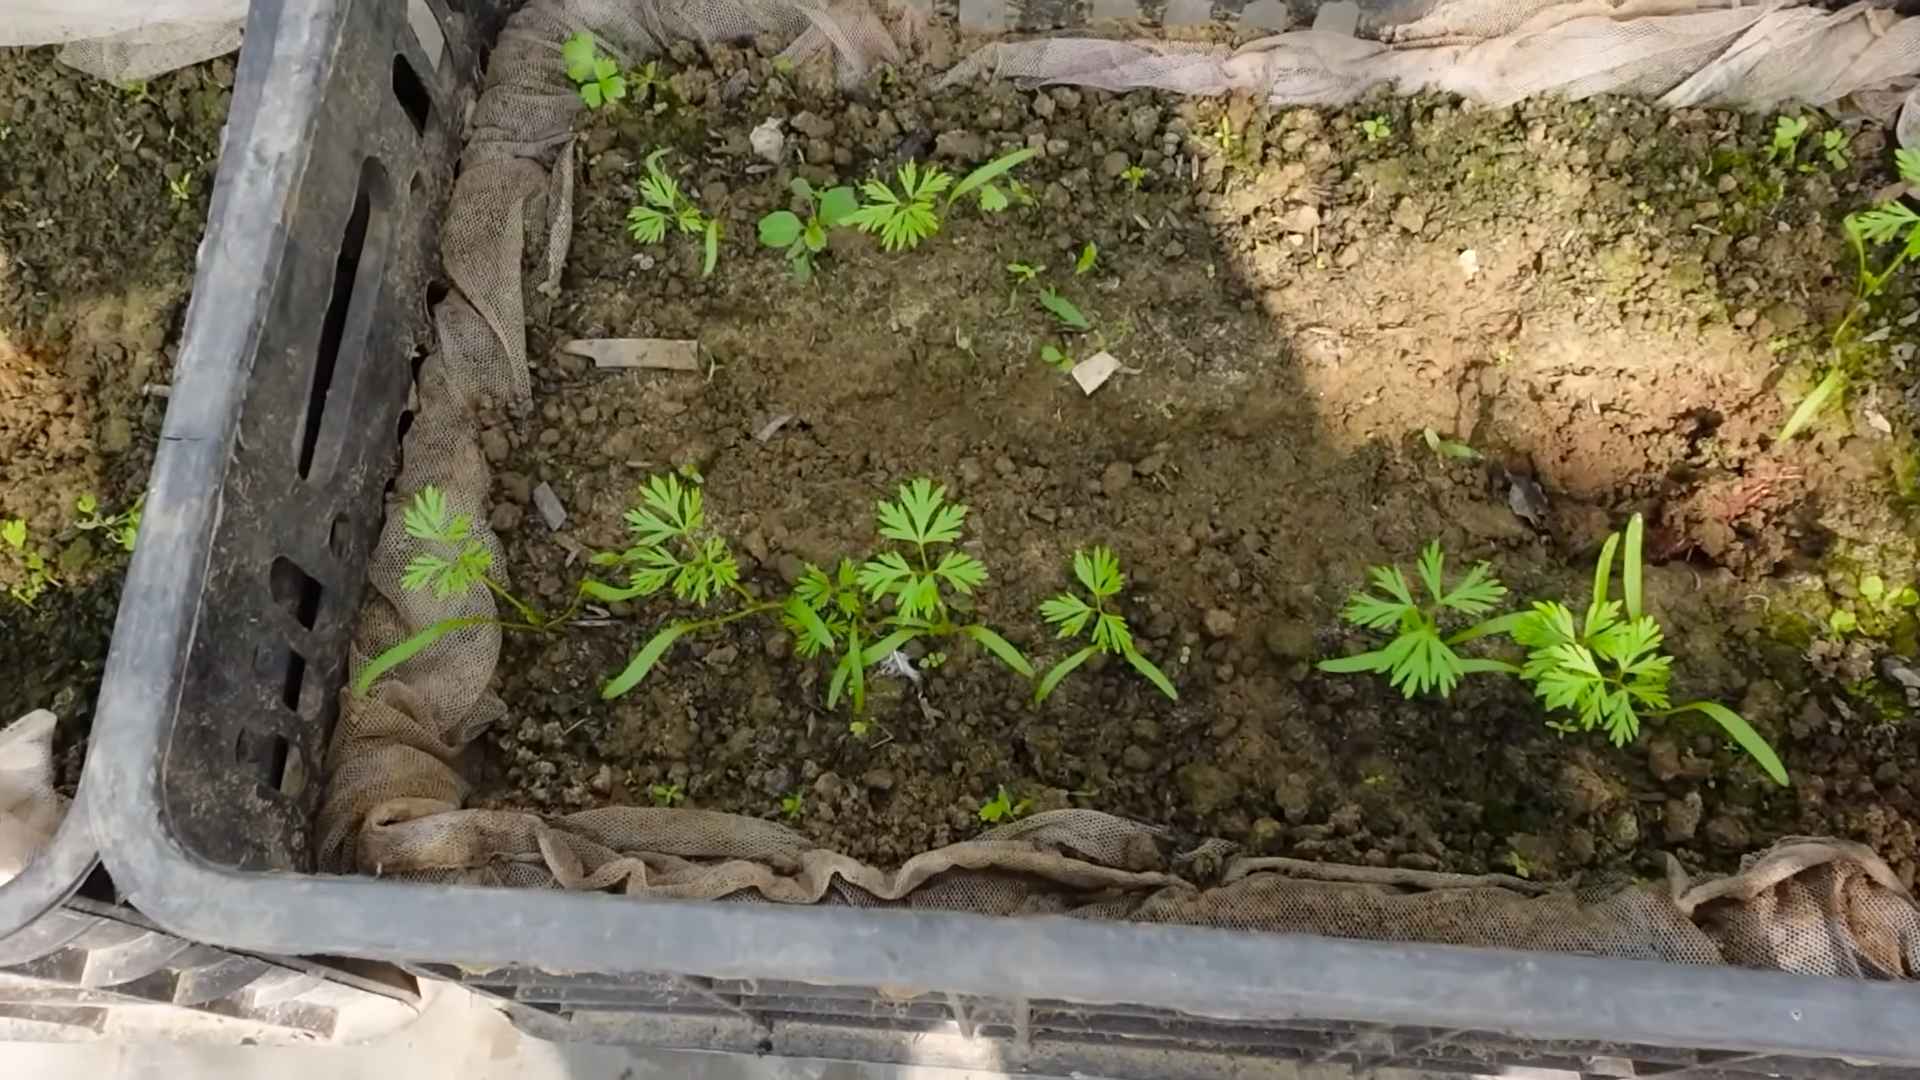
Growing your own carrots at home is a surprisingly rewarding experience, far more accessible than you might think. This DIY trick isn’t just about saving money on grocery bills; it’s about connecting with nature, understanding where your food comes from, and enjoying the unparalleled freshness of homegrown vegetables. The satisfying crunch of a carrot you’ve nurtured from seed to harvest is simply unmatched. This simple method allows you to bypass the often-processed and less flavorful carrots found in supermarkets, giving you complete control over the growing process and resulting in a superior product. You’ll be amazed at the vibrant orange hue and the intensely sweet flavor of your homegrown carrots. Beyond the taste, the sheer satisfaction of watching tiny seeds transform into plump, delicious roots is a deeply fulfilling experience, perfect for families and gardening enthusiasts alike. This DIY approach to growing carrots is a must-try for anyone looking to add a touch of self-sufficiency and deliciousness to their lives.
Don’t be afraid to experiment! This method is a fantastic starting point, but feel free to adapt it to your specific needs and preferences. Consider trying different carrot varieties – Nantes carrots are known for their sweetness, while Imperator carrots offer a longer, more slender shape. You can also experiment with different soil types and amendments to optimize your yield. For instance, adding compost to your soil will improve drainage and provide essential nutrients. If you have limited space, consider growing your carrots in containers – just ensure the containers are deep enough to accommodate the carrot roots. And for those with particularly sandy soil, consider adding some peat moss to improve water retention. The possibilities are endless!
We encourage you to embark on this rewarding journey of growing your own carrots. Share your experiences with us! Post pictures of your thriving carrot patch on social media using #GrowCarrotsAtHome and tag us. We’d love to see your success stories and learn from your experiences. Whether you’re a seasoned gardener or a complete beginner, growing carrots at home is an achievable and incredibly satisfying endeavor. So, grab some seeds, prepare your soil, and get ready to enjoy the freshest, most delicious carrots you’ve ever tasted. Remember, the journey is just as rewarding as the destination!
Frequently Asked Questions
What type of soil is best for growing carrots?
Carrots thrive in loose, well-drained soil that is free of rocks and stones. Heavy clay soil can hinder root development, resulting in stunted or misshapen carrots. Sandy loam is ideal, but you can amend heavier soils by adding compost or other organic matter to improve drainage and aeration. Ensure the soil is relatively neutral to slightly acidic (pH 6.0-7.0).
How much sunlight do carrots need?
Carrots need at least six hours of direct sunlight per day to grow properly. Choose a sunny location in your garden or on your patio for optimal results. Insufficient sunlight can lead to poor growth and reduced yields.
How often should I water my carrots?
Consistent moisture is crucial for healthy carrot growth. Water regularly, especially during dry periods, aiming to keep the soil consistently moist but not waterlogged. Overwatering can lead to root rot, while underwatering can result in stunted growth and cracked roots. A good rule of thumb is to water deeply and less frequently, allowing the soil to dry slightly between waterings.
When can I harvest my carrots?
The harvesting time depends on the carrot variety and the growing conditions. Generally, carrots are ready for harvest 70-80 days after sowing. You can check for readiness by gently tugging on a few carrots; if they pull out easily, they’re ready. For larger carrots, you might need to wait a bit longer.
What are some common problems when growing carrots?
Some common problems include carrot root flies (which can be deterred by using row covers), fungal diseases (which can be prevented by ensuring good drainage and air circulation), and poor soil conditions (which can be addressed by soil amendment). Regularly inspecting your plants for signs of pests or diseases is crucial for early intervention.
Can I grow carrots in containers?
Yes, you can definitely grow carrots in containers! Just make sure the containers are deep enough (at least 12 inches) to accommodate the full length of the carrot roots. Use a well-draining potting mix and ensure the containers receive adequate sunlight.
What should I do if my carrots are small or misshapen?
Small or misshapen carrots are often a result of poor soil conditions (rocky or compacted soil), insufficient watering, or pest infestations. Ensure your soil is loose and well-drained, water consistently, and monitor for pests. Next time, consider amending your soil with compost to improve its structure and nutrient content.
Can I save seeds from my homegrown carrots to plant next year?
While you can try saving seeds, it’s important to note that the resulting carrots may not be true to type. Hybrid carrots often produce seeds that don’t yield the same characteristics as the parent plant. It’s generally easier and more reliable to purchase fresh seeds each year for consistent results. However, if you’re interested in experimenting, allow some carrots to fully mature in the ground and collect the seeds from the flower heads once they’ve dried.

Leave a Comment