
Wet mopping cloths cleaning – it’s probably not the most glamorous topic, but trust me, mastering this little chore can make a HUGE difference in your home’s cleanliness and your sanity! How many times have you reached for your trusty mop, only to find the cloth is crusty, smelly, and basically spreading more grime than it’s removing? I’ve been there, and it’s not a pretty picture.
For centuries, humans have been devising ways to keep their living spaces clean. From ancient Romans using rudimentary tools to modern-day marvels like robotic vacuums, the quest for a spotless home is a timeless pursuit. While the tools have evolved, the basic principle remains the same: clean surfaces contribute to a healthier and happier life. And let’s be honest, a sparkling clean floor just feels good!
That’s why I’m sharing my tried-and-true DIY tricks for keeping your wet mopping cloths cleaning and ready for action. We’ll dive into simple, effective methods that will not only extend the life of your cloths but also ensure they’re actually doing their job – lifting dirt and grime, not just pushing it around. Plus, you’ll save money by avoiding constant replacements. So, ditch the dingy cloths and get ready to transform your mopping routine with these easy hacks!

DIY Reusable Wet Mopping Cloths: Save Money and the Planet!
Hey everyone! I’m so excited to share this super easy and eco-friendly DIY project with you. I was getting tired of constantly buying disposable wet mopping cloths, not to mention the cost and the environmental impact. So, I decided to create my own reusable version, and let me tell you, it’s been a game-changer! Not only are they incredibly effective at cleaning my floors, but they’re also super easy to make and wash. Let’s dive in!
What You’ll Need
Before we get started, let’s gather all the necessary materials. Don’t worry, most of these you probably already have lying around the house!
* Old Microfiber Cloths: This is the key ingredient! I used old cleaning cloths, worn-out towels (microfiber is best!), or even old microfiber shirts. The more absorbent, the better. Cut them into the size of your disposable mop cloths.
* Scissors: For cutting the microfiber cloths to the correct size.
* Sewing Machine (Optional): If you want a more professional finish, a sewing machine is great for hemming the edges. But don’t worry, you can totally skip this step and just use pinking shears or leave the edges raw.
* Thread (Optional): If you’re using a sewing machine, you’ll need thread that matches your fabric.
* Pinking Shears (Optional): These are great for preventing fraying if you’re not sewing the edges.
* Measuring Tape or Ruler: To ensure your cloths are the right size for your mop head.
* Your Favorite Cleaning Solution: You can use your regular store-bought cleaner, or even better, make your own natural cleaning solution (I’ll share my favorite recipe below!).
* Spray Bottle (Optional): For pre-treating stubborn stains.
Sizing Up Your Cloths
This is a crucial step to ensure your reusable cloths fit your mop head perfectly.
* Measure Your Mop Head: Use your measuring tape or ruler to measure the length and width of your mop head.
* Add an Inch or Two: Add about an inch or two to each measurement. This will give you some extra fabric to wrap around the mop head and ensure a secure fit. For example, if your mop head is 10 inches by 5 inches, you’ll want to cut your cloths to be about 11-12 inches by 6-7 inches.
* Cut Your Microfiber Cloths: Using your scissors, cut your microfiber cloths to the dimensions you calculated.
Making Your Reusable Wet Mopping Cloths
Now for the fun part! Let’s get to making those reusable cloths.
1. Prepare Your Microfiber Cloths: Lay your microfiber cloths flat on a clean surface.
2. Cut to Size: Using your scissors and the measurements you took earlier, carefully cut the cloths to the correct size. Remember to add that extra inch or two for overlap!
3. Hem the Edges (Optional): If you have a sewing machine and want a more durable and professional finish, hem the edges of each cloth. This will prevent fraying and make them last longer.
* Fold the Edge: Fold the edge of the cloth over about 1/4 inch and iron it flat.
* Fold Again: Fold it over again another 1/4 inch and iron it flat again. This creates a double hem.
* Sew Along the Edge: Using your sewing machine, sew along the folded edge, securing the hem in place. Repeat this for all four sides of the cloth.
4. Pinking Shears Alternative (Optional): If you don’t have a sewing machine, you can use pinking shears to trim the edges of the cloths. Pinking shears create a zig-zag cut that helps to prevent fraying.
5. Raw Edges (Also Optional!): Honestly, you can totally skip the hemming or pinking shears altogether! Microfiber doesn’t fray as badly as other fabrics, so you can just leave the edges raw. I’ve done this before, and they still work great!
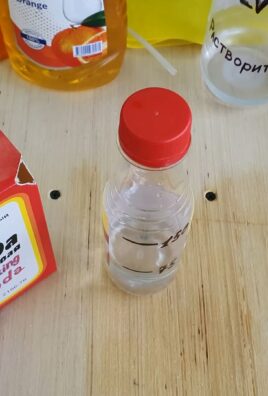
My Favorite Natural Cleaning Solution Recipe
Okay, so you’ve got your reusable cloths, now you need a cleaning solution to use with them! I’m a big fan of natural cleaning products, so here’s my go-to recipe:
* 1/2 Cup White Vinegar: Vinegar is a natural disinfectant and deodorizer.
* 1/4 Cup Rubbing Alcohol: Helps to cut through grease and grime and speeds up drying time.
* 2 Cups Warm Water: The base of the solution.
* 10-15 Drops Essential Oil (Optional): I love using lemon, lavender, or tea tree oil for their cleaning and disinfecting properties, plus they smell amazing!
* Mix it Up: Combine all the ingredients in a spray bottle and shake well to mix.
Using Your Reusable Wet Mopping Cloths
Now that you’ve made your cloths and your cleaning solution, it’s time to put them to work!
1. Attach the Cloth to Your Mop Head: Securely attach your reusable cloth to your mop head. Most mops have velcro or clips to hold the cloth in place.
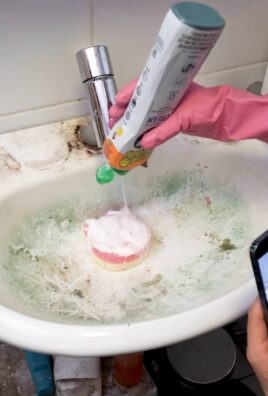
2. Spray the Floor (Optional): If you have stubborn stains or just want a little extra cleaning power, you can spray the floor with your cleaning solution before mopping.
3. Mop Away! Mop your floors as you normally would, using your cleaning solution.
4. Rinse and Repeat: If the cloth gets too dirty, remove it from the mop head, rinse it out with water, and reattach it. You can also switch to a fresh cloth if needed.
Washing and Caring for Your Reusable Cloths
To keep your reusable cloths in tip-top shape, it’s important to wash them properly.
1. Rinse After Use: After each use, rinse the cloth thoroughly with water to remove any dirt and debris.
2. Machine Wash: You can machine wash your reusable cloths with your regular laundry. I recommend washing them in cold or warm water with a mild detergent.
3. Avoid Fabric Softener: Fabric softener can reduce the absorbency of the microfiber, so it’s best to avoid using it.
4. Tumble Dry Low: You can tumble dry your cloths on low heat, or hang them to dry.
5. Don’t Bleach: Avoid using bleach, as it can damage the microfiber.
Troubleshooting Tips
Sometimes things don’t go exactly as planned. Here are a few troubleshooting tips to help you out:
* Cloth Doesn’t Fit: If your cloth is too small, you can try stretching it a bit, or you may need to cut a new one that’s slightly larger. If it’s too big, simply trim it down to size.
* Cloth Doesn’t Stay Attached: Make sure the cloth is securely attached to the mop head. If the velcro or clips are worn out, you may need to replace them. You can also try using safety pins to secure the cloth in place.
* Streaky Floors: Streaky floors can be caused by using too much cleaning solution or by using a dirty cloth. Try using less cleaning solution and rinsing the cloth more frequently.
* Lingering Odor: If your cloths have a lingering odor, you can try soaking them in a solution of water and baking soda before washing them.
Extra Tips and Tricks
Here are a few extra tips and tricks to help you get the most out of your reusable wet mopping cloths:
* Pre-Treat Stains: For stubborn stains, pre-treat them with a stain remover before mopping.
* Use Different Cloths for Different Areas: Consider using different colored cloths for different areas of your home to prevent cross-contamination. For example, use one color for the kitchen and another for the bathroom.
* Store Your Cloths Properly: Store your clean cloths in a dry, clean place.
* Experiment with Cleaning Solutions: Don’t be afraid to experiment with different cleaning solutions to find what works best for your floors. There are tons of natural cleaning recipes online!
* Make a Batch: Cut and sew a whole batch of cloths at once so you always have a clean one ready to go.
I hope you found this DIY tutorial helpful! Making your own reusable wet mopping cloths is a simple and effective way to save money, reduce waste, and keep your floors sparkling clean. Happy mopping!

Conclusion
So, there you have it! Creating your own DIY wet mopping cloths is not just a cost-effective alternative to store-bought options; it’s a game-changer for your cleaning routine. You’re not just saving money; you’re also gaining control over the ingredients you’re using in your home, reducing your exposure to harsh chemicals and contributing to a more sustainable lifestyle. The convenience of having pre-soaked cloths ready to go at a moment’s notice is undeniable, especially when unexpected spills or messes occur.
But the real magic lies in the customization. Feel free to experiment with different essential oils to find your perfect cleaning scent. Lavender for a calming aroma, lemon for a fresh and zesty clean, or tea tree oil for its antibacterial properties – the possibilities are endless! You can also adjust the ratio of water to vinegar or rubbing alcohol to suit your specific cleaning needs and the type of flooring you have. For instance, if you have delicate hardwood floors, you might want to reduce the amount of vinegar to prevent any potential damage.
Consider adding a few drops of dish soap for extra cleaning power, especially for tackling stubborn grime or grease. Just be mindful not to overdo it, as too much soap can leave a residue. Another variation is to infuse your cleaning solution with herbs like rosemary or thyme for a natural and fragrant boost. Simply steep the herbs in hot water for a few hours, strain, and then add the infused water to your cleaning solution.
The benefits of using homemade wet mopping cloths extend beyond just saving money and controlling ingredients. You’re also reducing waste by reusing the cloths instead of constantly buying disposable ones. This small change can make a big difference in your environmental impact. Plus, the satisfaction of knowing you’re cleaning your home with a solution you created yourself is incredibly rewarding.
We truly believe that once you try this DIY trick, you’ll never go back to store-bought wet mopping cloths again. The convenience, cost-effectiveness, and customization options are simply unbeatable. It’s a simple yet powerful way to elevate your cleaning routine and create a healthier, more sustainable home.
So, what are you waiting for? Gather your supplies, mix up a batch of your own DIY wet mopping cloths, and experience the difference for yourself. We’re confident that you’ll be amazed by the results. And most importantly, we want to hear about your experience! Share your tips, variations, and feedback in the comments below. Let’s create a community of DIY cleaning enthusiasts and inspire each other to make our homes cleaner, greener, and more enjoyable. Don’t forget to tell us what essential oil blends you tried and loved! Your insights could be exactly what someone else needs to perfect their own homemade wet mopping cloths. Happy cleaning!
Frequently Asked Questions (FAQ)
Q: What type of cloths are best to use for DIY wet mopping cloths?
A: Microfiber cloths are generally considered the best option for DIY wet mopping cloths. They are highly absorbent, durable, and effective at trapping dirt and grime. They are also reusable and washable, making them an eco-friendly choice. You can also use old t-shirts or towels cut into appropriate sizes, but microfiber will provide the best cleaning performance. Ensure the cloths are lint-free to avoid leaving streaks on your floors.
Q: Can I use any type of essential oil in my cleaning solution?
A: While many essential oils have cleaning properties, it’s important to choose oils that are safe for your surfaces and your family. Lemon, lavender, tea tree, eucalyptus, and peppermint are popular choices for their antibacterial, antiviral, and antifungal properties, as well as their pleasant scents. Avoid using essential oils that are known to be toxic to pets if you have animals in your home. Always dilute essential oils properly before use, as undiluted oils can be irritating to the skin and respiratory system. It’s also a good idea to test a small, inconspicuous area of your floor before using the cleaning solution on the entire surface.
Q: How often should I wash my DIY wet mopping cloths?
A: You should wash your DIY wet mopping cloths after each use to prevent the buildup of bacteria and dirt. This will also ensure that the cloths remain effective at cleaning your floors. You can wash them in your washing machine with your regular laundry, but avoid using fabric softener, as it can reduce the absorbency of the cloths. Tumble dry on low heat or hang them to dry.
Q: Can I use this DIY cleaning solution on all types of flooring?
A: While this DIY cleaning solution is generally safe for most types of flooring, it’s important to consider the specific needs of your floors. For hardwood floors, it’s best to use a solution with a lower concentration of vinegar, as vinegar can potentially damage the finish over time. For laminate floors, avoid using excessive amounts of water, as this can seep into the seams and cause damage. For tile and vinyl floors, this DIY cleaning solution is generally safe and effective. Always test a small, inconspicuous area of your floor before using the cleaning solution on the entire surface to ensure that it doesn’t cause any damage or discoloration.
Q: How long can I store the pre-soaked wet mopping cloths?
A: You can store the pre-soaked wet mopping cloths for up to a week in an airtight container. After a week, the solution may start to degrade, and the cloths may become less effective at cleaning. It’s best to make a fresh batch of cleaning solution each week to ensure optimal cleaning performance. Store the container in a cool, dark place to prevent the solution from evaporating or becoming contaminated.
Q: What if I don’t have vinegar or rubbing alcohol? Can I use something else?
A: Vinegar and rubbing alcohol are both effective cleaning agents, but if you don’t have them on hand, you can use other alternatives. For vinegar, you can substitute lemon juice, which has similar acidic properties. For rubbing alcohol, you can use hydrogen peroxide, which is a disinfectant. However, be careful when using hydrogen peroxide on colored surfaces, as it can have a bleaching effect. You can also simply use water with a few drops of dish soap for a basic cleaning solution.
Q: My DIY wet mopping cloths are leaving streaks on my floor. What am I doing wrong?
A: Streaking can be caused by several factors. First, make sure you’re not using too much soap in your cleaning solution. Excess soap can leave a residue that causes streaks. Second, ensure that your cloths are clean and lint-free. Dirty cloths or cloths that shed lint can leave streaks on your floor. Third, try using a dry microfiber cloth to buff the floor after mopping to remove any remaining residue. Finally, the type of water you’re using can also contribute to streaking. Hard water can leave mineral deposits on your floor. If you have hard water, consider using distilled water in your cleaning solution.
Q: Can I use this DIY cleaning solution in a steam mop?
A: It is generally not recommended to use DIY cleaning solutions in a steam mop unless the manufacturer specifically states that it is safe to do so. Steam mops are designed to use only water, and adding other ingredients can damage the internal components of the mop. If you want to add a scent to your steam cleaning, you can try adding a few drops of essential oil to a cotton ball and placing it near the steam vent, but avoid adding the oil directly to the water tank.
Q: How can I make my DIY wet mopping cloths more environmentally friendly?
A: There are several ways to make your DIY wet mopping cloths more environmentally friendly. First, use reusable microfiber cloths instead of disposable wipes. Second, choose eco-friendly cleaning ingredients, such as vinegar, lemon juice, and essential oils. Third, avoid using harsh chemicals that can be harmful to the environment. Fourth, wash your cloths in cold water to save energy. Finally, consider composting your used cloths if they are made from natural fibers.

Leave a Comment