
ZEP Stainless Steel Cleaner: Are you tired of battling fingerprints, smudges, and water spots on your beautiful stainless steel appliances? I know I was! It felt like a never-ending cycle of wiping and polishing, only to have them looking dull again within minutes. But guess what? I’ve discovered some amazing DIY tricks and hacks that will not only save you money but also leave your stainless steel sparkling like new, using ZEP Stainless Steel Cleaner!
Stainless steel has become a staple in modern kitchens and homes, prized for its sleek appearance and durability. Its popularity surged in the mid-20th century, symbolizing a move towards modern, efficient living. However, maintaining its pristine shine can be a real challenge. That’s where these DIY solutions come in.
Let’s face it, commercially available stainless steel cleaners can be expensive, and sometimes, they’re packed with harsh chemicals. Who wants that lingering around their food prep areas? That’s why I’m so excited to share these simple, effective, and budget-friendly methods for using ZEP Stainless Steel Cleaner to achieve a professional-level clean right in your own home. Get ready to say goodbye to frustrating streaks and hello to a gleaming, fingerprint-free finish!

DIY Stainless Steel Cleaner & Polisher: The ZEP Hack!
Hey everyone! I’m so excited to share this amazing DIY hack with you. I’ve been searching for ages for a truly effective and affordable stainless steel cleaner. You know how frustrating it is – fingerprints, water spots, smudges… they’re the bane of every kitchen! I tried so many commercial cleaners, and while some were okay, none really gave me that sparkling, showroom-new finish I craved. Plus, the cost adds up!
Then, I stumbled upon a little secret: you can significantly boost the cleaning power of ZEP Stainless Steel Cleaner with just one simple ingredient. Yes, just one! And the results are incredible. This method not only cleans but also polishes, leaving a protective layer that helps prevent future smudges. Trust me, your stainless steel appliances will thank you.
What You’ll Need
Before we dive in, let’s gather our supplies. This is a super simple list, which is one of the things I love most about this hack.
* ZEP Stainless Steel Cleaner (the star of the show!)
* Mineral Oil (food grade is best, but any will do)
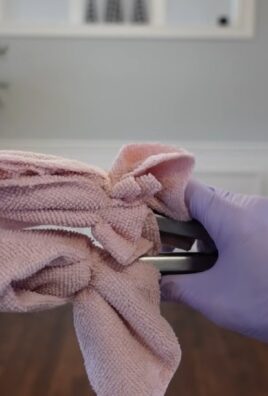
* Two Microfiber Cloths (clean and lint-free are essential)
* Spray Bottle (optional, but helpful for even application)
* Gloves (optional, but recommended for sensitive skin)
Why This Works: The Science Behind the Shine
Okay, so you might be wondering why this combination works so well. ZEP Stainless Steel Cleaner is already a decent cleaner, but it can sometimes leave a slightly streaky finish. The mineral oil is the key to unlocking its full potential.
Mineral oil acts as a polishing agent and a protectant. It fills in microscopic scratches on the stainless steel surface, creating a smoother, more reflective finish. It also leaves a thin, non-greasy layer that repels water and fingerprints, keeping your appliances looking cleaner for longer. Think of it as a sealant for your stainless steel!
Step-by-Step Guide: Achieving That Showroom Shine
Alright, let’s get down to business! Here’s the step-by-step guide to transforming your dull stainless steel into a gleaming masterpiece.
Phase 1: Preparing Your Supplies
1. Gather Everything: Make sure you have all your supplies within easy reach. There’s nothing worse than starting a cleaning project and realizing you’re missing something!
2. Prepare Your Spray Bottle (Optional): If you’re using a spray bottle, pour a small amount of ZEP Stainless Steel Cleaner into it. I usually fill it about halfway. This helps with even distribution, especially on larger appliances like refrigerators.
3. Prepare Your Work Area: Clear the area around the stainless steel surface you’ll be cleaning. This will prevent accidental spills or scratches.
Phase 2: Cleaning and Polishing
1. Apply ZEP Stainless Steel Cleaner: This is where the magic starts.
* If using a spray bottle: Lightly spray the ZEP Stainless Steel Cleaner onto the stainless steel surface. Don’t overdo it – a light mist is all you need.
* If not using a spray bottle: Apply a small amount of ZEP Stainless Steel Cleaner directly onto one of your microfiber cloths.
2. Wipe in the Direction of the Grain: This is crucial! Stainless steel has a grain, and wiping in the same direction as the grain will prevent streaks and scratches. Look closely at your appliance to identify the grain direction. It usually runs horizontally or vertically.
3. Remove Excess Cleaner: Using the same microfiber cloth, wipe away any excess cleaner. You want the surface to be damp, not soaking wet.
4. Apply Mineral Oil: Now for the secret ingredient!
* Dampen a clean microfiber cloth: Lightly dampen the second microfiber cloth with a *very* small amount of mineral oil. Remember, a little goes a long way! You don’t want to leave a greasy residue.
* Wipe in the Direction of the Grain (Again!): Just like with the cleaner, wipe the mineral oil onto the stainless steel surface in the direction of the grain. Use gentle, even pressure.
5. Buff to a Shine: Using a clean, dry section of the microfiber cloth (or a fresh, dry microfiber cloth if your first one is too saturated), buff the surface until it shines. This step is essential for removing any excess oil and creating that polished look. Keep buffing until you’re happy with the result. You’ll see the streaks disappear and the shine emerge!
Phase 3: Admire Your Work (and Maintain the Shine!)
1. Step Back and Admire: Seriously, take a moment to appreciate your hard work! You should see a noticeable difference in the appearance of your stainless steel. It should be cleaner, shinier, and more resistant to fingerprints.
2. Regular Maintenance: To maintain the shine, I recommend repeating this process every few weeks, or as needed. You can also use a dry microfiber cloth to wipe away fingerprints and smudges in between cleanings.
3. Spot Cleaning: For small spills or splatters, you can often get away with just wiping them up with a damp microfiber cloth. This will prevent them from drying and becoming harder to remove later.
Troubleshooting Tips: Common Issues and Solutions
Even with the best instructions, sometimes things don’t go exactly as planned. Here are a few common issues you might encounter and how to fix them:
* Streaks: If you’re still seeing streaks after buffing, it could be due to a few things:
* Too much mineral oil: You might have used too much mineral oil. Try buffing the surface again with a clean, dry microfiber cloth.
* Wiping against the grain: Double-check that you’re wiping in the direction of the grain.
* Dirty microfiber cloth: Make sure your microfiber cloths are clean and lint-free.
* Greasy Residue: If the surface feels greasy, you’ve definitely used too much mineral oil. Wipe the surface with a clean, dry microfiber cloth to remove the excess. You can also try using a slightly damp cloth with a drop of dish soap, followed by a thorough rinsing and drying.
* Dull Finish: If your stainless steel still looks dull after cleaning, it could be due to stubborn stains or buildup. You may need to repeat the cleaning process a few times, or try using a slightly more abrasive cleaner (but be careful not to scratch the surface!).
* Uneven Shine: An uneven shine can be caused by inconsistent application of the mineral oil. Make sure you’re applying it evenly and buffing the entire surface thoroughly.
Important Considerations: Safety and Precautions
While this DIY hack is generally safe, it’s always a good idea to take a few precautions:
* Test in an Inconspicuous Area: Before cleaning your entire appliance, test the cleaner and mineral oil on a small, hidden area to make sure it doesn’t damage the surface.
* Ventilation: Work in a well-ventilated area, especially if you’re using a spray bottle.
* Gloves: Wear gloves if you have sensitive skin or if you’re concerned about the cleaner or mineral oil irritating your hands.
* Avoid Abrasive Cleaners: Never use abrasive cleaners or scouring pads on stainless steel, as they can scratch the surface.
* Read the Labels: Always read and follow the instructions on the ZEP Stainless Steel Cleaner and mineral oil labels.
* Food Safety: While food-grade mineral oil is generally considered safe, it’s still a good idea to avoid direct contact with food preparation surfaces. Wipe down any surfaces that come into contact with food with a clean, damp cloth before use.
Beyond the Kitchen: Other Uses for This Hack
This DIY stainless steel cleaner and polisher isn’t just for kitchen appliances! You can also use it on:
* Stainless Steel Sinks: Keep your sink sparkling and free of water spots.
* Stainless Steel Backsplashes: Remove grease and grime from your backsplash with ease.
* Stainless Steel Railings: Polish your railings to a beautiful shine.
* Stainless Steel Outdoor Grills: Clean and protect your grill from the elements.
* Stainless Steel Elevator Doors: Yes, even elevator doors can benefit from this hack!
Why I Love This Hack: The Benefits
I’m a huge fan of this DIY stainless steel cleaner for so many reasons:
* It’s Affordable: You only need two ingredients, and both are relatively inexpensive.
* It’s Effective: It cleans, polishes, and protects, all in one step.
* It’s Easy: The process is simple and straightforward, even for beginners.
* It’s Long-Lasting: The mineral oil creates a protective layer that helps prevent future smudges and fingerprints.
* It’s Versatile: You can use it
Conclusion
So, there you have it! This simple, yet incredibly effective, DIY stainless steel cleaner using ZEP stainless steel cleaner is a game-changer for anyone battling stubborn smudges, fingerprints, and water spots on their appliances and surfaces. We’ve explored how to unlock the full potential of ZEP stainless steel cleaner, transforming it from a standard cleaner into a powerhouse solution that delivers professional-grade results without the hefty price tag or harsh chemicals often found in other commercial products.
Why is this DIY trick a must-try? Because it’s not just about cleaning; it’s about restoring the beauty and luster of your stainless steel, making it look brand new again. It’s about saving money by maximizing the effectiveness of a product you might already have in your cleaning arsenal. And it’s about achieving a streak-free, gleaming finish that will impress your guests and make you proud of your home.
But the beauty of this DIY approach lies in its adaptability. Feel free to experiment with variations to suit your specific needs and preferences. For instance, if you’re dealing with particularly stubborn grease or grime, consider pre-treating the area with a degreasing solution before applying the ZEP stainless steel cleaner mixture. Alternatively, for a more subtle shine, reduce the concentration of the cleaner in the water.
Consider these variations:
* For a deeper clean: Add a tablespoon of white vinegar to the mixture for extra degreasing power.
* For a more subtle shine: Reduce the amount of ZEP stainless steel cleaner to half an ounce per quart of water.
* For heavily soiled areas: Pre-treat with a paste of baking soda and water before cleaning with the ZEP solution.
We’re confident that once you try this DIY trick, you’ll be amazed by the results. It’s a simple, cost-effective, and environmentally friendly way to keep your stainless steel looking its best.
Don’t just take our word for it, though! We encourage you to try this DIY stainless steel cleaner using ZEP stainless steel cleaner and see the difference for yourself. We’re eager to hear about your experiences, so please share your before-and-after photos and tips in the comments section below. Let’s build a community of sparkling stainless steel enthusiasts! Your insights could help others discover the magic of this simple yet powerful cleaning solution. We believe in the power of shared knowledge and collective experience, and your feedback is invaluable. So go ahead, give it a try, and let us know what you think!
Frequently Asked Questions (FAQs)
What exactly is ZEP stainless steel cleaner, and why is it so effective?
ZEP stainless steel cleaner is a commercially available cleaning product specifically formulated for use on stainless steel surfaces. Its effectiveness stems from its unique blend of surfactants and solvents that work together to lift dirt, grease, and grime without scratching or damaging the delicate surface of stainless steel. The formula is designed to leave a protective layer that helps prevent future smudges and fingerprints, keeping your appliances and surfaces looking cleaner for longer. The key is to use it correctly, and our DIY trick helps you maximize its potential.
Can I use this DIY cleaner on all types of stainless steel?
Generally, yes, this DIY cleaner is safe for use on most types of stainless steel. However, it’s always a good idea to test it on a small, inconspicuous area first, especially if you have a brushed or textured stainless steel finish. This will help you ensure that the cleaner doesn’t cause any discoloration or damage. If you notice any adverse effects, discontinue use immediately.
How often should I use this DIY stainless steel cleaner?
The frequency of cleaning depends on how often your stainless steel surfaces are used and how dirty they get. For high-traffic areas like kitchen appliances, you may want to clean them once or twice a week. For less frequently used surfaces, such as stainless steel trim or decorative items, cleaning once a month may be sufficient. Regular cleaning will help prevent the buildup of dirt and grime, making it easier to maintain the shine and luster of your stainless steel.
What kind of cloth should I use to apply the cleaner?
Microfiber cloths are the best choice for cleaning stainless steel. They are soft, absorbent, and non-abrasive, which means they won’t scratch or damage the surface. Avoid using paper towels or abrasive sponges, as these can leave streaks and scratches. Use one microfiber cloth to apply the cleaner and another clean, dry microfiber cloth to buff the surface to a shine.
Is this DIY cleaner safe for use around food preparation areas?
While ZEP stainless steel cleaner is generally considered safe, it’s essential to take precautions when using it around food preparation areas. Always wipe down the surfaces thoroughly with a clean, damp cloth after cleaning to remove any residue. Avoid spraying the cleaner directly onto food or utensils. If you’re concerned about using chemicals around food, you can opt for a more natural cleaning solution, such as a mixture of vinegar and water, for those specific areas.
What if I don’t have ZEP stainless steel cleaner? Can I use another brand?
While this guide specifically focuses on using ZEP stainless steel cleaner, you can try using other commercially available stainless steel cleaners. However, keep in mind that the results may vary depending on the specific formulation of the cleaner. Always follow the manufacturer’s instructions and test the cleaner on a small, inconspicuous area first.
The cleaner left streaks on my stainless steel. What did I do wrong?
Streaking can occur if you use too much cleaner or if you don’t buff the surface properly. Make sure to use a small amount of cleaner and apply it evenly. Use a clean, dry microfiber cloth to buff the surface in the direction of the grain. If streaks persist, try diluting the cleaner further or using a different microfiber cloth.
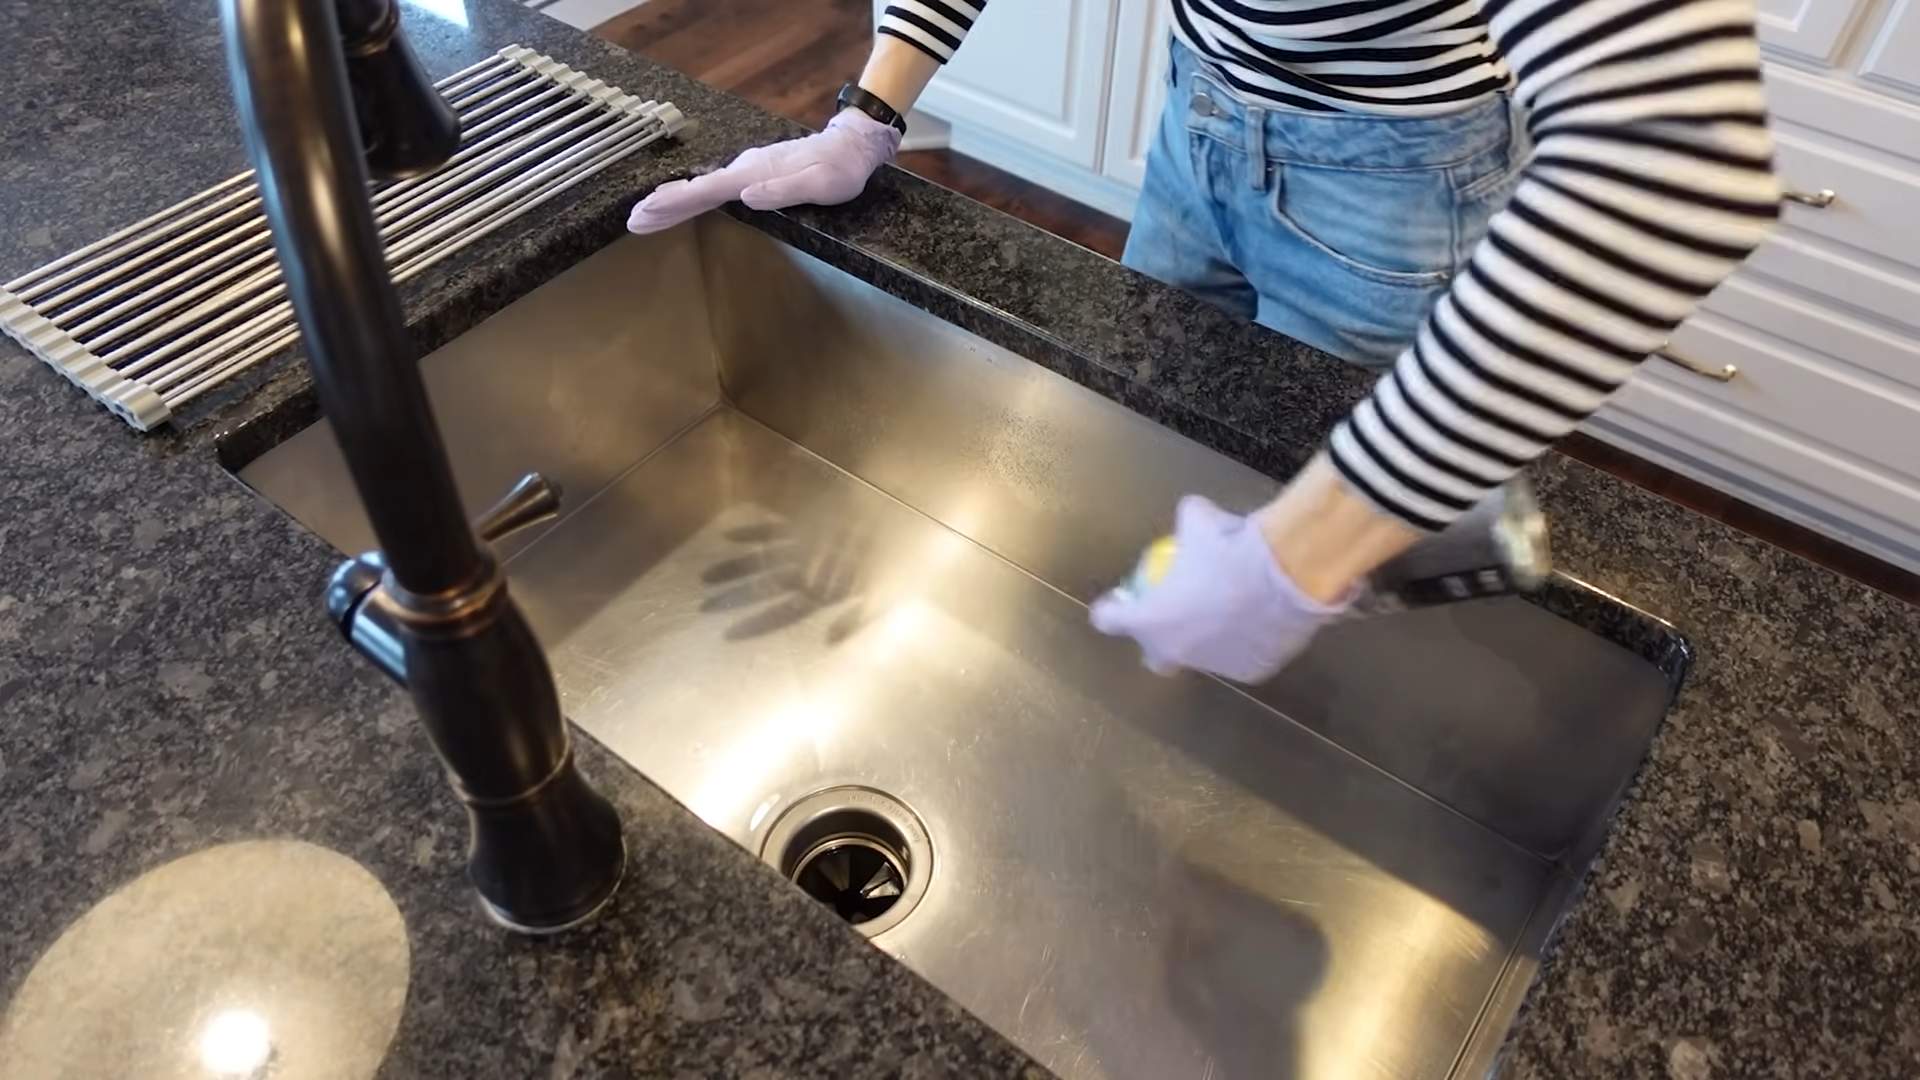
Can I use this cleaner on stainless steel sinks?
Yes, this cleaner can be used on stainless steel sinks. However, be sure to rinse the sink thoroughly with water after cleaning to remove any residue. You can also use a separate cleaner specifically designed for stainless steel sinks to remove stubborn stains or water spots.
How do I store the leftover DIY cleaner?
Store the leftover DIY cleaner in a tightly sealed spray bottle in a cool, dry place. Be sure to label the bottle clearly to avoid confusion. The cleaner should be good for several weeks, but it’s best to use it within a month for optimal results.
Is this DIY cleaner environmentally friendly?
While ZEP stainless steel cleaner is not a completely natural product, it is generally considered to be less harsh than some other commercial cleaners. To make the DIY cleaner more environmentally friendly, you can use a smaller amount of cleaner or opt for a more natural cleaning solution, such as a mixture of vinegar and water, for less heavily soiled areas. Always dispose of the cleaner properly according to local regulations.
Leave a Comment